If you’ve ever found yourself craving the warm, cinnamon-scented goodness of apple fritters but dreaded the mess of frying, you’re in for a treat. These baked apple fritters are crisp on the outside, soft in the middle, and glazed with a sweet vanilla drizzle that makes them absolutely irresistible. They’re healthier than their fried cousins and so simple, you can whip them up on a busy weeknight—or make them the star of your fall brunch spread.
I’ll be honest: the first time I baked apple fritters instead of frying them, I was skeptical. Could they really taste just as indulgent? But after watching my kids devour them (with sticky fingers and big grins), I knew this was a keeper.
Table of Contents
Why You’ll Love These Baked Apple Fritters
- Quick & Easy – Ready in just 25 minutes.
- Lighter than Fried – Less oil, less guilt, more flavor.
- Perfectly Spiced – Cinnamon, nutmeg, and allspice give them that cozy fall bakery vibe.
- Kid-Friendly – My three little taste-testers approve every time.
(And if you’re already dreaming up more apple desserts, you’ll love my Apple Cider Cake or Apple Spice Cake!)
What Do Baked Apple Fritters Taste Like?
Imagine a cross between a spiced apple muffin and a doughnut, with a shiny vanilla glaze that crackles slightly when you bite into it. The apples stay tender and juicy, while the warm spices make your whole kitchen smell like autumn in a candle shop (but better, because you can actually eat this).
Ingredients You’ll Need for Baked Apple Fritters
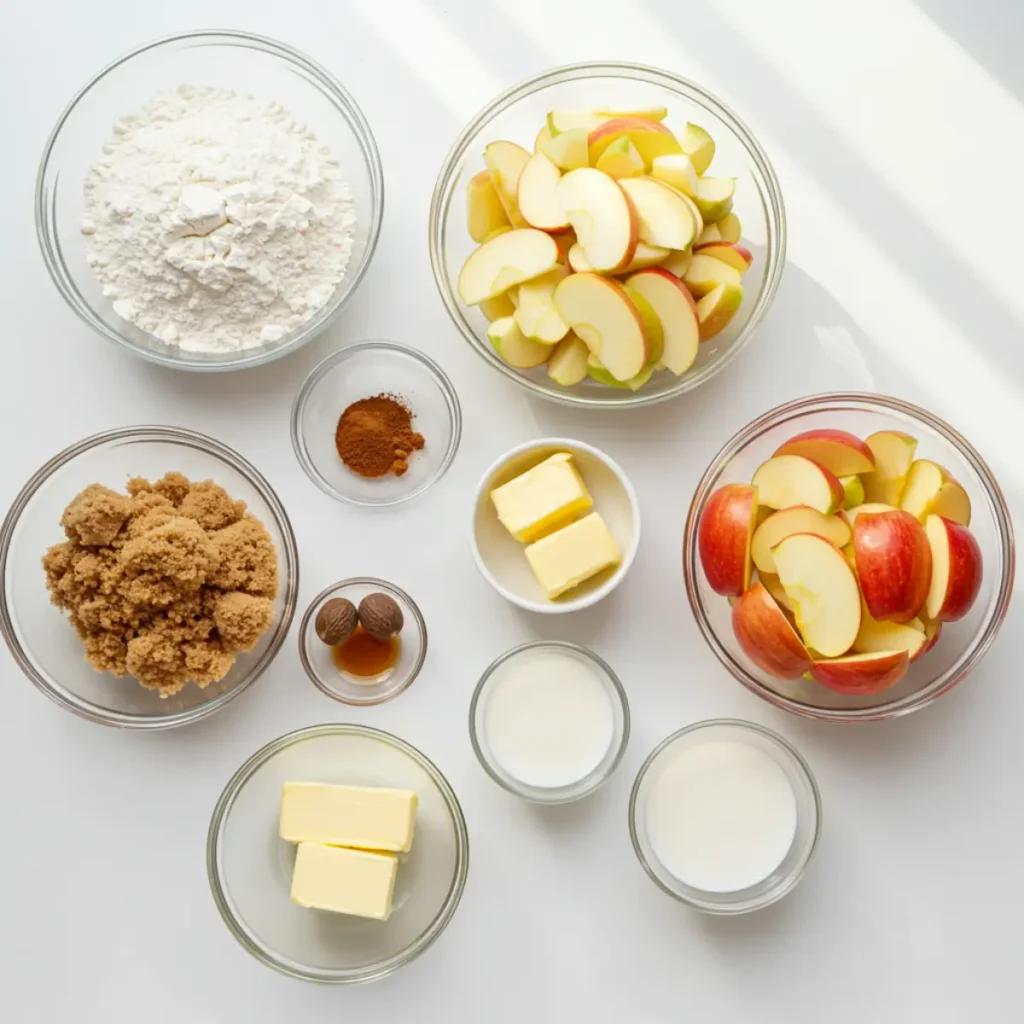
One of the reasons I love making Baked Apple Fritters is that the ingredients are simple pantry staples mixed with fresh fall apples. No fancy gadgets, no hard-to-find items—just real, wholesome ingredients that come together to make something magical. Let’s walk through what you’ll need and why each piece matters:
- All-Purpose Flour (¾ cup) – This is your classic baking base. It gives the fritters structure and softness. Using just all-purpose flour would make them light, but not hearty enough on their own.
- White Whole Wheat Flour (¾ cup) – Here’s my secret weapon for making fritters feel a little more wholesome without turning them into dense hockey pucks. White whole wheat flour is milled from a lighter wheat berry, so it bakes more tender while still adding fiber and that subtle nutty flavor. It’s the same trick I use in my Apple Pumpkin Streusel Muffins, and trust me—your family won’t even notice the difference.
- Brown Sugar (½ cup) – Adds sweetness, yes, but also moisture thanks to its natural molasses content. That’s why baked fritters stay soft and chewy instead of drying out. Light or dark brown sugar both work—dark just gives a slightly deeper caramel note.
- Baking Powder (2 teaspoons) – Think of this as your fritters’ “lift-off.” It helps the dough puff up so each bite feels light and pillowy, not heavy.
- Cinnamon (1 teaspoon) – No apple recipe is complete without cinnamon. It wraps the apples in warmth and instantly makes your kitchen smell like autumn at a county fair.
- Nutmeg (½ teaspoon) – Just a pinch adds depth and a slightly nutty, earthy note. A little goes a long way—too much and it can overpower the apples.
- Allspice (¼ teaspoon) – Despite the name, it’s not a blend—it’s its own spice! It tastes like a little bit of cinnamon, nutmeg, and cloves all rolled into one. Perfect for apple desserts.
- Salt (¼ teaspoon) – Don’t skip this. A touch of salt brings balance, sharpening the sweetness of the sugar and the tartness of the apples.
- Butter (6 tablespoons, cold and cut into cubes) – Cold butter is key for creating tender, flaky fritters. When those little bits of butter melt in the oven, they leave behind tiny air pockets that make the texture irresistible.
- Milk (½ cup) – Brings moisture and ties everything together. Whole milk works beautifully, but you can also use 2% or even oat milk for a dairy-free option.
- Egg (1 large) – Adds structure and helps bind the batter so your fritters don’t crumble apart.
- Vanilla Extract (1 teaspoon) – The flavor enhancer. It ties all the spices and apples together into that nostalgic “bakery” taste.
- Fresh Apple (1 cup, chopped) – The star of the show! I recommend Honeycrisp or Granny Smith—Honeycrisp gives sweetness and juiciness, while Granny Smith keeps things tart and bright. If you’re feeling adventurous, mix a couple of varieties for extra depth. This same trick works beautifully in my Apple Spice Cake.
For the Glaze:
- Confectioner’s Sugar (1 cup) – That classic powdered sugar glaze gives your fritters their signature crackly finish.
- Milk (2 tablespoons) – Smooths out the sugar to make a pourable glaze.
- Vanilla Extract (1 teaspoon) – A touch of sweetness that makes the glaze shine.
💡 Tip from my kitchen: Don’t be afraid to play with flavors. For example, swap half the vanilla in the glaze with apple cider for a tangy twist—similar to the flavor profile in my Apple Cider Whoopie Pies. It’s a little change that makes your Baked Apple Fritters taste even more like fall in a bite.
Step-by-Step Instructions for Baked Apple Fritters
Making Baked Apple Fritters is easier than pie (literally!) and only takes about 25 minutes from start to finish. Here’s how to bring these warm, spiced fritters to life in your own kitchen:
Step 1: Preheat the Oven
Set your oven to 400°F (200°C) and line a baking sheet with either parchment paper or a silicone baking mat. I love using a silicone mat because nothing sticks, and clean-up is a breeze (a lifesaver when you have little ones running around!). While the oven warms up, go ahead and gather your ingredients—it makes the process feel smoother and a lot less stressful.
If you’re already in fall-baking mode, this prep step is the same one I use when making Apple Cider Cake. Getting organized before mixing keeps baking fun instead of messy.
Step 2: Mix the Dry Ingredients
In a large bowl, whisk together the all-purpose flour, white whole wheat flour, brown sugar, baking powder, cinnamon, nutmeg, allspice, and salt. This isn’t just about combining—whisking helps add a little air into the mix, which makes the fritters lighter once baked.
Tip: Smell that? The spices are already giving off that cozy aroma! It’s basically a sneak preview of how your kitchen will smell when these fritters come out of the oven.
Step 3: Cut in the Butter
Take your cold, cubed butter and cut it into the flour mixture using a pastry cutter or two forks. You’re aiming for a coarse, crumbly texture—kind of like damp sand with little pea-sized bits of butter throughout.
Why cold butter? As the fritters bake, those butter chunks melt and create tender, flaky layers. It’s the same trick used in biscuits and scones. (If you love that texture, you’d also enjoy my Apple Pumpkin Streusel Muffins—they use a similar technique!)
Step 4: Whisk the Wet Ingredients
In a smaller bowl, whisk together the milk, egg, and vanilla extract until smooth. This mixture helps bind everything together and gives your fritters their structure. Once it’s well combined, pour it gently into the bowl with your dry mixture.
Step 5: Bring the Batter Together
Using a spatula or wooden spoon, stir the wet and dry mixtures until they just come together. Don’t overmix here—lumpy batter is totally fine (and actually better). Overmixing can make your fritters dense instead of tender.
Step 6: Fold in the Apples
Now for the star ingredient—apples! Gently fold in your chopped apples until they’re evenly distributed throughout the dough. Each fritter should have little bursts of juicy apple in every bite.
💡 Tip: If you’re mixing apple varieties (say, a Granny Smith and a Honeycrisp), this is where the magic really happens. That balance of tart and sweet takes your Baked Apple Fritters to the next level.
Step 7: Drop the Dough & Bake
Using a ¼-cup measuring scoop, drop mounds of dough onto your prepared baking sheet. Space them out a little since they’ll puff as they bake. Pop the tray in the oven and bake for 11–13 minutes, or until the bottoms are golden and the centers are set.
Your house will smell amazing at this point—like a mix between a cinnamon candle and your grandma’s kitchen.
Step 8: Make the Glaze
While the fritters are baking, whisk together the confectioner’s sugar, milk, and vanilla extract in a small bowl until smooth and pourable. This glaze is what gives your fritters that irresistible shiny finish.
Step 9: Glaze & Broil
Here’s where the magic happens! Once the fritters are baked, place them on a wire rack. Brush a thin layer of glaze over the tops, then switch your oven to broil. Return the fritters to the oven for just 2–4 minutes, until the glaze bubbles slightly and the tops turn golden.
⚠️ Watch closely! Broiling moves fast—one moment you’ve got golden fritters, the next you’ve got charred sugar. Stay by the oven and don’t walk away.
Step 10: Finish & Serve
Take the fritters out, brush with the remaining glaze, and let them set for a few minutes until the glaze hardens slightly. That’s it—you’ve got yourself warm, golden Baked Apple Fritters ready to enjoy!
Pair them with a hot cup of coffee or spiced tea, and you’ve got the perfect cozy treat. They’re especially wonderful served alongside a lighter salad like my Apple Pecan Fall Salad if you’re looking for a balanced brunch spread.
Tips & Tricks for Perfect Fritters
- Keep butter cold – This helps create tender, biscuit-like pockets.
- Don’t overmix – Stir just until combined; lumps are fine.
- Use tart apples – Granny Smith or Honeycrisp balance the sweetness beautifully.
- Broil carefully – Watch closely! The glaze can go from golden to burnt in seconds.
- Make ahead – Bake a batch, freeze without glaze, then reheat and glaze fresh.
Storage
- Counter – Store in an airtight container for up to 2 days.
- Fridge – Keep up to 5 days (rewarm before serving).
- Freezer – Freeze unfrosted fritters up to 3 months. Add glaze after thawing and reheating.
FAQs
Can I skip the broil step?
Yes! You’ll miss the golden crust, but they’ll still taste amazing.
Can I use gluten-free flour?
Absolutely—just sub in your favorite 1:1 gluten-free flour blend.
Do I have to peel the apples?
Nope. If you like a little extra texture, leave the skins on.
Conclusion
These baked apple fritters bring all the cozy, nostalgic flavor of the fairground treat—without the fryer. They’re quick, healthier, and guaranteed to make your kitchen smell like fall itself. Bake a batch this weekend, pour yourself a cup of coffee, and enjoy a sweet little moment of joy.
Follow us on Pinterest for weekly slow cooker inspiration, or join the conversation over on our Facebook page where fellow food lovers share their favorite comfort meal.
Print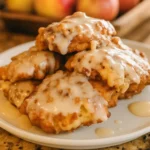
Baked Apple Fritters
- Prep Time: 15 minutes
- Cook Time: 13 minutes
- Total Time: 30 minutes
- Yield: 10–12 fritters
- Category: Dessert
- Method: Baking
- Cuisine: American
- Diet: Vegetarian
Description
These Baked Apple Fritters are soft, spiced, and full of fresh apples—topped with a light vanilla glaze and broiled for that perfect golden bakery-style finish without frying.
Ingredients
¾ cup all-purpose flour
¾ cup white whole wheat flour
½ cup brown sugar
2 tsp baking powder
1 tsp cinnamon
½ tsp nutmeg
¼ tsp allspice
¼ tsp salt
6 tbsp cold unsalted butter, cubed
½ cup milk
1 large egg
1 tsp vanilla extract
1 cup chopped fresh apple (Honeycrisp or Granny Smith)
For the Glaze:
1 cup confectioner’s sugar
2 tbsp milk
1 tsp vanilla extract
Instructions
1. Preheat oven to 400°F and line a baking sheet with parchment paper or a silicone mat.
2. In a large bowl, whisk together all-purpose flour, white whole wheat flour, brown sugar, baking powder, cinnamon, nutmeg, allspice, and salt.
3. Cut in cold butter using a pastry cutter or two forks until the mixture is crumbly with pea-sized bits of butter.
4. In a small bowl, whisk together milk, egg, and vanilla extract. Pour into dry ingredients and stir until just combined.
5. Gently fold in chopped apples until evenly distributed.
6. Use a ¼-cup scoop to drop mounds of batter onto the prepared baking sheet. Leave space between each fritter.
7. Bake for 11–13 minutes, or until golden and centers are set.
8. While fritters bake, whisk together confectioner’s sugar, milk, and vanilla to make glaze.
9. Remove fritters from oven, place on a wire rack, and brush with glaze.
10. Switch oven to broil. Return glazed fritters to oven for 2–4 minutes, watching carefully until glaze bubbles and lightly browns.
11. Remove from oven, brush with remaining glaze, and let set before serving.
Notes
Use a mix of apple varieties (like Granny Smith and Honeycrisp) for more depth of flavor.
Watch closely while broiling—sugar can burn quickly.
These are best enjoyed warm on the day they’re made, but leftovers can be stored at room temperature for 1–2 days.