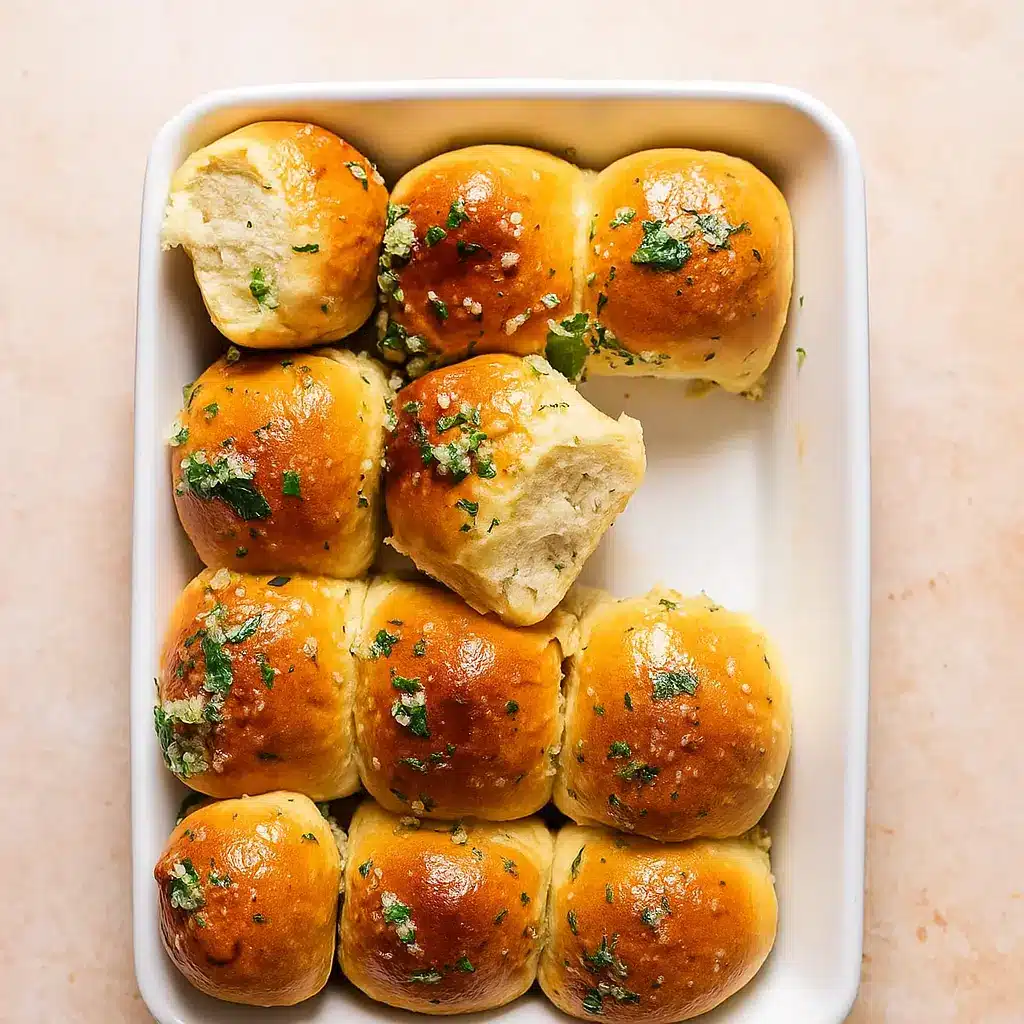
There’s just something about garlic bread rolls that makes any dinner table instantly cozier. Maybe it’s the buttery aroma that sneaks out of the oven and has everyone wandering into the kitchen, or maybe it’s the way the rolls practically melt in your mouth. Either way, if you’ve been looking for a soft, pillowy bread recipe that packs a garlicky punch—friend, you’re in the right place.
As a Texas girl and mama of three, I can tell you these rolls don’t just “go” with dinner—they steal the show. My kids call them “little flavor pillows,” and let me tell you, if a seven-year-old happily eats parsley because it’s baked into warm bread, that’s a recipe worth keeping.
Table of Contents
Why You’ll Love This Garlic Bread Rolls Recipe
- Soft, fluffy, and golden brown perfection.
- Packed with fresh garlic in both the dough and the finishing butter.
- Perfect as a side dish for pasta, soup, or even Thanksgiving dinner.
- Easy to make ahead and reheat (because we all need shortcuts sometimes).
What Do Garlic Bread Rolls Taste Like?
Imagine your favorite garlic bread met the softest dinner roll—it’s a match made in carb heaven. The rolls are slightly sweet from the milk and sugar, buttery throughout, and bursting with savory garlic flavor. Brushing them with garlic butter straight out of the oven makes them glossy, fragrant, and downright irresistible.
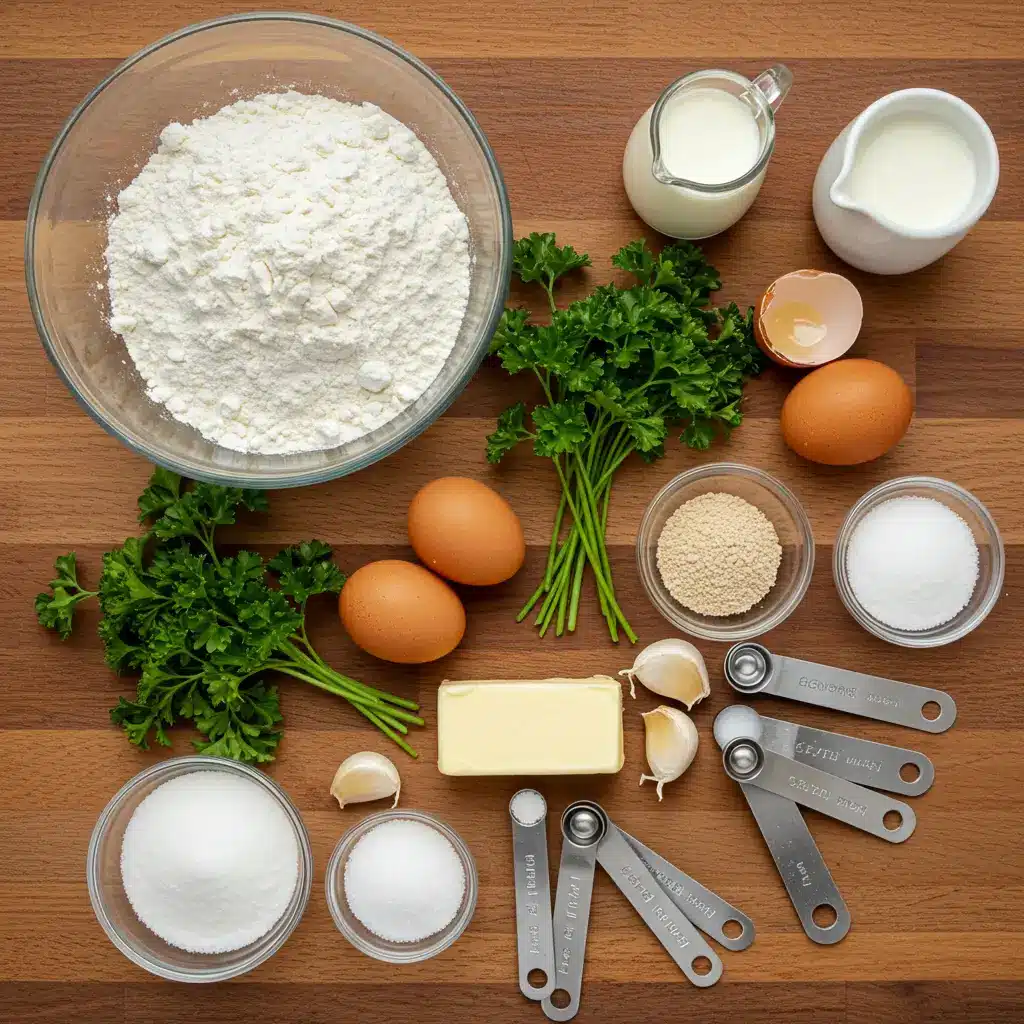
Ingredients You’ll Need for Garlic Bread Rolls
One of the best parts about making garlic bread rolls at home is that you don’t need fancy or hard-to-find ingredients. Most of these items are pantry and fridge staples you probably already have on hand, which makes this recipe both approachable and budget-friendly. Let’s break them down so you know exactly why each one matters:
- All-purpose flour – The foundation of your rolls. Using the spoon-and-level method (or a kitchen scale if you have one) will give you that perfect soft, fluffy texture. Too much flour, and your rolls will turn out dense instead of pillowy.
- Unsalted butter – Butter is what gives these rolls their rich, melt-in-your-mouth flavor. You’ll use some in the dough and more in the garlic butter topping. If you only have salted butter, just reduce the added salt slightly.
- Fresh garlic (minced) – The star of the show. Fresh garlic adds depth and warmth that garlic powder just can’t compete with. You’ll infuse it into both the dough and the finishing butter for double the flavor.
- Whole or 2% milk (warmed) – Warm milk activates the yeast and adds moisture to the dough. It also gives the rolls a tender crumb and subtle richness.
- Granulated sugar – Just a tablespoon is all you need. Sugar helps feed the yeast so your dough rises beautifully and balances the savory garlic flavor.
- Instant yeast – Instant yeast is quick and reliable, perfect for busy home bakers. If you prefer active dry yeast, you can use that too—just proof it first in the warm milk with a pinch of sugar until foamy.
- Fresh parsley – Not only does parsley add a pop of color, but it also brings freshness that keeps the garlic butter from being too heavy. You can swap it for chives or oregano if you’re in the mood to experiment.
- Fine sea salt – Salt balances the flavor, strengthens the dough, and brings out the buttery notes.
- Eggs – One egg goes into the dough for structure, while another is beaten and brushed over the tops before baking, giving the rolls their gorgeous golden shine.
- Flaky sea salt (optional) – This is the final touch. A sprinkle of flaky sea salt after brushing with garlic butter gives the rolls a satisfying little crunch and elevates the flavor.
👉 Pro Tip: If you’re already baking something sweet for dessert, like these pumpkin sugar cookies, you can prep both recipes side by side. While the dough for your garlic bread rolls is rising, you’ll have time to mix up your cookie dough—double win!
Step-by-Step Instructions for Garlic Bread Rolls
Making homemade garlic bread rolls might sound intimidating at first, but trust me—it’s easier than you think. This recipe is very forgiving, and if you follow these steps, you’ll end up with soft, fluffy rolls that your family will ask for again and again. Grab your apron, and let’s do this together.
Step 1: Prepare Your Baking Pan
Lightly butter the bottom and sides of a 9×13-inch baking dish. This prevents sticking and gives your rolls a nice golden edge. If you prefer, you can also line it with parchment paper for easy cleanup.
Step 2: Make the Garlic Butter Base
In a small pot, melt unsalted butter and stir in the minced garlic. Cook for just 1–2 minutes, until fragrant. This step infuses the butter with that irresistible garlicky flavor we all love. Set it aside to cool slightly while you measure your dry ingredients.
Pro Tip: Don’t let the garlic brown here—it can turn bitter. You just want it soft and aromatic.
Step 3: Mix the Dough
In the bowl of a stand mixer (or a large bowl if you’re kneading by hand), combine flour, parsley, sugar, yeast, and salt. Then pour in the warm milk, the egg, and the cooled garlic butter mixture.
Using the dough hook, knead on low speed for 10–12 minutes until the dough feels soft, smooth, and just a little tacky. If the dough sticks too much, add extra flour one tablespoon at a time until it’s workable.
Think of this step as building the foundation of your garlic bread rolls—good kneading means good texture!
Step 4: Shape the Dough Balls
Once your dough is ready, divide it into 12 equal pieces. A kitchen scale makes this easy (around 67 grams each). Roll each portion into a smooth ball by cupping it in your hand and tucking the seams underneath.
Place the dough balls snugly into your prepared pan, leaving a little space between them so they can expand.
Step 5: Let the Dough Rise
Cover the pan loosely with plastic wrap or a clean kitchen towel. Let the dough rest in a warm spot until it has doubled in size—this usually takes 1–2 hours.
This is a great time to multitask. While your rolls are rising, why not start on a cozy fall treat like pumpkin cheesecake cookies? That way, you’ll have both dinner and dessert ready to wow your family.
Step 6: Bake to Golden Perfection
Preheat your oven to 350°F. Once the rolls have doubled in size, brush the tops with a beaten egg. This gives them that beautiful bakery-style shine.
Bake for 20–30 minutes, or until the tops are golden brown and your kitchen smells like pure heaven.
Step 7: Brush with Garlic Butter
While the rolls are baking, prepare the finishing garlic butter. Melt butter in a pan, add minced garlic, and cook until fragrant. Stir in fresh parsley, then remove from heat.
As soon as the rolls come out of the oven, brush them generously with the garlic butter. Sprinkle with flaky sea salt for a little crunch and extra flavor.
Step 8: Serve Warm and Enjoy
These garlic bread rolls are best served warm, straight from the pan. Pair them with pasta, soup, or even a holiday turkey dinner. Honestly, they’re so good you might just “sample” two before they ever reach the table (guilty as charged!).
Tips and Tricks for Perfect Garlic Bread Rolls
- Measure flour correctly. Spoon and level (or use a scale). Too much flour = tough rolls.
- Don’t rush the rise. Good bread takes its sweet time. Let the dough double before baking.
- Swap it up. No parsley? Try chives or even oregano.
- Make ahead magic. Shape, refrigerate overnight, then bake the next day. Perfect for holidays!
- Freeze ‘em. They keep beautifully for up to a month. Just reheat in the oven until warm.
Confession: I once froze a whole batch for “future dinners” and ended up snacking on them one by one until they disappeared. Zero regrets.
Storage for Garlic Bread Rolls
- Room Temp: Store in an airtight bag for 2–3 days.
- Freezer: Freeze cooled rolls in a container for up to 1 month.
- Reheat: Oven (350°F covered with foil) or microwave (20–30 seconds). Always serve warm—cold rolls just don’t do them justice.
FAQs
Can I use active dry yeast instead of instant yeast?
Yes! Just activate it in warm milk with a pinch of sugar first and let it foam before adding.
Can I double this recipe?
Absolutely. You’ll just need two pans, but trust me, they’ll all get eaten.
Do these rolls taste like restaurant garlic knots?
Kind of—but fluffier, softer, and way fresher since they’re homemade.
Conclusion
If comfort food had a VIP list, garlic bread rolls would be at the top. They’re warm, garlicky, buttery little clouds of happiness that work with just about any meal (or as a snack straight from the pan—no judgment here).
So grab your flour and garlic, and let’s make magic in the kitchen. And hey, if you bake these, tag me—I’d love to see your golden beauties!
Follow us on Pinterest for weekly slow cooker inspiration, or join the conversation over on our Facebook page where fellow food lovers share their favorite comfort meal.

Garlic Bread Rolls: The Best Soft & Fluffy Recipe Ever
- Prep Time: 1 hour 30 minutes
- Cook Time: 20 minutes
- Total Time: 1 hour 50 minutes
- Yield: 12 servings
- Category: Appetizer, Side Dish
- Method: Baking
- Cuisine: American
- Diet: Vegetarian
Description
Garlic bread rolls are soft, fluffy, and loaded with fresh garlic flavor. Perfectly golden and brushed with garlic herb butter, these rolls are a must-have side for any meal.
Ingredients
4 1/2 tablespoons unsalted butter
2 tablespoons minced garlic
3 1/2 cups + 1 tablespoon all-purpose flour
3 tablespoons chopped fresh parsley
1 tablespoon granulated sugar
2 1/4 teaspoons instant yeast
1 teaspoon fine sea salt
1 cup whole or 2% milk, warmed to 110°F
1 large egg, room temperature
1 beaten egg, for brushing the tops
For the Garlic Butter:
2 tablespoons unsalted butter
1 tablespoon minced garlic
1 tablespoon chopped fresh parsley
Flaky sea salt, for finishing
Instructions
1. Lightly butter the bottom and sides of a 9×13 pan and set it aside.
2. In a small pot, melt the butter and add the minced garlic. Cook for 1-2 minutes or until the garlic is fragrant. Remove from heat and let cool.
3. In a stand mixing bowl, combine the flour, parsley, sugar, yeast, and salt. Add the warmed milk, egg, and the garlic butter mixture. Knead on low speed with the dough hook until the dough is smooth and tacky, about 10-12 minutes.
4. Divide the dough into 12 equal portions (about 67g each). Shape each into a smooth ball, pinch the seam, and place in the prepared pan. Cover and let rise in a warm spot until doubled in size, about 1-2 hours.
5. Preheat oven to 350°F (180°C).
6. Brush the tops of the rolls with beaten egg wash and bake for 20-30 minutes, or until golden brown.
7. While rolls are baking, melt the garlic butter: combine butter and garlic in a pot, cook until fragrant, remove from heat, and stir in parsley.
8. Immediately brush hot rolls with garlic butter and sprinkle with flaky sea salt. Serve warm.
Notes
Measure dry ingredients using the spoon and level method, or for best accuracy, use a kitchen scale.
If using active dry yeast instead of instant yeast, activate it in warm milk with a pinch of sugar and let it foam before using.
Rolls are best enjoyed the day they’re made but can be stored in an airtight container for 2-3 days at room temperature.
To freeze: cool baked rolls completely, then store in an airtight container for up to one month.
To make ahead: shape rolls and place in pan, then refrigerate overnight. Let rise to double before baking.
Reheat by covering with foil and baking at 350°F until warm or microwave for 20-30 seconds.