If there’s one thing that can bring a little joy to a hectic weekday, it’s this Crispy Dill Chicken Sandwich. Think golden-brown, crunchy chicken with juicy tenderness inside, hugged by a buttery brioche bun, and topped with creamy dill mayo that tastes like sunshine on a plate. It’s a little bit fancy, a whole lot satisfying, and takes under an hour from start to finish. Whether you’re trying to impress your family or just want something that feels restaurant-level without leaving home, this sandwich is it. The best part? It’s flexible enough to suit your mood—add a slice of cheese, toss on extra pickles, or give it a spicy kick.
Table of Contents
What is Crispy Dill Chicken Sandwich?
The Crispy Dill Chicken Sandwich is a flavor-packed take on a classic chicken sandwich. It’s made with juicy chicken breasts coated in seasoned flour and crispy panko breadcrumbs, giving every bite that irresistible crunch. What sets this sandwich apart is the dill—both dried (in the coating) and fresh (in the mayo)—creating a refreshing, slightly tangy twist that makes the sandwich shine. Served on soft brioche buns with shredded lettuce and crisp dill pickles, it’s the kind of comfort food that hits all the right notes: crunchy, creamy, tangy, and savory. It’s easy enough for a weekday dinner but special enough for a weekend treat.
Reasons to Try Crispy Dill Chicken Sandwich
There are so many reasons you’ll fall for this Crispy Dill Chicken Sandwich. First off, it’s quick—less than an hour from fridge to plate, which means dinner is handled even on busy nights. Second, it’s budget-friendly yet feels gourmet, thanks to that golden crust and flavorful dill mayo. Third, it’s incredibly customizable. Want it spicy? Add hot sauce to the mayo. Watching calories? Use Greek yogurt instead. And if you’re feeding picky eaters, this sandwich is practically foolproof—they’ll love the crunch. Plus, the dill flavor brings a refreshing twist that feels light, not heavy, even though it’s fried. Pair it with soup or a crisp side salad for a full, balanced meal.
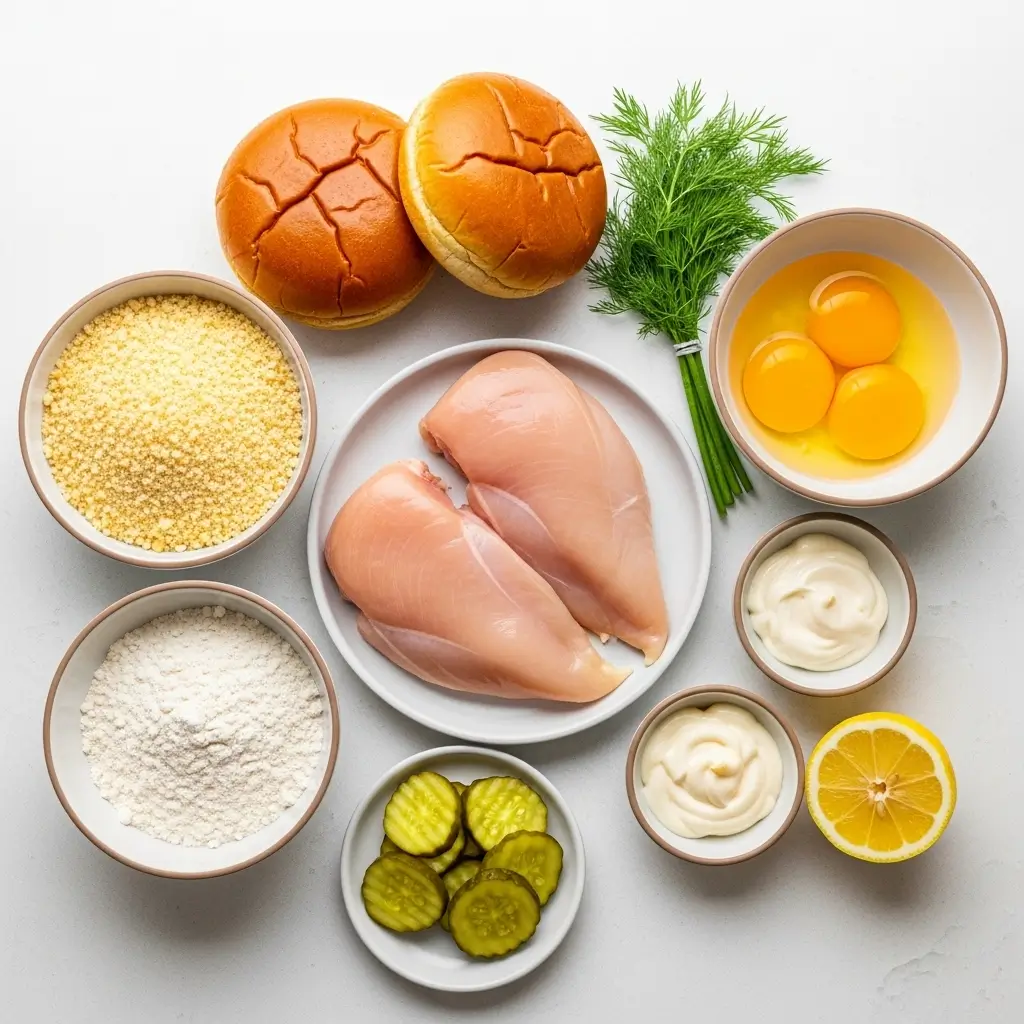
Ingredients Needed to Make Crispy Dill Chicken Sandwich
- 2 large chicken breasts, boneless and skinless
- 1 cup all-purpose flour
- 1 teaspoon salt
- 1 teaspoon black pepper
- 2 teaspoons garlic powder
- 2 teaspoons onion powder
- 1 tablespoon dried dill
- 2 large eggs
- ¼ cup milk
- 1 cup panko breadcrumbs
- Vegetable oil, for frying
- 4 brioche buns
- ½ cup mayonnaise
- 2 tablespoons chopped fresh dill
- 1 tablespoon lemon juice
- 1 cup shredded lettuce
- 8 slices dill pickle
Instructions to Make Crispy Dill Chicken Sandwich
Let’s walk through this Crispy Dill Chicken Sandwich step by step, because trust me—once you make it right the first time, you’ll be craving it every week. Each step below is simple, detailed, and designed for busy home cooks who want that restaurant-quality crunch without the fuss.
Step 1: Prepare and Flatten the Chicken
To start, place your chicken breasts on a clean cutting board. Slice each one in half horizontally to make two thinner pieces (this helps them cook evenly). Then, cover the chicken with a piece of plastic wrap and gently pound it using a meat mallet or rolling pin until it’s about ½ inch thick.
Why is this important? Evenly thick chicken cooks faster and stays tender inside while the crust turns perfectly golden. If you’re new to this technique, check out our post on simple prep tips for chicken recipes to make your kitchen process smoother.
Step 2: Season and Set Up the Coating Stations
Now, for the flavor foundation. In one shallow bowl, combine flour, salt, black pepper, garlic powder, onion powder, and dried dill. This seasoned flour locks in flavor and helps the coating stick beautifully.
In a second bowl, whisk together eggs and milk—this mixture gives the coating something to cling to. Finally, pour panko breadcrumbs into a third dish; this is what gives your sandwich that signature crispy texture.
Setting up your stations step by step keeps the process clean and efficient, just like in a professional kitchen.
Step 3: Coat the Chicken (The Secret to Crunch)
Here’s where your chicken gets its crunchy personality. First, dredge each piece in the seasoned flour, making sure every inch is coated—no bare spots allowed! Then dip it into the egg mixture so it’s fully covered, and finally press it into the panko breadcrumbs until you’ve got an even crust.
Tip: Gently press the breadcrumbs into the chicken to help them adhere better. Want to make this sandwich a touch healthier? You can use whole wheat panko or even crushed cornflakes. For more healthy swaps, see our ingredient substitution guide.
Step 4: Fry the Chicken to Crispy Perfection
Heat a generous layer of vegetable oil in a large skillet over medium-high heat. To test if the oil’s ready, drop in a breadcrumb—if it sizzles immediately, it’s go time.
Fry the chicken pieces for about 4–5 minutes on each side until they turn a rich, golden brown. The coating should be crisp, and the inside should reach 165°F for safe cooking. Once done, transfer the pieces to a paper towel-lined plate to drain any excess oil.
This step-by-step frying process ensures your chicken stays crunchy, not greasy. If frying isn’t your thing, you can bake or air-fry the chicken too—just like in our Crockpot White Chicken Chili recipe, where we focus on lighter cooking techniques.
Step 5: Whip Up the Dill Mayo Sauce
While your chicken rests, mix up the sauce that takes this sandwich from good to unforgettable. In a small bowl, combine mayonnaise, freshly chopped dill, and a squeeze of lemon juice. Give it a quick stir until smooth. The dill adds freshness while the lemon cuts through the richness, creating a perfectly balanced flavor.
For a lighter option, substitute half the mayo with Greek yogurt. It gives a tangy twist and cuts some calories. You can find more creamy, wholesome sauce ideas in our Vegan Rosemary Garlic White Bean Soup—trust me, it’s full of inspiration for healthy condiments.
Step 6: Toast the Brioche Buns
Never underestimate the power of a toasted bun. Lightly butter each half of your brioche buns and toast them on a skillet or in the oven for 1–2 minutes until they’re golden and slightly crisp. This step-by-step toasting trick keeps your sandwich from getting soggy and adds an irresistible buttery flavor.
Step 7: Assemble the Crispy Dill Chicken Sandwich
Now for the fun part—assembly! Spread a generous layer of dill mayo on both sides of the toasted bun. Add a handful of shredded lettuce for crunch, then place a piece of your perfectly fried chicken on top. Finish it off with a few slices of dill pickle for that briny bite that ties everything together.
Press the sandwich gently so everything settles into place, and there you have it—the ultimate Crispy Dill Chicken Sandwich step-by-step creation that looks as amazing as it tastes.
Step 8: Serve and Enjoy
Serve your masterpiece warm, ideally with a side of sweet potato fries, a light salad, or even a bowl of our comforting White Bean and Kale Soup for balance.
Take that first crunchy bite, and you’ll understand why this recipe deserves a spot in your weekly rotation. Once you’ve nailed it, try experimenting with flavors—like adding spicy mayo or a slice of cheese for an indulgent twist.
What to Serve with Crispy Dill Chicken Sandwich
This sandwich shines alongside light, fresh sides. Think sweet potato fries, coleslaw, or even a zesty cucumber salad. If you’re craving something cozier, try one of our soothing soups like the Zesty Greek Lemon Chicken Soup or Healing Pumpkin Soup. A tall glass of iced tea or sparkling lemonade rounds out the meal beautifully.
Key Tips for Making Crispy Dill Chicken Sandwich
- Pound evenly: Thin, even chicken cooks quickly and stays juicy.
- Use panko: Regular breadcrumbs won’t give that signature crunch.
- Don’t overcrowd the pan: Fry in batches to keep your coating crisp, not soggy.
- Rest the chicken: Give it five minutes after frying for the crust to set perfectly.
- Play with flavor: Add a pinch of cayenne for heat, or swap the dill mayo for ranch if you’re out of fresh herbs.
Storage and Reheating Tips for Crispy Dill Chicken Sandwich
If you’ve got leftovers (lucky you), store the chicken and buns separately. Keep fried chicken pieces in an airtight container in the fridge for up to 3 days. Reheat in the oven at 375°F for 10–12 minutes or in the air fryer for extra crispiness. Avoid microwaving—it softens the coating. The dill mayo keeps well in the fridge for 2–3 days, tightly sealed. Assemble your sandwich just before eating for the freshest texture.
FAQs
Can I bake the chicken instead of frying?
Yes! Bake at 425°F for 20–25 minutes, flipping halfway. It’s a bit lighter but still crunchy.
Can I use chicken thighs?
Absolutely. They’re juicier and more flavorful—just adjust cook time slightly.
Is this recipe freezer-friendly?
The cooked chicken freezes well. Wrap each piece individually and store up to 2 months. Reheat in the oven or air fryer.
Final Thoughts
The Crispy Dill Chicken Sandwich is everything you want in a meal: crispy, flavorful, satisfying, and quick. It’s the kind of recipe that makes you feel like you’ve treated yourself—without the restaurant bill. Whether it’s lunch for one or a family dinner, it delivers big on flavor and texture every time. So grab that dill, heat that skillet, and get ready for a seriously delicious bite.
Follow us on Pinterest for weekly slow cooker inspiration, or join the conversation over on our Facebook page where fellow food lovers share their favorite comfort meal.

Crispy Dill Chicken Sandwich – Delicious, Juicy & Quick Recipe
- Prep Time: 30 minutes
- Cook Time: 20 minutes
- Total Time: 55 minutes
- Yield: 4 sandwiches
- Category: Lunch
- Method: Frying
- Cuisine: American
Description
This crispy dill chicken sandwich features tender, juicy chicken coated in crunchy panko, paired with a tangy dill mayo and fresh veggies. Perfect for lunch or dinner!
Ingredients
- 2 large chicken breasts, boneless and skinless
- 1 cup all-purpose flour
- 1 teaspoon salt
- 1 teaspoon black pepper
- 2 teaspoons garlic powder
- 2 teaspoons onion powder
- 1 tablespoon dried dill
- 2 large eggs
- 1/4 cup milk
- 1 cup panko breadcrumbs
- Vegetable oil, for frying
- 4 brioche buns
- 1/2 cup mayonnaise
- 2 tablespoons chopped fresh dill
- 1 tablespoon lemon juice
- 1 cup shredded lettuce
- 8 slices of dill pickle
Instructions
1. Slice each chicken breast in half horizontally to create four thin pieces. Use a meat mallet to gently pound the pieces to an even thickness, around 1/2 inch.
2. In a shallow dish, mix together the flour, salt, black pepper, garlic powder, onion powder, and dried dill.
3. In another bowl, whisk the eggs and milk together.
4. In a separate dish, place the panko breadcrumbs.
5. Dip each piece of chicken first into the flour mixture, making sure it’s fully coated, then into the egg mixture, and finally into the panko breadcrumbs for an even coating.
6. Heat vegetable oil in a large skillet over medium-high heat until hot. Fry the chicken pieces for 4-5 minutes on each side, or until golden brown and cooked through. Drain on paper towels.
7. In a small bowl, mix the mayonnaise, fresh dill, and lemon juice to make the dill mayo sauce.
8. Toast the brioche buns lightly.
9. Assemble the sandwiches by spreading dill mayo on both sides of the bun, adding a layer of shredded lettuce, then the fried chicken piece, and topping with pickle slices.
10. Serve the sandwiches warm for best taste.
Notes
For an extra kick, add a slice of your favorite cheese before topping the sandwich.
You can substitute Greek yogurt for mayonnaise to make a lighter, tangier sauce.
Add some hot sauce to the dill mayo for a spicy variation of the sandwich.
This sandwich pairs well with a side of sweet potato fries or a crisp coleslaw.