No-Bake Apple Pie Cheesecake is the kind of dessert that makes you feel like fall wrapped itself in a cozy sweater and decided to show up at your dinner table. It combines the creamy, dreamy texture of cheesecake with the warm, cinnamon-spiced comfort of apple pie—without ever turning on your oven (well, maybe just a quick minute for the crust).
Whether you’re hosting Thanksgiving, craving something sweet after Sunday dinner, or just trying to impress your in-laws without breaking a sweat, this No-Bake Apple Pie Cheesecake will make you look like a dessert genius. The best part? It’s surprisingly easy, even if baking isn’t your love language. Just a few simple steps, some chill time, and voilà—you’ve got a dessert that feels like a hug in every bite.
Table of Contents
What is No-Bake Apple Pie Cheesecake?
No-Bake Apple Pie Cheesecake is a luscious twist on two classic favorites: creamy cheesecake and spiced apple pie. The no-bake method skips the oven entirely, relying instead on refrigeration to set the filling. The result? A velvety smooth cheesecake layer nestled over a buttery graham cracker crust, crowned with tender, cinnamon-coated apples that taste just like Grandma’s pie filling. This dessert balances the best of both worlds—rich and light, indulgent yet refreshing. It’s the kind of dessert that pleases everyone at the table, from kids who love the sweet apple topping to adults who appreciate a sophisticated, silky finish. And because it’s no-bake, it’s perfect for warm kitchens or busy holidays when your oven is already working overtime.
Reasons to Try No-Bake Apple Pie Cheesecake
First of all, no oven means no stress. That’s reason enough! But this No-Bake Apple Pie Cheesecake also hits all the right notes: buttery, creamy, spiced, and sweet. It’s the ultimate dessert when you want something impressive yet easy to make ahead. The graham cracker crust adds a satisfying crunch, while the cream cheese filling is smooth and tangy. And those caramelized apples on top? Pure fall magic. It’s also a crowd-pleaser for any occasion—potlucks, holiday parties, or just a random Tuesday when you want something special. Plus, since it needs to chill for a few hours, it’s a make-ahead dream, freeing up your schedule for more important things (like sipping cider or binging your favorite show).
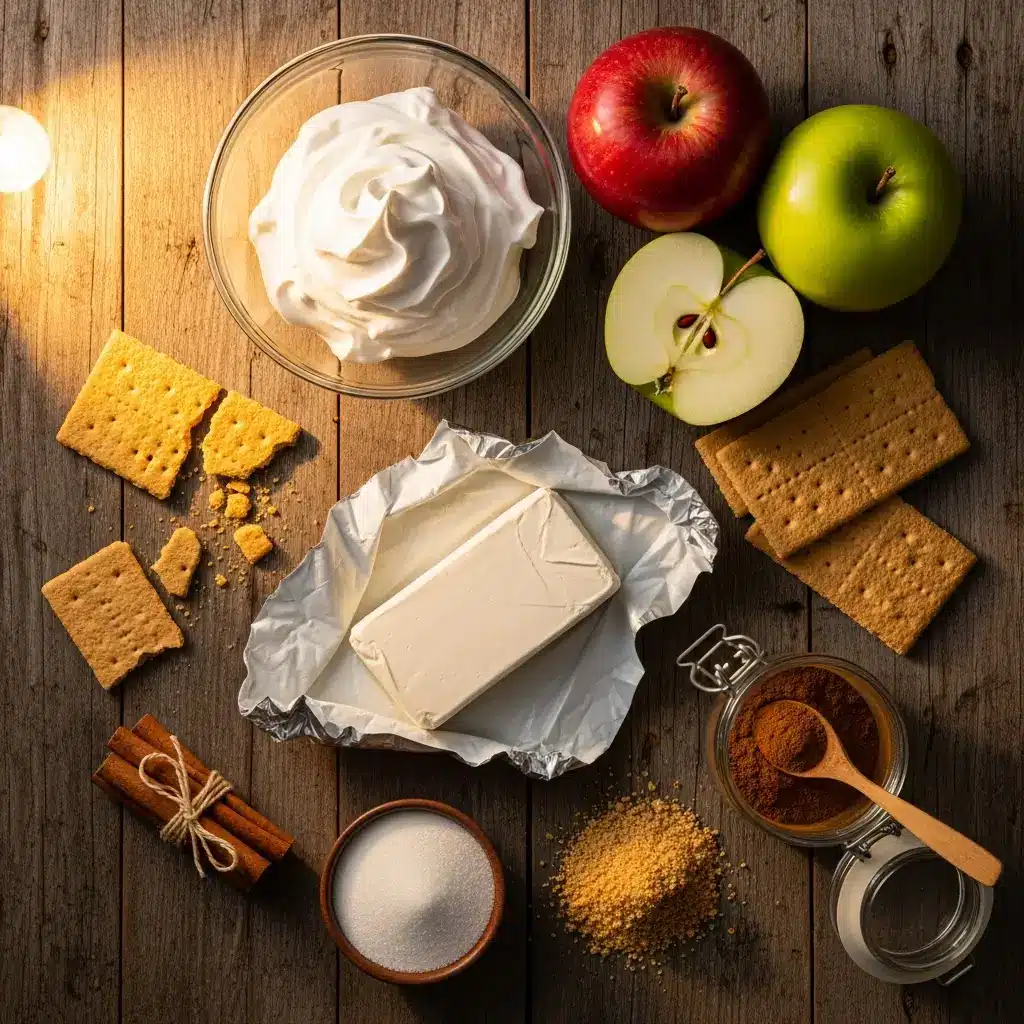
Ingredients Needed to Make No-Bake Apple Pie Cheesecake
Graham Cracker Crust:
- 2 cups graham crackers, crushed
- ½ cup unsalted butter, melted
- 2 tbsp granulated sugar
- 1 tsp ground cinnamon
Cheesecake Filling:
- 2 (8 oz) packages Philadelphia cream cheese, softened
- 3 cups lite Cool Whip, thawed
- 1 ⅓ cup granulated sugar
- ½ tsp ground cinnamon
Apple Pie Topping:
- ¼ cup unsalted butter
- 4 Gala apples, peeled, cored, and chopped
- ½ cup water
- 2 tsp cornstarch
- ½ cup packed light brown sugar
- 2 tsp ground cinnamon
- ½ tsp vanilla extract
Optional:
- Caramel sauce and vanilla ice cream for serving
Instructions to Make No-Bake Apple Pie Cheesecake
Making this No-Bake Apple Pie Cheesecake step by step is a breeze, even if you’re not an experienced baker. Each part builds beautifully on the next, resulting in a show-stopping dessert that’s equal parts creamy, crunchy, and perfectly spiced. Grab your mixing bowls, take a deep breath, and let’s walk through it — one delicious step at a time.
Step 1: Prepare the Graham Cracker Crust (Step by Step)
Start your No-Bake Apple Pie Cheesecake step by step journey with the crust — the foundation of flavor and texture. In a medium mixing bowl, combine 2 cups of crushed graham crackers, ½ cup melted butter, 2 tablespoons of granulated sugar, and 1 teaspoon of cinnamon. Stir everything together until the mixture looks like wet sand. If you’re short on graham crackers, you can use crushed vanilla wafers or gingersnaps for a twist (check out my Classic Green Bean Casserole Recipe for another holiday favorite that pairs perfectly with this dessert).
Next, pour the crumb mixture into a 9-inch springform pan. Use the bottom of a measuring cup or a glass to press it evenly into the bottom and slightly up the sides. This gives you that professional-looking crust that holds its shape when sliced.
While this is technically a “no-bake” recipe, baking the crust for 12 minutes at 375°F helps it firm up and adds a toasty, nutty flavor. However, if you want to keep it 100% no-bake, you can skip the oven and chill the crust in the refrigerator for about 30 minutes instead. Once baked or chilled, let it cool completely before moving to the next step.
Step 2: Whip Up the Creamy Cheesecake Filling (Step by Step)
Now it’s time for the creamy, dreamy heart of this dessert. In a large mixing bowl, beat 2 packages (8 oz each) of softened Philadelphia Cream Cheese using a hand mixer or stand mixer on medium speed. Beat until completely smooth—no lumps in sight. (For more tips on achieving silky smooth fillings, check out my Creamy Easy Potato Soup guide—because smoothness is everything!)
Gradually add 1⅓ cups of sugar, about ⅓ cup at a time, mixing thoroughly after each addition. Sprinkle in ½ teaspoon of ground cinnamon for that cozy apple-pie warmth. Finally, gently fold in 3 cups of Cool Whip using a spatula. Be gentle here—fold, don’t stir! This keeps your cheesecake filling light and airy.
Once everything is beautifully combined, pour the cheesecake filling over your cooled crust. Smooth the top with a spatula to create an even layer. Then, cover the pan with plastic wrap and refrigerate for at least 3½ hours—or, if you have the patience, let it chill overnight. The longer it chills, the firmer and creamier the texture becomes.
Step 3: Cook the Apple Pie Topping (Step by Step)
While the cheesecake chills, let’s make the apple pie topping. This part fills your kitchen with the kind of aroma that makes everyone wander in asking, “What’s cooking?”
In a large skillet, melt ¼ cup unsalted butter over medium heat. Add 4 peeled, cored, and chopped Gala apples (or Honeycrisp for extra sweetness) and cook for 6–8 minutes, stirring frequently until they start to soften and release their juices. In a small bowl, whisk together ½ cup water and 2 teaspoons cornstarch, then pour it into the pan. This mixture thickens the sauce so it clings beautifully to the apples.
Next, add ½ cup packed light brown sugar and 2 teaspoons ground cinnamon, stirring until everything is coated in a glossy, caramel-like sauce. Let it simmer for another 2–3 minutes, then stir in ½ teaspoon vanilla extract. The apples should be tender but not mushy—think soft apple pie filling. Remove the pan from the heat and let the mixture cool for about 5–10 minutes. You don’t want to pour hot apples on your cheesecake or you’ll melt the filling (been there, done that).
Once cooled, spoon the apple topping over the chilled cheesecake, spreading it evenly across the surface. The glistening apples with hints of cinnamon make this dessert look bakery-perfect.
Step 4: Add the Optional Caramel Sauce and Ice Cream (Step by Step)
Now comes the extra indulgence—homemade caramel sauce and vanilla ice cream. If you’ve never made caramel before, don’t worry; it’s easier than it looks when done step by step.
In a medium saucepan, evenly sprinkle 1 cup granulated sugar over the bottom and cook on medium heat, whisking constantly. The sugar will clump before melting into a smooth, amber-colored liquid (don’t walk away—it goes from perfect to burnt fast!). Once melted, whisk in 6 tablespoons cubed butter until fully combined. Then, slowly pour in ½ cup heavy whipping cream while whisking. Be careful—it will bubble up! Keep whisking until smooth, then remove from heat and let it cool for about 10 minutes.
When ready to serve, slice the cheesecake and top each piece with a scoop of vanilla ice cream and a generous drizzle of caramel sauce. The combination of creamy cheesecake, spiced apples, and warm caramel will make even non-dessert lovers swoon.
For another comforting fall dessert pairing, try my Sweet Potato Casserole with Pecan Topping—it’s the perfect sidekick to this cheesecake at any Thanksgiving table.
Step 5: Chill, Slice, and Serve (Step by Step)
After assembling your cheesecake, give it at least another 30 minutes of chill time in the fridge. This helps the layers settle and makes slicing clean and easy. To release it from the springform pan, run a thin knife around the edges before unclipping the sides.
When you cut into it, you’ll see layers of buttery crust, fluffy cheesecake, and glossy apple topping—pure dessert harmony. Serve it cold and savor each creamy, cinnamon-kissed bite.
And there you have it—the No-Bake Apple Pie Cheesecake step by step process from start to finish! Once you’ve mastered it, try variations with different fruits or toppings. You might also enjoy the cozy vibes of my Creamy Tuscan Chicken Soup for a savory balance after dessert.
What to Serve with No-Bake Apple Pie Cheesecake
No-Bake Apple Pie Cheesecake is a star on its own, but pairing it with a few extras can take it to dessert heaven. Try serving it with a scoop of vanilla or cinnamon ice cream for contrast, or drizzle some caramel or maple syrup over the top for that bakery-worthy look. If you’re planning a fall feast, this dessert pairs beautifully with cozy dishes like Roasted Sweet Potato Rounds with Honey or Thanksgiving Turkey Stuffing. And if you love apples, check out my Delicious Autumn Harvest Honeycrisp Apple for another fall favorite!
Key Tips for Making No-Bake Apple Pie Cheesecake
- Use room temperature cream cheese for the smoothest texture. Cold cream cheese tends to clump, and no one wants lumps in their cheesecake.
- Don’t rush the chilling time. It needs those few hours to set up perfectly.
- Mix gently when folding in Cool Whip to keep the filling airy.
- Add the apple topping after the cheesecake sets so the layers stay distinct and gorgeous.
- Store in a springform pan until you’re ready to serve—it keeps the shape picture-perfect.
Storage and Reheating Tips for No-Bake Apple Pie Cheesecake
This cheesecake keeps beautifully in the fridge for up to five days, covered tightly with plastic wrap or stored in an airtight container. For longer storage, you can freeze it for up to two months—just skip the apple topping until you’re ready to serve. When thawing, move it to the fridge for about 6–8 hours before enjoying. If you’ve made extra caramel sauce, store it in a jar in the refrigerator for up to two weeks and reheat gently in the microwave or on the stove before serving.
FAQs
Q: Can I use store-bought pie filling?
A: Absolutely! It won’t be quite as fresh-tasting, but it’s a great shortcut.
Q: Can I make it gluten-free?
A: Yes! Just use gluten-free graham crackers for the crust.
Q: What other fruits can I use?
A: Try pears, peaches, or even a mixed berry topping for a summer twist.
Q: Can I use homemade whipped cream instead of Cool Whip?
A: Definitely. Just stabilize it with a bit of powdered sugar so it holds its shape.
Final Thoughts
No-Bake Apple Pie Cheesecake brings all the cozy flavors of fall without the hassle of baking. It’s creamy, comforting, and absolutely show-stopping. Whether you’re serving it for Thanksgiving dinner or a casual weekend treat, this dessert promises to be a new favorite. So grab your apples, mix up that cream cheese filling, and let your fridge do the hard work—because sometimes, the sweetest things in life don’t need to bake at all.
Follow us on Pinterest for weekly slow cooker inspiration, or join the conversation over on our Facebook page where fellow food lovers share their favorite comfort meal.
Print
No-Bake Apple Pie Cheesecake: Easy Fall Dessert Magic
- Prep Time: 20 minutes
- Cook Time: 4 hours 10 minutes
- Total Time: 4 hours 30 minutes
- Yield: 8 slices
- Category: Dessert
- Method: No-Bake
- Cuisine: American
- Diet: Vegetarian
Description
This No-Bake Apple Pie Cheesecake is a decadent dessert featuring a graham cracker crust, creamy cinnamon-spiced cheesecake filling, and warm apple pie topping. Finished with an optional drizzle of homemade caramel and a scoop of vanilla ice cream, it’s the ultimate fall treat.
Ingredients
Graham Cracker Crust:
- 2 cups graham crackers, crushed
- ½ cup unsalted butter, melted
- 2 tbsp granulated sugar
- 1 tsp ground cinnamon
Cheesecake Filling:
- 2 (8 oz) packages Philadelphia Cream Cheese, softened
- 3 cups lite Cool Whip, thawed
- 1 1/3 cups granulated sugar
- ½ tsp ground cinnamon
Apple Pie Topping:
- ¼ cup unsalted butter
- 4 apples, peeled, cored, and chopped (Gala apples recommended)
- ½ cup water
- 2 tsp cornstarch
- ½ cup packed light brown sugar
- 2 tsp ground cinnamon
- ½ tsp vanilla extract
Caramel Sauce & Vanilla Ice Cream (Optional):
- 1 cup granulated sugar
- 6 tbsp unsalted butter, cubed, room temperature
- ½ cup heavy whipping cream
- 2 cups vanilla ice cream
Instructions
1. Preheat oven to 375°F.
2. In a bowl, combine graham cracker crumbs, melted butter, sugar, and cinnamon. Press into a 9-inch springform pan. Bake for 12 minutes or until browned. Cool completely.
3. In a large mixing bowl, whip cream cheese and Cool Whip on medium speed. Gradually add sugar, 1/3 cup at a time, then cinnamon. Mix until well combined.
4. Pour the cheesecake filling over the cooled crust. Refrigerate for at least 3 ½ hours or overnight to set.
5. In a skillet, melt butter over medium heat. Add chopped apples and cook 6–8 minutes, stirring often.
6. In a small bowl, mix water and cornstarch. Add to apples along with brown sugar and cinnamon. Bring to a slight boil, stirring for 2–3 minutes until thickened.
7. Stir in vanilla extract and remove from heat. Cool for 5 minutes, then pour over the chilled cheesecake.
8. To make caramel sauce, heat sugar in a saucepan over medium heat, whisking until melted and lightly browned (8–10 minutes).
9. Remove from heat and whisk in butter until fully combined. Slowly whisk in heavy cream. Cool for 10 minutes.
10. Serve each cheesecake slice with a scoop of vanilla ice cream and drizzle with caramel sauce if desired.
Notes
Refrigerate cheesecake for up to 5 days.
Caramel sauce can be stored in the refrigerator for up to 2 weeks.
Caramel sauce yields about 1 ½ cups.
For a shortcut, use store-bought caramel and pre-made graham crust.
Make the cheesecake a day ahead for easier serving and best texture.