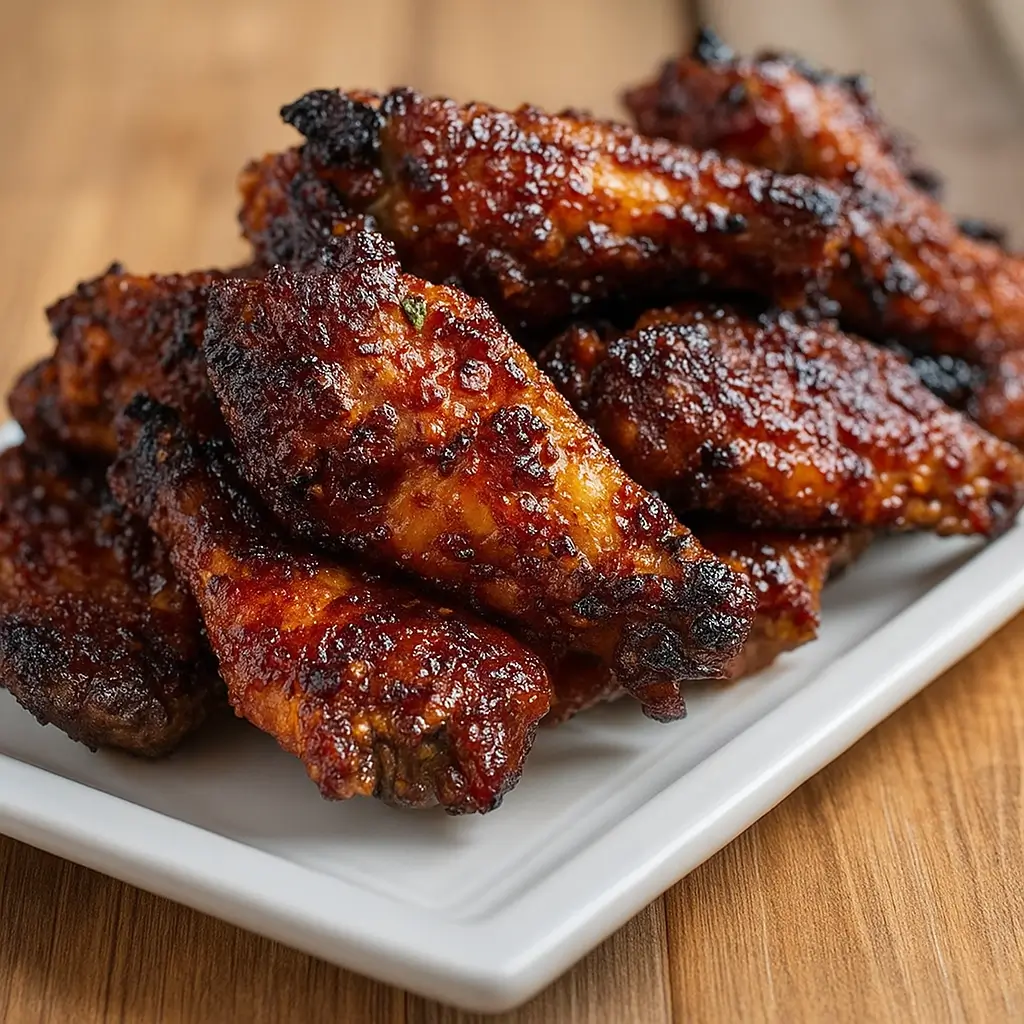
Honey Glazed Chicken Wings are that sweet-and-savory miracle that manages to disappear faster than you can say “game night.” There’s something almost hypnotic about that sticky honey glaze clinging to golden, crispy wings—it’s finger-licking good in every possible way. Whether you’re making them for a cozy Friday night in, a casual family dinner, or a holiday party, these wings hit the spot every single time.
The balance between that deep caramelized sweetness from the honey and the slight tang from soy sauce and rice vinegar is nothing short of magical. What’s even better? They’re incredibly easy to make. You don’t need fancy gadgets or a deep fryer to get restaurant-quality crispiness—just your oven and a few pantry staples. So grab your mixing bowls and let’s turn your kitchen into the most delicious wing joint on the block.
Table of Contents
What is Honey Glazed Chicken Wings?
Honey Glazed Chicken Wings are the perfect marriage of sweet, salty, and just a touch spicy. The wings are first baked until golden and crispy, then tossed in a glossy glaze made from honey, brown sugar, soy sauce, and rice vinegar. The result? A beautiful, sticky coating that caramelizes in the oven and clings to every curve of those juicy wings. While this recipe feels indulgent, it’s actually a lighter alternative to deep-fried versions.
Baking gives you all the crispiness with none of the greasy mess. Plus, the honey glaze adds natural sweetness while keeping things balanced with savory and umami notes. These wings aren’t just for game day either—they’re fantastic as a main course with rice or roasted veggies, or as an appetizer for any get-together. They’re the kind of dish that makes everyone gather around the table with napkins in hand and happy faces.
Reasons to Try Honey Glazed Chicken Wings
First, flavor. Honey Glazed Chicken Wings pack the kind of flavor combo that’s downright irresistible—sweet, salty, smoky, and just a little spicy. Second, versatility. They’re perfect for casual nights, parties, or even as a fun weekend dinner. Third, simplicity. This recipe takes minimal effort and ingredients, but delivers restaurant-worthy results.
Fourth, they’re baked, not fried, meaning less oil and easier cleanup. And fifth, they reheat beautifully (if any are left, that is). These wings also pair with nearly anything—serve them with rice, coleslaw, or even something fancy like Easy Greek Lemon Rice from our site for a complete meal. If you’re a fan of sweet-and-spicy chicken dishes, you’ll also love our Hot Honey Butter Chicken—another sticky favorite. But these Honey Glazed Chicken Wings? They’re a showstopper in their own right. One bite and you’ll understand why this simple, oven-baked recipe is a go-to for busy home cooks everywhere.
Ingredients Needed to Make Honey Glazed Chicken Wings
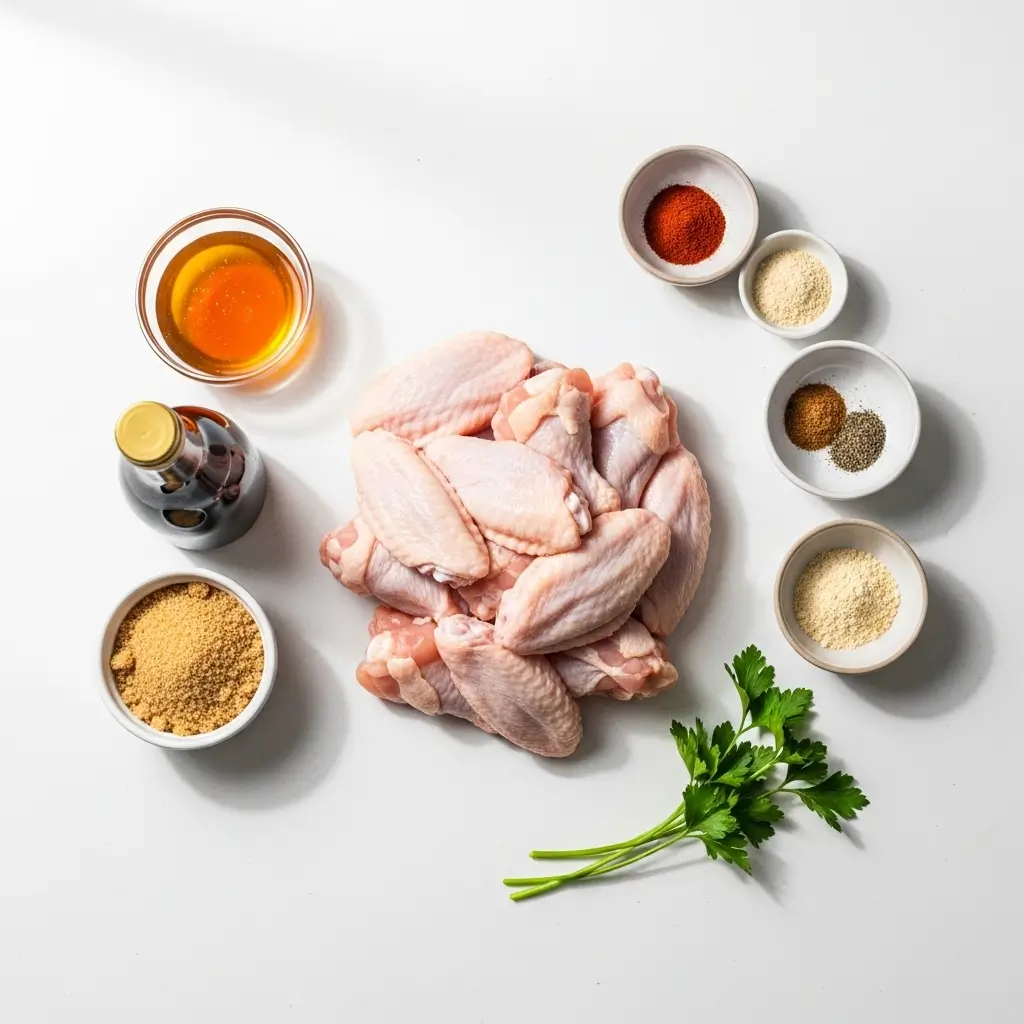
For the Wings:
- 2 pounds chicken wings, separated into drumettes and flats
- 1 tablespoon vegetable oil
- 1 teaspoon garlic powder
- 1 teaspoon onion powder
- 1 teaspoon smoked paprika
- ½ teaspoon black pepper
- ½ teaspoon salt
For the Glaze:
- ½ cup honey
- ¼ cup brown sugar, packed
- ¼ cup soy sauce
- 1 teaspoon rice vinegar
- Pinch of red pepper flakes
- Dried parsley for garnish
Instructions to Make Honey Glazed Chicken Wings – Step by Step
If you’ve ever wondered how restaurants get that perfect balance of crispy skin and sticky glaze, this Honey Glazed Chicken Wings step by step guide will walk you through every delicious detail. No fancy tools, no deep fryer—just your oven, a few pantry staples, and a touch of patience. By the end, your wings will be golden, glossy, and downright irresistible.
Step 1: Prep and Dry the Chicken Wings
This might seem like a small detail, but it’s one of the most important steps in this Honey Glazed Chicken Wings step by step process. Grab about two pounds of wings and pat them completely dry using paper towels. Seriously—get every bit of moisture off. Moisture is the enemy of crispiness. Think of this as giving your wings a little pre-bake spa treatment. If they’re damp, they’ll steam in the oven instead of crisping up. Once they’re dry, place them in a large bowl and set aside.
Pro Tip: If you’re new to prepping chicken, check out our guide on Garlic Parmesan Chicken and Potatoes—it’s another simple recipe that shows how seasoning and prep can completely transform a dish.
Step 2: Season for Maximum Flavor
In a small bowl, whisk together vegetable oil, garlic powder, onion powder, smoked paprika, black pepper, and salt. This simple spice blend brings smoky depth and savory warmth to every bite. Pour it over the wings and toss thoroughly until each piece is evenly coated. This part is hands-on—literally. Don’t be afraid to use your hands to massage that seasoning into every nook and cranny. You’re building layers of flavor from the very first step.
Want to change things up? You can swap smoked paprika for chili powder or add a pinch of cayenne for heat. For more ideas on tweaking seasonings, check out our Hot Honey Butter Chicken recipe—it’s another reader favorite that balances sweet and spicy beautifully.
Step 3: Arrange for Perfect Crispiness
Now comes the trick to getting restaurant-level crispiness without frying. Line a baking sheet with foil (trust me, cleanup will be a breeze later). Place a wire rack on top of the sheet, then arrange the wings in a single layer, leaving a little breathing room between each piece. That space is key—it lets hot air circulate, creating even crisping all around. If the wings are touching, they’ll steam instead of bake.
This is the kind of setup you’ll want to remember for future recipes like our Crockpot Kung Pao Chicken, where getting that perfect texture starts with how you arrange and cook your ingredients.
Step 4: Bake Until Golden and Crisp
Preheat your oven to 400°F (200°C). Slide your tray onto the middle rack and bake the wings for 40–45 minutes. About halfway through, flip each wing over—this helps them brown evenly on all sides. You’ll start to see the skin tighten and turn a rich golden brown, and your kitchen will smell like pure heaven.
If you want extra-crispy results, let the wings bake for the full 45 minutes. The goal here is a firm, crunchy exterior that can handle the glaze later without going soggy.
Step 5: Make the Honey Glaze
While the wings bake, it’s time to whip up that glossy, finger-licking glaze. In a small saucepan, combine honey, brown sugar, soy sauce, rice vinegar, and a pinch of red pepper flakes. Place it over medium heat and stir until the sugar dissolves completely. Let it simmer gently for 2–3 minutes until the sauce thickens slightly—it should coat the back of a spoon when it’s ready.
The honey and brown sugar give the glaze its sticky sweetness, while the soy sauce and vinegar balance things with savory and tangy notes. If you prefer a bolder flavor, add minced garlic or a touch of ginger. You can find more ways to personalize glazes and sauces in our Maple Orange Glazed Chicken Quarters recipe—it’s a must-try if you love that sweet-meets-savory magic.
Step 6: Toss and Coat the Wings
When the wings are golden and crisp, remove them from the oven and carefully transfer them to a clean, large bowl. Pour the warm honey glaze over the wings and toss gently until every piece is coated in that shiny, sticky goodness. The heat from the wings will help the glaze cling perfectly.
You’ll want to do this step quickly while everything is hot—it’s the secret to locking in flavor. If you’re preparing ahead, you can also make extra glaze and save some on the side for dipping.
Step 7: Bake Again for a Sticky Finish
This Honey Glazed Chicken Wings step by step method includes one more quick bake that turns everything from delicious to downright irresistible. Return the glazed wings to the rack and bake for another 10–15 minutes. This allows the glaze to caramelize and form that sticky, candy-like coating.
If you like a little char (and let’s be honest, who doesn’t?), switch on the broiler for the last 2–3 minutes. Keep a close eye, though—honey burns fast. You’ll know they’re done when they look deep amber and smell sweetly smoky.
For even more crispy, sticky inspiration, take a peek at our Sticky Garlic Chicken Noodles recipe. It uses a similar caramelization technique for a deliciously glossy finish.
Step 8: Garnish and Serve
Once out of the oven, sprinkle the wings with a little dried parsley for color and freshness. You can also add sesame seeds or sliced green onions for a fancier touch. Serve them hot and watch them vanish.
Honey Glazed Chicken Wings are perfect with celery sticks, ranch dip, or even a bowl of Easy Greek Lemon Rice if you’re turning them into a meal. However you serve them, one thing’s for sure—these wings will have everyone asking for the recipe.
What to Serve with Honey Glazed Chicken Wings
These wings are flavor-packed enough to shine on their own, but pairing them with the right sides can take dinner to another level. Try them with Easy Greek Lemon Rice or One Pot Green Enchiladas Soup for a filling meal. Craving something lighter? A crisp cabbage slaw or roasted veggies will balance the sweetness perfectly. And if you’re going for full comfort mode, whip up a side of Garlic Parmesan Chicken and Potatoes for a hearty spread.
Key Tips for Making Honey Glazed Chicken Wings
- Dry the wings completely before seasoning—moisture is the enemy of crispiness.
- Use a wire rack to let hot air circulate under the wings while baking.
- Flip halfway through to ensure even cooking.
- Simmer the glaze gently, so the honey doesn’t burn.
- Broil at the end for a few minutes for that caramelized charred edge everyone loves.
Storage and Reheating Tips for Honey Glazed Chicken Wings
Got leftovers? Store them in an airtight container in the fridge for up to 3 days. To reheat, place them on a baking sheet and warm them in a 350°F oven for about 10 minutes—this brings back the crisp texture. Avoid microwaving; it makes the skin soggy and ruins the magic. You can also freeze the wings before glazing for a make-ahead option. Just thaw overnight and glaze fresh before serving.
FAQs
Can I make these in an air fryer? Absolutely! Cook the wings at 380°F for 25–30 minutes, flipping halfway, then toss them in the glaze and cook another 5 minutes.
Can I use boneless chicken instead? Yes, but you’ll need to reduce the cooking time since boneless cooks faster.
What can I substitute for soy sauce? Try tamari or coconut aminos for a gluten-free alternative.
Are they spicy? Only mildly, but you can skip the red pepper flakes or add more if you love heat.
Final Thoughts
Honey Glazed Chicken Wings are the kind of recipe that hits all the right notes—crispy, sticky, sweet, and savory all at once. They’re easy enough for a weeknight yet impressive enough for guests. If you’re looking for another flavor-packed favorite, check out our Maple Orange Glazed Chicken Quarters. Cooking shouldn’t be complicated—it should be fun, flavorful, and nourishing. So go ahead, whip up these wings, and watch them disappear faster than you can make your next batch.
Follow us on Pinterest for weekly slow cooker inspiration, or join the conversation over on our Facebook page where fellow food lovers share their favorite comfort meal.
Print
Honey Glazed Chicken Wings: Sticky, Sweet, and Absolutely Delicious
- Prep Time: 15 minutes
- Cook Time: 1 hour
- Total Time: 1 hour
- Yield: 4 servings
- Category: Main Course
- Method: Baking
- Cuisine: American
Description
These honey glazed chicken wings are oven-baked to crispy perfection, then coated in a sticky-sweet glaze with a hint of spice and umami. Perfect as a main course or party appetizer, this easy recipe delivers maximum flavor with simple ingredients.
Ingredients
- About 2 pounds chicken wings, separated into drumettes and flats
- 1 tablespoon vegetable oil
- 1 teaspoon garlic powder
- 1 teaspoon onion powder
- 1 teaspoon smoked paprika
- 1/2 teaspoon black pepper
- 1/2 teaspoon salt
- For the Glaze:
- 1/2 cup honey
- 1/4 cup brown sugar, packed
- 1/4 cup soy sauce
- 1 teaspoon rice vinegar
- Pinch of red pepper flakes
- Dried parsley for garnish
Instructions
1. Prepare the wings by patting them very dry with paper towels to remove surface moisture.
2. In a small bowl, mix vegetable oil, garlic powder, onion powder, smoked paprika, black pepper, and salt. Pour over wings and toss to coat thoroughly.
3. Arrange wings in a single layer on a wire rack placed over a baking sheet. Leave space between each wing for air circulation.
4. Preheat oven to 400°F (200°C). Bake wings for 40–45 minutes, flipping halfway through, until golden and crispy.
5. While wings bake, prepare the glaze: combine honey, brown sugar, soy sauce, rice vinegar, and red pepper flakes in a saucepan. Simmer for 2–3 minutes until slightly thickened, then remove from heat.
6. Transfer hot wings to a clean bowl and toss with the warm glaze until well coated.
7. Return wings to the wire rack and bake for another 10–15 minutes until glaze is caramelized and wings are fully cooked.
8. For extra char and crispiness, broil wings for the last 2–3 minutes, watching carefully to prevent burning.
9. Remove from oven, garnish with dried parsley, and serve immediately.
Notes
For extra crispiness and char, broil the wings for the last 2–3 minutes of cooking time. Watch closely to prevent burning.
Patting the wings completely dry before seasoning is key to crispy skin.
These wings are great as a party snack, appetizer, or main dish.