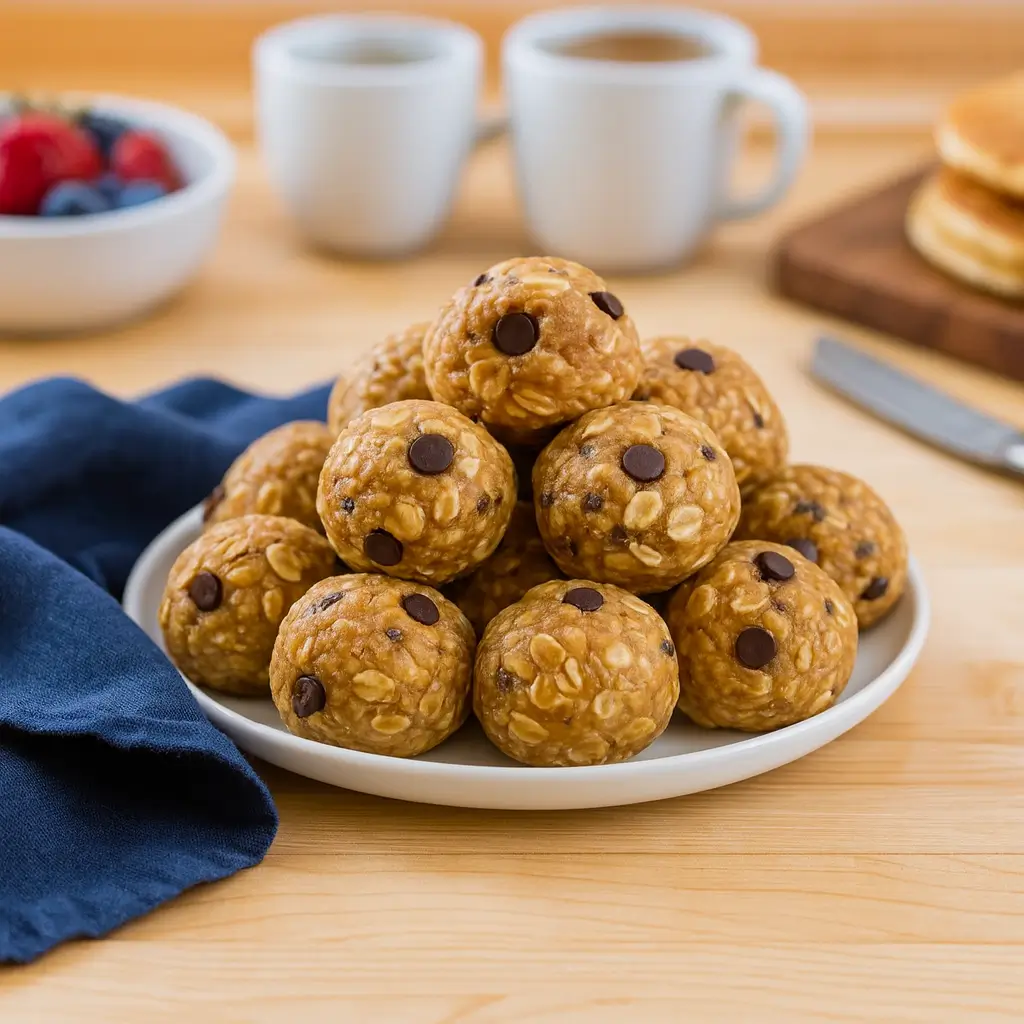
Energy Balls are the little bites of heaven that make healthy eating actually feel fun. Picture this—you’re running out the door, juggling your morning coffee, your kids’ backpacks, and maybe your sanity. You grab one of these chewy, nutty Energy Balls, and suddenly, the world feels right again. Packed with oats, peanut butter, and flaxseed, these bite-sized snacks are perfect for busy mornings, afternoon slumps, or when you just want something sweet but don’t want to cave to a candy bar.
The best part? These Energy Balls are no-bake and ready in just 10 minutes. Whether you’re a meal prep pro or a “wing-it” kind of cook, this recipe will quickly become your go-to for quick energy, balanced nutrition, and a little kitchen confidence.
Table of Contents
What is an Energy Ball?
An Energy Ball is a small, nutrient-dense snack made from wholesome ingredients like oats, nut butter, honey, and seeds. Think of it as a power-packed version of a cookie dough bite—but without the guilt. They’re often referred to as “protein bites” or “energy bites” and are popular among athletes, moms, and health-conscious snackers. The goal of Energy Balls is simple: quick fuel that tastes good and keeps you going.
They’re portable, customizable, and require no baking, which is a total win on busy days. With just one or two bites, you’re giving your body fiber, protein, and healthy fats that keep hunger at bay. And yes, they taste amazing—like dessert met a gym snack and decided to stay together forever.
Reasons to Try Energy Balls
Let’s be honest—there are a million snack options out there, but most of them are either sugar bombs or taste like cardboard. Energy Balls hit that sweet spot between healthy and delicious. First, they’re super quick. You can make them in under 10 minutes, which is perfect if your patience for “long recipes” disappeared around the same time as your free time. Second, they’re incredibly versatile. Whether you prefer chocolatey, nutty, or fruity flavors, you can tweak this recipe to fit your cravings.
Third, they’re no-bake—meaning no oven, no fuss, no cleanup drama. Finally, they’re the kind of snack that both adults and kids love. From lunchboxes to gym bags, these Energy Balls fit right in. And if you’re someone who’s always hungry between meals (same here), these will become your secret weapon.
Ingredients Needed to Make Energy Balls
- 1 cup rolled oats (use gluten-free if needed)
- ½ cup natural peanut butter (or almond, cashew)
- ⅓ cup honey or maple syrup
- ¼ cup ground flaxseed or chia seeds
- 1 teaspoon vanilla extract
- Pinch of salt
- Optional mix-ins (choose 1–2):
- ¼ cup mini chocolate chips, shredded coconut, cocoa powder, dried cranberries, or protein powder
- Optional for rolling: extra coconut, cocoa, or chopped nuts

Instructions to Make Energy Balls – Step by Step
Let’s dive right into this Step by Step guide to making the most irresistible, healthy, no bake Energy Balls. Whether you’re a kitchen newbie or someone who just wants a foolproof snack to grab between Zoom calls, this recipe has your back. Each step is simple, quick, and guaranteed to deliver those chewy, satisfying bites that make you wonder why you ever bought packaged snacks in the first place.
Step 1: Gather and Measure Your Ingredients
Before anything else, grab your ingredients and line them up on the counter. It might sound basic, but starting organized makes this Step by Step process smoother. You’ll need rolled oats, peanut butter (or almond butter if that’s your jam), honey or maple syrup, flaxseed or chia seeds, vanilla extract, and a pinch of salt.
Tip: If you’re looking for a high-protein twist, you can check out our Best No Bake Protein Balls for inspiration—similar prep, just with a protein punch.
Measuring everything before mixing ensures your Energy Balls come out perfectly balanced. It’s a small detail that makes a big difference—especially if you’ve got kids tugging at your sleeve or a timer counting down before your next meeting.
Step 2: Mix the Dry Ingredients
In a large mixing bowl, combine your rolled oats, flaxseed (or chia seeds), and a pinch of salt. This dry base creates that chewy texture we all love in Energy Balls. If you’re going for a chocolate version, add a spoonful of cocoa powder here. Give it all a light stir—nothing fancy, just enough to blend the ingredients evenly.
This Step by Step stage sets up the structure for your snack. The oats provide slow-releasing carbs (hello, sustained energy!), while the flax or chia seeds give you fiber and healthy fats.
If you’re curious about other nutrient-packed ideas, you might also enjoy our Brownie Protein Balls, which use similar ingredients in a more dessert-like form.
Step 3: Add the Wet Ingredients
Now comes the glue that holds it all together—literally. Add your creamy peanut butter, honey (or maple syrup for a vegan twist), and vanilla extract right into the bowl. These ingredients will bind everything and give that smooth, decadent texture we crave in no-bake snacks.
Using a sturdy spoon, start stirring gently. You’ll notice the mixture thickening as everything combines. If it feels like an arm workout, you’re doing it right! Some folks even like to use their hands at this stage—it’s a little messy but oddly satisfying.
For a smoother texture, warm your honey slightly before adding it. It mixes easier and coats the oats more evenly. For more tips like this, check out our Quick and Easy Protein Cookie Dough guide—it’s full of small adjustments that make big texture improvements.
Step 4: Check and Adjust the Texture
Now that you’ve mixed everything, it’s time for the texture test. The mixture should be sticky enough to hold together but not so wet that it sticks to your fingers like glue. If it’s too dry, drizzle in a bit more honey or syrup. If it’s too sticky, sprinkle in more oats a tablespoon at a time.
This Step by Step adjustment is where you make the recipe your own. Everyone’s peanut butter or syrup consistency varies slightly, so this tiny tweak helps you nail the perfect chewy, moldable dough.
Here’s a little secret: the mixture should feel like soft cookie dough. If it holds shape when pressed but doesn’t crumble apart, you’ve got it just right.
Step 5: Add Your Mix-ins
This is where you can really have fun. Toss in your favorite mix-ins—mini chocolate chips, shredded coconut, dried cranberries, chopped nuts, or even a scoop of protein powder. Mix everything gently so each bite gets a bit of everything.
If you’re in the mood for a flavor experiment, try combining coconut and dark chocolate chips—it gives your Energy Balls that “tropical brownie” vibe. And for those who like a bit of fruitiness, cranberries add a tangy pop that complements the nut butter perfectly.
Want more inspiration for flavor combinations? Browse our Healthy Protein Cookie Dough Recipes—you’ll find fun ways to tweak this base recipe without compromising on nutrition.
Step 6: Chill the Mixture
Once everything’s well mixed, cover the bowl with plastic wrap or a lid and pop it in the fridge for 15–30 minutes. This chilling Step by Step moment is crucial—it firms up the mixture, making it much easier to roll into neat, tidy balls later.
Think of it as giving your ingredients a quick power nap. The oats soften slightly, the nut butter binds better, and the flavors come together beautifully.
If you’re meal prepping, you can even leave the mixture in the fridge overnight. It’ll be ready to roll first thing in the morning—perfect for those “no-time-for-breakfast” days.
Step 7: Roll into Balls
Now for the most satisfying part of this Step by Step recipe—rolling! Scoop about one to two tablespoons of the chilled mixture into your hands and gently roll it into a ball. You’ll get around 12–16 balls depending on how generous your scoops are.
Don’t worry if they’re not perfectly round; that homemade look is part of the charm. If your hands get sticky, lightly coat them with water or a touch of oil before rolling.
Want to make them look extra fancy? Roll them in shredded coconut, cocoa powder, or finely chopped nuts for a finishing touch. It adds texture, flavor, and that little “treat-yourself” feeling.
If you’re making these for lunchboxes or pre-workout snacks, you can also check out our High Protein Garlic Parmesan Pasta Bowls for meal ideas that complement your snack routine.
Step 8: Store and Enjoy
Line a plate or container with parchment paper and arrange your freshly rolled Energy Balls on top. Store them in an airtight container in the fridge, where they’ll stay fresh for up to 2 weeks.
If you want to keep them longer, place them in the freezer. They’ll last up to 2 months—just thaw for 10–15 minutes before eating.
These Step by Step Energy Balls are perfect for meal prep, quick breakfasts, or healthy snacks on busy afternoons. They’re portable, wholesome, and taste like a sweet little victory every time you bite into one.
And here’s a bonus: if you’re craving variety, make half the batch classic peanut butter and the other half chocolate coconut. That way, you’ll have two flavors to choose from all week.
For more creative meal-prep snack ideas, check out our Coconut Chicken Rice Bowl—it pairs beautifully with these no-bake bites for a balanced, energizing lunch combo.
What to Serve with Energy Balls
Energy Balls pair beautifully with a hot cup of coffee or tea for a quick morning fix. If you’re on the go, pack them with Greek yogurt and fruit for a balanced mini-meal. They also work as a pre-gym snack with a smoothie—try our Best No-Bake Protein Balls for another delicious combo. For an afternoon pick-me-up, enjoy them with almond milk or a light salad to keep you satisfied until dinner.
Key Tips for Making Energy Balls
Always chill your dough before rolling—it makes the texture perfect and keeps your hands clean. Use natural nut butter for easy mixing and the best flavor. Taste the mixture before adding extras to adjust sweetness. And remember, these are meant to be fun and forgiving—if your first batch looks a little rustic, that’s part of their charm. For more protein-packed ideas, check out our Brownie Protein Balls.
Storage and Reheating Tips for Energy Balls
Store your Energy Balls in an airtight container in the fridge for up to 2 weeks. If you’re meal-prepping, freeze them in a single layer first, then transfer to a freezer-safe bag—they’ll last up to 2 months. When ready to eat, thaw for 10–15 minutes at room temperature. No reheating needed—these bites are ready to roll whenever you are.
FAQs
Can I make these vegan? Absolutely—just swap honey for maple syrup.
Can I use almond butter instead of peanut butter? Yes, any nut butter works beautifully.
Can I add protein powder? Totally! Just reduce the oats a bit if the mix gets too dry.
Can kids eat these? 100%. They’re kid-friendly, nutritious, and fun to make together.
Final Thoughts
Energy Balls aren’t just snacks—they’re little bites of sanity for busy days. Quick, wholesome, and endlessly customizable, they remind us that healthy eating doesn’t have to be complicated. So next time you need a pick-me-up, skip the vending machine and grab one of these homemade Energy Balls instead. Trust me, your body (and your taste buds) will thank you.
Follow us on Pinterest for weekly slow cooker inspiration, or join the conversation over on our Facebook page where fellow food lovers share their favorite comfort meal.
Print
Energy Balls Recipe: Quick, Healthy, and No Bake
- Prep Time: 10 minutes
- Cook Time: 0 minutes
- Total Time: 10 minutes
- Yield: 12-16 energy balls
- Category: Evening Meals
- Method: No-Bake
- Cuisine: Healthy Snack
- Diet: Vegetarian
Description
This energy balls recipe is a quick, healthy, and easy no-bake snack. Perfect for a boost of energy any time of day! Ready in just 10 minutes.
Ingredients
- 1 cup (90g) rolled oats (old-fashioned, certified gluten-free if needed)
- 1/2 cup (125g) natural peanut butter (or almond butter, cashew butter)
- 1/3 cup (80ml) honey or maple syrup (for vegan)
- 1/4 cup (25g) ground flaxseed or chia seeds
- 1 teaspoon vanilla extract
- Pinch of salt
- Optional Mix-ins (choose 1–2):
- 1/4 cup mini chocolate chips (dark chocolate for healthier option)
- 1/4 cup shredded unsweetened coconut
- 2 tablespoons cocoa powder (for chocolate flavor)
- 1/4 cup chopped dried cranberries or raisins
- 2 tablespoons protein powder (unflavored or vanilla)
- For Rolling (optional):
- Extra shredded coconut
- Cocoa powder
- Chopped nuts
Instructions
1. In a large mixing bowl, combine the rolled oats, ground flaxseed (or chia seeds), and a pinch of salt.
2. Add the peanut butter, honey or maple syrup, and vanilla extract.
3. Mix everything together until a sticky, cohesive dough forms. Adjust consistency with more syrup or oats if needed.
4. Stir in your chosen optional mix-ins like chocolate chips or coconut.
5. Cover the bowl and refrigerate for 15–30 minutes to help firm the dough.
6. Scoop 1–2 tablespoon portions and roll into balls using your hands.
7. Roll finished balls in optional coatings like shredded coconut, cocoa powder, or chopped nuts.
8. Place energy balls on a parchment-lined plate or container.
9. Store in an airtight container in the refrigerator to keep fresh and firm.
10. Enjoy as a snack, breakfast bite, or healthy dessert.
Notes
If you don’t have ground flaxseed, grind whole flaxseeds fresh with a spice grinder.
Add 2 tablespoons of cocoa powder for a rich chocolate version.
A spoonful of orange zest adds a fresh citrusy twist.
Easily double or triple the batch for meal prep.
Add a scoop of protein powder for a boost—adjust liquid if needed.
Use natural nut butter for easy mixing.
Taste the mixture before adding mix-ins to adjust sweetness.
Store in an airtight container in the fridge for up to 2 weeks or freeze for up to 2 months.
Let frozen balls thaw for 10–15 minutes before eating.