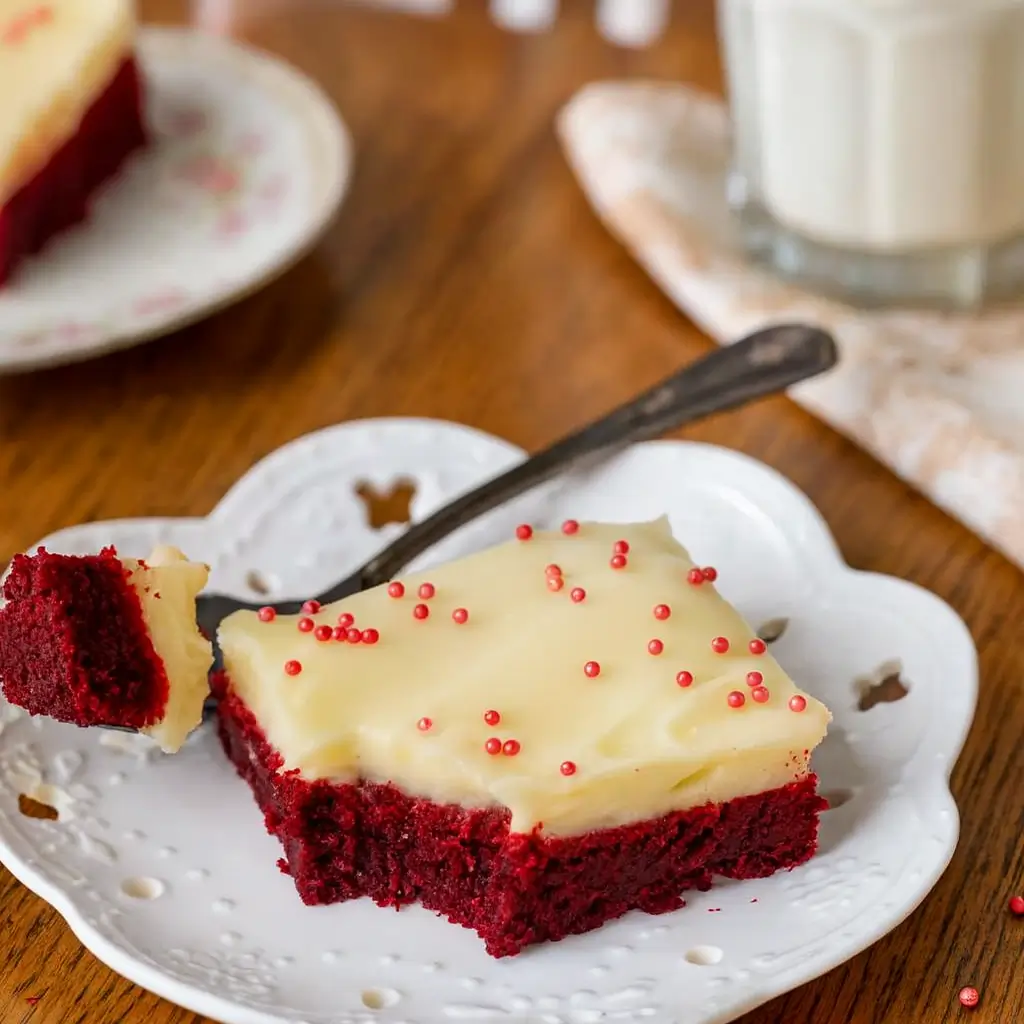
If there’s one dessert that instantly says “celebration,” it’s Red Velvet Cookie Bars. Soft, chewy, and topped with that dreamy cream cheese frosting we all secretly want to eat by the spoonful—these bars are a total crowd-pleaser. Whether you’re making them for Valentine’s Day, Christmas, or just a random Tuesday (because why not?), this red velvet cookie bar recipe gives you that classic cocoa-kissed flavor in an easy, no-fuss bar form.
No need to chill dough, roll balls, or babysit batches in the oven. Just mix, bake, frost, and slice. Sweet simplicity at its finest. And trust me—once that cream cheese frosting hits the warm red velvet, it’s a love story worth repeating.
Table of Contents
What Are Red Velvet Cookie Bars?
Red Velvet Cookie Bars are like the cozy cousin of red velvet cake—slightly denser, extra chewy, and loaded with buttery flavor. Imagine the soft texture of a cookie but baked into one glorious pan that you slice into squares. Each bite has that signature tang from a hint of vinegar, balanced with cocoa undertones and finished with a creamy frosting that practically melts on your tongue.
They’re the kind of dessert that feels fancy without requiring much work. You can dress them up with festive sprinkles or keep them plain and elegant. Best part? You don’t need to be a pro baker to nail these. If you’ve ever made brownies, you can absolutely handle this.
Reasons to Try Red Velvet Cookie Bars
There are about a hundred reasons to bake Red Velvet Cookie Bars, but let’s keep it simple. First, they’re the ultimate time-saver. Instead of making individual cookies, you spread the dough in one pan and let the oven do the work. Perfect for busy moms, office potlucks, or anyone who just wants to impress without stress. Second, that cream cheese frosting.
It’s sweet, tangy, and downright addictive. Third, they’re stunning. The vibrant red color practically screams “holiday dessert,” but they work year-round—birthdays, BBQs, or just because you deserve something sweet. And if you’re already in baking mode, pair these with something savory from the site like Crockpot Healthy White Chicken Chili for a balanced, cozy meal combo.
Ingredients Needed to Make Red Velvet Cookie Bars
For the Bars:
- 2¼ cups all-purpose flour
- 3 tablespoons cocoa powder
- ½ teaspoon baking powder
- ½ teaspoon baking soda
- ¼ teaspoon salt
- 1 cup unsalted butter, softened
- ¾ cup granulated sugar
- ½ cup brown sugar
- 1 large egg + 1 egg yolk
- 2 teaspoons vanilla extract
- 1 tablespoon red food coloring
- ½ teaspoon white vinegar
For the Cream Cheese Frosting:
- ½ cup unsalted butter, softened
- 8 ounces full-fat brick-style cream cheese
- 2½–3½ cups powdered sugar (sifted)
- ¼ teaspoon salt
- 1–2 tablespoons cream (if needed)

Instructions to Make Red Velvet Cookie Bars – Step by Step
Alright, grab your apron (and maybe a little patience, because that cream cheese frosting is worth the wait). Here’s your step-by-step guide to making the most delicious Red Velvet Cookie Bars from scratch — no cookie scoop or mixer drama required.
Step 1: Preheat and Prep Like a Pro
Before you even think about mixing, preheat your oven to 350°F (180°C). This step ensures your bars bake evenly from edge to center — a must for that perfect chewy texture. While it warms up, lightly grease your 9×13-inch baking pan or line it with parchment paper. If you go with parchment, leave a little overhang on the sides. It’ll act like built-in handles later when you’re lifting the bars out to frost. If you’ve ever tried to scrape cookie bars out of a pan, you’ll understand why this is such a lifesaver.
Pro tip: check out our baking prep essentials guide for more smart kitchen tricks that make cleanup a breeze.
Step 2: Whisk the Dry Ingredients
In a medium-sized bowl, whisk together the flour, cocoa powder, baking powder, baking soda, and salt. This step-by-step mix helps evenly distribute the leavening agents so your bars rise just right—no dense patches or weird textures here. Make sure your cocoa powder is unsweetened and high-quality for that deep, slightly earthy red velvet flavor.
If your flour tends to clump (looking at you, humid kitchen air), sift it before adding. This small step keeps your cookie bars light, not cakey. For extra cocoa-rich flavor, you can even mix in a teaspoon of espresso powder—it quietly deepens the chocolate taste without making it coffee-flavored.
Step 3: Cream Butter and Sugars Together
Now, in a large mixing bowl, add softened butter, granulated sugar, and brown sugar. Beat them together using an electric mixer on medium speed until the mixture turns light and fluffy. This process aerates the butter, which is the key to creating soft, chewy bars. It should look pale, creamy, and easy to spread.
If you’re using a stand mixer, let it run for about 2–3 minutes. Don’t rush it—this step-by-step creaming process lays the foundation for that perfect cookie-bar crumb.
Step 4: Mix in the Wet Ingredients
Next comes the magic. Crack in one large egg and then add an extra yolk (that’s where a lot of the richness comes from). Pour in the vanilla extract, red food coloring, and vinegar. That last one may sound strange, but vinegar gives red velvet its subtle tang and helps keep that bold red color vibrant once baked.
Beat everything together until the mixture is fully blended, smooth, and evenly colored. No streaks, no clumps, just a beautifully deep red batter that already smells amazing.
If you’re new to baking, you might find our guide on baking ingredient swaps helpful—it covers simple alternatives like using beet juice for natural red coloring.
Step 5: Combine the Wet and Dry Ingredients
Now it’s time to bring it all together. Add your dry mixture to the wet batter in two batches. Mix on low speed just until everything’s combined. You’ll know it’s ready when you don’t see streaks of flour anymore.
Don’t overmix here—doing so can make your bars dense instead of chewy. The dough will be thick and sticky, somewhere between cookie dough and brownie batter. If it feels too dry, add a splash of milk to loosen it slightly.
This step-by-step mixing part might seem small, but it’s where the texture magic happens. Treat it like the heart of your recipe—gentle mixing equals tender, bakery-style results.
Step 6: Spread the Dough Evenly
Spoon the dough into your prepared pan. It’s going to be thick, so use the back of a spoon or your hands (covered with wax paper) to press it into an even layer. You want the top smooth and level so the bars bake evenly.
Here’s a handy tip: if you’ve got kids helping out, this is the perfect part for them. It’s easy, fun, and pretty forgiving.
For a little extra flair, you could sprinkle some white chocolate chips on top before baking. They’ll melt slightly and add a creamy sweetness that pairs beautifully with the cocoa flavor.
Step 7: Bake to Perfection
Place your pan in the center of the oven and bake for 25–30 minutes. The bars are done when the top looks set and the edges are pulling slightly away from the pan. A toothpick inserted in the center should come out clean or with a few moist crumbs—no raw batter.
The aroma filling your kitchen at this point? Absolutely divine. Like a red velvet dream. If you’ve ever baked our Greek Yogurt Banana Muffins, you’ll know that sweet “something’s-baking” scent that instantly feels like home.
Step 8: Cool Completely Before Frosting
Once baked, resist the urge to frost right away. Cooling is essential—otherwise, the frosting will melt and slide right off. Let the bars cool in the pan for at least an hour, or place them on a wire rack if you used parchment. If you’re impatient (we’ve all been there), you can pop them in the fridge for about 20 minutes.
This cooling step-by-step process is worth it. You’ll get those clean, professional bakery cuts and perfectly smooth frosting on top.
Step 9: Make the Cream Cheese Frosting
In a clean bowl, beat together butter and cream cheese until creamy and smooth. Add 2 cups of powdered sugar, plus the vanilla extract and salt. Beat on low at first (trust me, unless you want a sugar snowstorm). Once combined, increase to medium-high speed and keep beating until fluffy.
Gradually add more powdered sugar, ½ cup at a time, until you reach the desired consistency. You want it thick but spreadable. If it’s too stiff, add 1–2 tablespoons of cream.
This frosting should taste tangy, sweet, and buttery all at once—a perfect match for the cocoa-rich bars.
Step 10: Frost, Slice, and Serve
Once your bars are cool, lift them from the pan using the parchment overhang or leave them in the pan if you greased it. Spread the frosting evenly over the surface with a flat spatula or butter knife. Smooth it out or swirl it—it’s totally your call. For an extra festive touch, add sprinkles or crushed peppermint candy.
When slicing, use a thin, sharp knife. Wipe it between cuts for those Instagram-worthy clean edges. Each square will be soft, chewy, and topped with that silky frosting that practically melts on your tongue.
For a fun dessert night, serve these bars alongside our Brownie Protein Balls or a scoop of vanilla ice cream. You’ll have the ultimate sweet spread—no one will leave without asking for seconds (or the recipe).
Step 11: Enjoy and Share
And there you have it—Red Velvet Cookie Bars step by step, from mixing bowl to dessert plate. Perfectly chewy, gently tangy, and topped with rich cream cheese frosting, these bars taste as good as they look.
Whether you’re baking for family, friends, or a little “me time,” this recipe proves you don’t need fancy skills to create something truly special. If you love this one, don’t miss our Protein Cookie Dough Chocolate Yogurt Cookies for another easy, sweet fix you can whip up in minutes.
What to Serve with Red Velvet Cookie Bars
Pair your Red Velvet Cookie Bars with something simple like a hot coffee or a glass of cold milk for that classic cookies-and-cream combo. Hosting a party? Serve them alongside Easy Thai Peanut Chicken Wraps for a fun sweet-and-savory spread. They also make a lovely addition to dessert tables with brownies, blondies, or even Cookie Dough Protein Balls if you want something lighter next to them.
Key Tips for Making Red Velvet Cookie Bars
- Use room temperature ingredients: They mix better and give that soft, even crumb.
- Don’t overbake: They’ll continue to cook a bit as they cool. Slightly underdone means extra chewy.
- Brick-style cream cheese only: Skip the tub kind—it’s too soft and your frosting won’t hold up.
- Cut cleanly: For picture-perfect bars, chill them for 15 minutes before slicing.
Storage and Reheating Tips
Store frosted bars in an airtight container in the fridge for up to 3 days. If you’re making them ahead, freeze the unfrosted bars wrapped tightly in plastic wrap and thaw overnight in the fridge. You can also rewarm individual bars in the microwave for 10 seconds if you like them slightly gooey.
FAQs
Can I use gel food coloring? Yes! Gel gives a deeper red without adding extra liquid.
Can I skip the vinegar? Technically yes, but it won’t have that true red velvet tang.
Can I double the recipe? Absolutely—just use two pans. Perfect for parties or gifting.
Can I make these gluten-free? Swap in a 1:1 gluten-free flour blend. They’ll still bake up beautifully.
Final Thoughts
Red Velvet Cookie Bars are the dessert you didn’t know you needed—sweet, chewy, and just a little fancy. They’re easy enough for a weekday bake but special enough for any celebration. Bake a batch for your next get-together, and don’t be surprised if they disappear before you can even grab a second square. For more sweet inspiration, check out our Protein Cookie Dough Chocolate Yogurt Cookies—because dessert should always bring a smile.
Follow us on Pinterest for weekly slow cooker inspiration, or join the conversation over on our Facebook page where fellow food lovers share their favorite comfort meal.
Print
Red Velvet Cookie Bars: Soft, Chewy, and Totally Irresistible
- Prep Time: 45 minutes
- Cook Time: 25 minutes
- Total Time: 2 hours 10 minutes
- Yield: 15 cookie bars
- Category: Dessert
- Method: Baking
- Cuisine: American
- Diet: Vegetarian
Description
These red velvet cookie bars are soft, chewy, and topped with a tangy cream cheese frosting. With all the flavor of red velvet cake and the ease of a cookie bar, they’re perfect for any celebration or casual treat.
Ingredients
Red Velvet Cookie Bars:
- 2 1/4 cups all-purpose flour
- 3 tablespoons cocoa powder
- 1/2 teaspoon baking powder
- 1/2 teaspoon baking soda
- 1/4 teaspoon salt
- 1 cup unsalted butter, softened
- 3/4 cup granulated sugar
- 1/2 cup brown sugar (light or dark)
- 1 large egg
- 1 large egg yolk
- 2 teaspoons vanilla extract
- 1 tablespoon red food coloring (liquid or gel)
- 1/2 teaspoon vinegar (distilled or white)
Cream Cheese Frosting:
- 1/2 cup unsalted butter, softened but not melted
- 8 ounces full-fat brick-style cream cheese
- 2 1/2 to 3 1/2 cups powdered sugar, sifted if lumpy
- 1/4 teaspoon salt
- 1–2 tablespoons cream (whipping cream or table cream, if needed)
Instructions
1. Preheat the oven to 350°F (180°C). Lightly grease a 9×13 inch (23×33 cm) pan or line with parchment paper.
2. In a medium bowl, whisk together the flour, cocoa powder, baking powder, baking soda, and salt.
3. In a large bowl, beat together the butter, granulated sugar, and brown sugar until creamed.
4. Beat in the egg, egg yolk, vanilla, red food coloring, and vinegar until fully combined.
5. Add the dry ingredients to the wet ingredients and mix on low speed until no dry streaks remain.
6. Spoon the dough into the prepared pan and press into an even layer using wax paper to prevent sticking.
7. Bake for 25–30 minutes or until the top looks set and edges begin to pull away from the pan.
8. Cool the bars completely before frosting.
9. To make the frosting, beat the butter and cream cheese together until smooth.
10. Add 2 cups powdered sugar, vanilla, and salt. Beat on low speed until combined.
11. Gradually beat in remaining powdered sugar until desired sweetness and thickness is achieved. Add cream if needed to thin.
12. Frost the cooled bars evenly with a flat knife. Decorate with sprinkles if desired.
13. Slice into bars using a thin, sharp knife.
Notes
Be sure to use full-fat brick-style cream cheese for the frosting.
Store frosted bars in the fridge for up to 3 days. Unfrosted bars can be frozen tightly wrapped and thawed in the fridge.
Allow eggs to come to room temperature before baking for best results.