Yopokki recipe has become my favorite twist on Korea’s beloved tteokbokki. It’s fast, flavorful, and can be easily adapted for family meals. I remember the first time I tried a packaged yopokki cup—it was late at night, and I needed comfort food after a long day. It warmed me up instantly. That moment inspired me to recreate a homemade yopokki recipe with whole-food ingredients and none of the additives. It’s become a staple in my kitchen, and now I get to share it with you. If you love spicy, chewy, and rich umami-packed dishes, this one’s for you.
Table of Contents
Yopokki Recipe Story: How This Homemade Version Became a Family Favorite
Yopokki Recipe Love: Why This Dish Instantly Won Me Over
Yopokki recipe wasn’t always part of my kitchen repertoire. It actually started with my kids’ obsession with ramen cups. One day at the Korean market, I spotted a bright red container labeled “cheese yopokki.” I figured—why not? Back home, we tried it and were instantly hooked. But I knew I could make a version that felt more nourishing.
My homemade yopokki recipe uses real gochujang, tamari, garlic, and a splash of maple syrup for a clean yet bold taste. No preservatives. Just real, honest comfort food. This dish became our Friday night tradition—easy enough for a tired mom, delicious enough to impress dinner guests.
Along the way, I played with flavor profiles, adding in bok choy for greens or using mushrooms for a tteokbokki recipe vegetarian twist. If you’ve ever had my protein broccoli bread or mounjaro coffee, you know how I love blending wellness with taste. This yopokki recipe is no exception—it satisfies the senses and supports that cozy, cared-for feeling we all crave.
How Yopokki Differs from Traditional Tteokbokki
While tteokbokki and yopokki share core ingredients—rice cakes and spicy sauce—yopokki tends to be thicker, sweeter, and often comes in creamy or cheesy variations. The base of the tteokbokki sauce recipe is still gochujang, but it’s more concentrated here. The rice cakes are typically shorter, making them easier to eat with a spoon.
Another key difference? Yopokki recipe versions often come ready in cups or kits. But my goal was to bring that same delicious flavor to life in a homemade, real-food version—without the artificial stuff.
If you’re already a fan of dishes like beetroot detox drink or dandelion root tea, you’ll appreciate how this recipe stays grounded in whole ingredients while still satisfying that spicy-sweet craving.
Print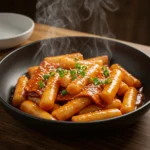
Yopokki Recipe
- Prep Time: 10 minutes
- Cook Time: 15 minutes
- Total Time: 25 minutes
- Yield: 2 servings
- Category: Main Dish
- Method: Stovetop
- Cuisine: Korean
- Diet: Vegetarian
Description
This spicy-sweet homemade yopokki recipe features chewy Korean rice cakes simmered in a rich gochujang-based sauce. It’s quick, comforting, and adaptable for vegetarians.
Ingredients
- 2 cups Korean rice cakes (tteok)
- 2 tablespoons gochujang
- 1 tablespoon tamari or soy sauce
- 2 garlic cloves, minced
- 1 tablespoon maple syrup or honey
- 1 teaspoon sesame oil
- 1 cup water or vegetable broth
Instructions
- Soak rice cakes in warm water for 10–15 minutes if refrigerated or frozen.
- In a pan, whisk together gochujang, tamari, garlic, maple syrup, sesame oil, and broth.
- Bring sauce to a simmer over medium heat until smooth.
- Add soaked rice cakes and cook for 8–10 minutes, stirring occasionally, until sauce thickens.
- Top with sesame seeds, green onions, or extras like tofu or veggies.
Notes
- For extra heat, add gochugaru (Korean chili flakes).
- To make vegetarian: use mushroom or kombu broth and skip any fish cakes.
- Store leftovers in an airtight container for up to 3 days.
Yopokki Recipe Ingredients & Easy Cooking Steps
Yopokki Recipe Essentials: What You’ll Need to Make It at Home
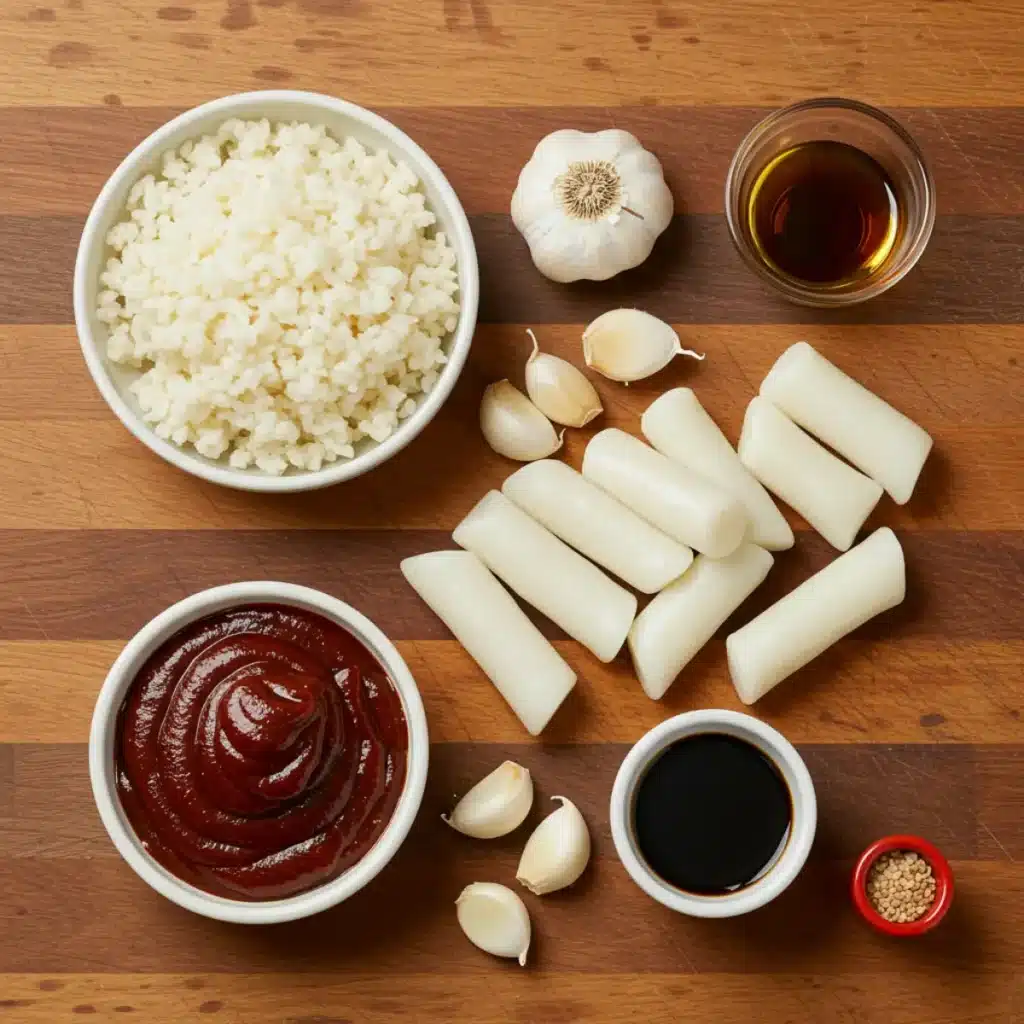
Yopokki recipe success starts with just a handful of pantry-friendly ingredients. Whether you’re making it from scratch or upgrading a store-bought version, you’ll need chewy Korean rice cakes (tteok), gochujang (Korean red chili paste), and a few flavor-packed basics. Here’s everything I use to create that thick, glossy, sweet-spicy sauce.
I usually keep tteok in the freezer—they thaw quickly in warm water and cook beautifully in 5–7 minutes. For my sauce, I whisk together gochujang, tamari (for depth), garlic, and maple syrup for sweetness. If you’re avoiding refined sugar, maple makes the sauce rich without overpowering. You’ll also want a touch of sesame oil to round things out.
Here’s a quick ingredient snapshot:
| Ingredient | Amount |
|---|---|
| Korean rice cakes (tteok) | 2 cups |
| Gochujang | 2 tablespoons |
| Tamari or soy sauce | 1 tablespoon |
| Garlic, minced | 2 cloves |
| Maple syrup or honey | 1 tablespoon |
| Sesame oil | 1 teaspoon |
| Water or broth | 1 cup |
You can also toss in extras like tofu, bok choy, or shredded carrots if you want to turn this into a complete tteokbokki recipe vegetarian dish.
Yopokki Recipe Made Simple: Step-by-Step Instructions Anyone Can Follow
One of the things I love most about this yopokki recipe is how fast it comes together. Start by soaking your rice cakes in warm water for about 15 minutes if they’ve been refrigerated or frozen. This helps them cook evenly and stay tender, a common question people have when asking, “Do I need to soak tteokbokki before cooking?” Yes—especially for frozen!
Next, heat a medium pan over medium-high and stir together your sauce ingredients: gochujang, tamari, garlic, maple syrup, sesame oil, and water or broth. Whisk until it becomes smooth and begins to bubble. Then add your rice cakes and simmer, stirring gently to prevent sticking.
In just about 8–10 minutes, the sauce thickens and coats the tteok beautifully. That glossy, spicy-sweet texture is everything. Sprinkle on sesame seeds or green onions to finish.
This method works beautifully even if you’re aiming for a lighter version. I often serve mine with a side of turmeric weight loss tonic or beet detox drink to balance the spice with grounding nourishment.
Yopokki Sauce Variations & Flavor Twists
Yopokki Recipe Sauce: How to Customize the Heat, Sweetness & Creaminess
Yopokki recipe sauce is the real heart of this dish. And while the classic version is thick, spicy, and slightly sweet, I’ve played with a few fun twists to keep things exciting—especially for picky eaters or those new to Korean food.
The base sauce combines gochujang with tamari, garlic, maple syrup, and broth, but small swaps go a long way. For added heat, I’ll stir in a teaspoon of gochugaru (Korean red pepper flakes). For a creamier finish—especially if you’re craving that cheesy cup-yopokki vibe—try adding a spoonful of cream cheese or unsweetened coconut cream right before serving. It softens the spice and turns the sauce lusciously silky.
Want to try a more gut-friendly version? Add a splash of apple cider vinegar or miso paste. These balance the sweetness while supporting digestion. I often alternate between miso and sesame paste depending on the season or what my body feels like it needs.
These tweaks help me transform the same yopokki recipe into three different meals across a week without losing its comforting feel. And for a fun variation, I’ve even stirred the sauce into my protein-packed broccoli bread batter for a spicy surprise loaf.
Tteokbokki Recipe Easy Upgrades: Add-Ins & Toppings to Boost Flavor
If you’re wondering how to keep your tteokbokki recipe easy but packed with interest, start with toppings. Once your rice cakes are coated in that velvety sauce, you’ve got a perfect base to build on.
For a veggie-loaded version, toss in steamed broccoli, spinach, or bok choy during the last 2 minutes of cooking. If you’re not strictly vegetarian, sliced boiled eggs, sautéed shrimp, or shredded rotisserie chicken add extra protein without complicating the process.
Need crunch? Sprinkle roasted seaweed strips or toasted sesame seeds over the top. I sometimes crumble leftover nori sheets from sushi night—it gives the dish that fun Korean market feel at home.
You can also spoon your finished yopokki recipe into a shallow bowl and top it with fresh green onions and a drizzle of chili oil. It’s quick, budget-friendly, and incredibly satisfying—kind of like comfort food meets wellness bowl.
And if you love playing with fusion dishes, try spooning your tteokbokki sauce recipe over a bed of rice or quinoa to make a spicy grain bowl. I’ve even added the rice cakes to soups when I’m out of noodles, especially alongside a cup of dandelion root tea for a deeply warming meal.
Tteokbokki Recipe Vegetarian Style — Flavorful & Satisfying
Yopokki Recipe Goes Vegetarian: A Plant-Based Take Without Losing Boldness
Yopokki recipe enthusiasts often ask if you can make it vegetarian without losing that bold, spicy depth. The answer is a definite yes—and I actually prefer this version when I want something clean, comforting, and deeply satisfying.
The key lies in replacing the traditional fish cake (eomuk) and anchovy broth found in classic tteokbokki with rich plant-based umami sources. I use a quick kombu and shiitake mushroom broth—it takes just 20 minutes to steep and delivers that savory backbone that tteokbokki needs. If you’re short on time, low-sodium veggie broth plus a splash of tamari or white miso works too.
Instead of fish cakes, I load my tteokbokki recipe vegetarian version with firm tofu cubes, wilted spinach, and thin-sliced mushrooms. The tofu soaks up the gochujang sauce beautifully, and mushrooms add that meaty chew that even my non-vegetarian friends love.
To round it out, I often serve this with a light side—like my go-to mounjaro coffee or warm herbal teas. It’s the perfect balance between heat, depth, and grounding.
Vegetarian Yopokki for the Whole Family (Even Picky Eaters!)
If your house is like mine, getting little ones on board with spicy dishes can be tricky. But this vegetarian yopokki recipe wins them over every time. I simply scale back the gochujang a bit and add a small spoon of unsweetened peanut butter to mellow the heat. The result? A creamy, savory-sweet sauce that coats the rice cakes beautifully and still keeps that classic flavor profile.
For extra fun, let kids top their own bowls with avocado slices, sesame seeds, or crunchy veggies. Mine love adding shredded carrots and cucumber ribbons—it becomes part meal, part craft project.
This version has become our midweek lifesaver. It’s quick, pantry-friendly, and comes together in under 30 minutes with zero meat or dairy. Plus, the leftovers heat up beautifully, especially when spooned into a thermos for school lunches.
Yopokki recipe fans, don’t think going vegetarian means compromising. This version is still spicy, sticky, and spoon-licking good. And when paired with something cleansing like my beetroot detox drink, it turns into a meal that feels as good as it tastes.
How to Serve & Store Your Yopokki Recipe the Right Way
Yopokki Recipe Serving Ideas: From Casual Dinner to Fancy Korean Night
One of the best things about this yopokki recipe is its versatility. You can serve it hot and steamy in a deep bowl as a weeknight meal, or present it tapas-style as part of a Korean-inspired dinner spread.
For casual meals, I love pairing it with cold cucumber salad, sesame-dressed greens, or even crispy tofu nuggets for the kids. If you want to elevate things, serve your tteokbokki recipe easy version with a side of kimchi, miso soup, and steamed jasmine rice.
When guests come over, I use a shallow platter and top the yopokki with toasted sesame seeds, finely sliced scallions, and seaweed flakes. A drizzle of chili oil adds visual flair and extra heat—just like a dish you’d find in a Seoul food alley.
This also makes an excellent potluck dish because it travels well and reheats beautifully.
How to Store & Reheat Yopokki Without Losing Texture
If you’ve got leftovers—and honestly, that’s rare in our house—you’ll be happy to know this yopokki recipe keeps really well.
To store: Let it cool completely, then transfer to an airtight container. Refrigerate for up to 3 days. The sauce may thicken slightly in the fridge, but that’s easy to fix.
To reheat: Add a splash of water or broth to the pan and warm it slowly over medium heat, stirring gently. The rice cakes will soften again, and the sauce returns to that luscious, glossy texture you love.
I don’t recommend freezing unless you’re using fresh rice cakes (not pre-frozen), as their texture can become too chewy when thawed.
Now, whenever I make a big batch of this tteokbokki recipe vegetarian version, I always save a portion to enjoy the next day with a fried egg on top and a cup of detox tea on the side. It’s a warming, soul-satisfying lunch that doesn’t feel like leftovers at all.
FAQs
What Are the Ingredients of Tteokbokki?
The traditional tteokbokki—and by extension, this yopokki recipe—relies on just a few core ingredients to deliver its unforgettable taste. The must-haves are Korean rice cakes (tteok), gochujang (Korean chili paste), garlic, soy sauce or tamari, and a natural sweetener like sugar, maple syrup, or honey.
Why Is Tteokbokki (and Yopokki) So Addicting?
Tteokbokki is the ultimate comfort food—it’s chewy, saucy, spicy, and slightly sweet, all at once. That perfect balance is what makes this yopokki recipe so crave-worthy. The rice cakes provide a deeply satisfying texture, while the gochujang sauce hits that umami-sweet-spicy spot in just the right way. Add in a few nourishing toppings or creamy upgrades and you’ve got a dish that satisfies every part of your palate. If you’ve ever tried a spicy dish followed by something grounding like my dandelion root tea, you’ll know exactly what I mean—it’s that harmony that keeps you coming back.
Do I Need to Soak Tteokbokki Before Cooking?
Yes, soaking is a simple step that makes a big difference in the final dish. If you’re using refrigerated or frozen tteok (rice cakes), they can get stiff or uneven when cooked straight from the package. For the best results with your yopokki recipe, soak them in warm water for 10–15 minutes. This softens them just enough to cook evenly and absorb the sauce, giving you that ideal chewy texture. Skipping this step often leads to dry or hard centers—definitely not the goal when making a cozy Korean classic.
What Is Included in Tteokbokki?
The base dish includes rice cakes and spicy gochujang sauce. From there, it’s up to you! This tteokbokki recipe easy version can be expanded with add-ins like:Hard-boiled eggs, Tofu or mushrooms, Green onions, Bok choy or spinach
Cheese or cream (for that cheesy yopokki flavor) and Sesame seeds or seaweed.
Conclusion
There’s something so comforting about cooking a yopokki recipe from scratch. It’s spicy, chewy, slightly sweet—and endlessly customizable for your lifestyle, whether you’re plant-based, gluten-free, or just trying something new.
As a mom of three who’s always balancing wellness with real-life cravings, this recipe has become one of my go-to meals for both comfort and nourishment. I hope it becomes a favorite in your kitchen too.
Don’t be afraid to tweak the spice, add your favorite toppings, or go full vegetarian. This dish welcomes creativity—and that’s exactly what makes it so addicting.
Follow us on Pinterest for weekly slow cooker inspiration, or join the conversation over on our Facebook page where fellow food lovers share their favorite comfort meal.