Chocolate Mousse Brownies are the answer to every deep, dark cocoa craving you’ve ever had, combining a fudgy base with a cloud-like middle layer. If you are looking for a treat that feels like a high-end bakery find but comes together in your own kitchen, this Chocolate Mousse Brownies recipe is exactly what you need to satisfy that sweet tooth. I know life gets hectic, and sometimes you just need a win that doesn’t involve a sink full of complicated gadgets or ingredients you can’t pronounce. Whether you’re dealing with picky eaters who only want “plain” treats or you’re trying to impress the in-laws, these brownies bridge the gap between simple comfort food and spectacular elegance. Since we are all about keeping things real here, let’s admit that sometimes a box mix doesn’t cut it, yet we don’t have all day to temper chocolate like a professional chocolatier. This recipe is your secret weapon for birthdays, holidays, or those “just because it was a long Monday” moments.
What is a Chocolate Mousse Brownie?
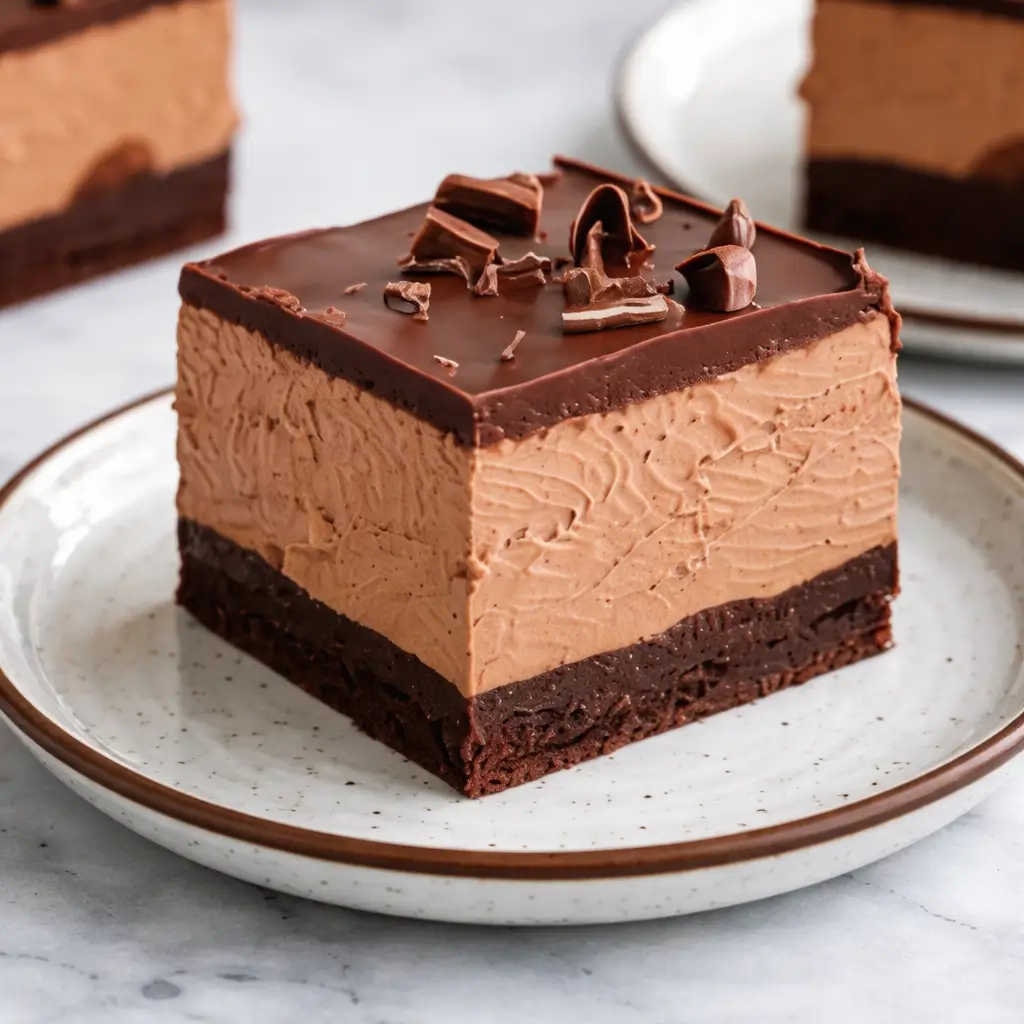
A Chocolate Mousse Brownie is a decadent, multi-textured masterpiece that stacks three distinct layers of chocolatey goodness into one single bite. At the very bottom, you have a dense, chewy, and intensely fudgy brownie that provides a sturdy foundation for everything sitting on top. Above that base sits a light-as-air, velvety chocolate mousse made by folding rich melted chocolate into freshly whipped cream. Finally, the whole thing is crowned with a glossy chocolate ganache that adds a silky finish and a professional look. It is essentially the “little black dress” of the dessert world—classic, sophisticated, and always in style. While a standard brownie is great for a casual snack, this version transforms the experience into a plated dessert worthy of a special occasion. It’s the kind of treat that makes people stop talking and start nodding in pure cocoa-induced bliss.
Reasons to Try Chocolate Mousse Brownies
You should try Chocolate Mousse Brownies because they offer a sensory experience that a single-layer bar simply cannot match. First, the contrast between the cold, creamy mousse and the room-temperature fudgy base is absolutely addictive. Because it is a “make-ahead” dessert, it is perfect for busy women who want to get the baking out of the way a day before a big event. You won’t be rushing to pull something out of the oven while guests are arriving; instead, you’ll just be pulling a perfectly set tray out of the fridge. Furthermore, this recipe uses pantry staples like flour, sugar, and cocoa, so you don’t need a massive shopping list to get started. It’s also incredibly versatile; you can dress it up with berries or keep it simple with a dusting of cocoa powder. Honestly, seeing the look on someone’s face when they see those three perfect layers is a victory in itself.
Ingredients Needed to Make Chocolate Mousse Brownies
- 1/2 cup (115g) unsalted butter: Melted down to provide that essential richness and fat for a moist brownie base.
- 1 cup (200g) granulated sugar: To sweeten the deal and help create that slightly crackly brownie top we all love.
- 2 large eggs: These act as the binder, giving the base its structure and chewiness.
- 1 tsp vanilla extract: Because every chocolate dessert needs a hit of vanilla to round out the flavors.
- 1/3 cup (40g) unsweetened cocoa powder: Use a high-quality cocoa here for the best depth of flavor.
- 1/2 cup (65g) all-purpose flour: Just enough to hold everything together without making the brownie cakey.
- 1/4 tsp salt: To balance the sugar and make the chocolate notes sing.
- 1/4 tsp baking powder: A tiny bit of lift to ensure the base isn’t a brick.
- 1 1/2 cups (350ml) heavy whipping cream: This must be chilled to ensure it whips up into stiff, voluminous peaks for the mousse.
- 12 oz (340g) semisweet chocolate: Divided between the mousse (8 oz) and the ganache (4 oz). Finely chopped chocolate melts much smoother than large chunks.
- 3 tbsp (45ml) milk: Used to melt the chocolate for the mousse base gently.
- 2 tbsp (25g) powdered sugar: To lightly sweeten the whipped cream without adding grit.
- 1/2 cup (120ml) heavy cream (for ganache): To create that pourable, shiny top layer.
Instructions to Make Chocolate Mousse Brownies – Step by Step
Step 1: Prepare the Pan and Oven
The first movement in our chocolate symphony is getting the stage ready. Preheat your oven to 350°F (175°C). While that’s warming up, take an 8×8-inch square baking pan and line it with parchment paper. Here is a pro tip: leave a little bit of the paper hanging over the edges like handles. This makes it a breeze to lift the entire block of brownies out later without destroying your beautiful layers. If the paper won’t stay put, a tiny dab of butter on the pan helps it stick.
Step 2: Mix the Wet Ingredients
In a large mixing bowl, whisk together your melted butter and granulated sugar. Once they are combined, crack in your two eggs and add the vanilla extract. Whisk this Step by Step until the mixture looks smooth and slightly pale. You want the sugar to start dissolving into the fats and proteins so your brownie has a consistent texture. It’s a great little arm workout, but don’t feel like you need to overdo it—just get it well-incorporated.
Step 3: Fold in the Dry Ingredients
Now, grab a sifter or a fine-mesh strainer. Sift the cocoa powder, flour, salt, and baking powder directly into your wet mixture. Sifting is key here because cocoa powder is notorious for having stubborn little lumps that refuse to break. Using a spatula, gently fold the dry ingredients into the wet ones. We want to do this Step by Step until the flour streaks just disappear. Overmixing at this stage leads to tough brownies, and we are aiming for fudgy perfection, not bread.
Step 4: Bake the Brownie Foundation
Pour that thick, gorgeous batter into your prepared pan. Use your spatula to smooth the top so it’s nice and level. Pop it into the oven for 20 to 25 minutes. You’ll know it’s done when a toothpick inserted into the center comes out with a few moist crumbs clinging to it. If it comes out completely clean, you might have overbaked it slightly, but don’t panic! Let the brownie base cool completely in the pan. This is vital because if the base is even slightly warm, your mousse will melt into a puddle.
Step 5: Create the Chocolate Mousse Base
While your brownies are cooling, let’s start the middle layer. In a small saucepan over low heat, warm up 3 tablespoons of milk until it’s steaming but not boiling. Place 8 ounces of your finely chopped semisweet chocolate in a heatproof bowl and pour the warm milk over it. Let it sit for about 2 minutes. This gives the heat time to penetrate the chocolate. Then, stir it gently until it’s a smooth, glossy liquid. Set this aside to cool to room temperature.
Step 6: Whip the Cream to Perfection
In a separate chilled bowl, pour in your 1 1/2 cups of heavy whipping cream and the powdered sugar. Using a hand mixer or a stand mixer, beat the cream until soft peaks form. You want it to be thick and hold its shape, but still look creamy, not curdled. This part of the process must be done Step by Step so you don’t accidentally turn your cream into butter. Keep a close eye on it; it goes from “almost there” to “oops” very quickly.
Step 7: Combine Chocolate and Cream
Now comes the delicate part. Take a big spoonful of your whipped cream and stir it into the cooled chocolate mixture. This “lightens” the chocolate so it’s easier to fold. Then, gently fold the rest of the whipped cream into the chocolate. Use a slow, circular motion with your spatula, cutting through the center and lifting from the bottom. This Step by Step approach ensures you keep all that lovely air in the mousse, making it light and fluffy rather than dense and heavy.
Step 8: Assemble the Mousse Layer
Once your mousse is perfectly blended and streak-free, spread it evenly over the cooled brownie base. Use an offset spatula or the back of a spoon to get it into the corners and smooth out the surface. Now comes the hard part: patience. Place the pan in the refrigerator for at least 2 hours. The mousse needs this time to set up firmly so it can support the weight of the ganache we are about to add.
Step 9: Prepare the Silky Ganache
After the mousse has had its nap in the fridge, it’s time for the final touch. Place 4 ounces of chopped chocolate in a small bowl. Heat 1/2 cup of heavy cream in a saucepan until it just starts to simmer (look for little bubbles around the edges). Pour the hot cream over the chocolate and let it sit for 3 minutes. Stir it slowly starting from the center until you have a dark, shiny ganache. It should look like liquid velvet.
Step 10: The Final Pour
Pour that warm ganache directly over the chilled mousse layer. Tilt the pan slightly to help it spread to the edges, or use a spatula to smooth it out. This layer seals everything in and adds a punch of intense chocolate flavor. Put the pan back into the fridge for one more hour. This final chill ensures the ganache firms up enough to be sliced without running everywhere.
Step 11: Slicing for Success
Once the ganache is firm, use those parchment paper handles to lift the brownies out of the pan. To get those clean, professional-looking edges you see in photos, run a sharp knife under hot water, wipe it dry, and then make your cut. Repeat the “hot water and wipe” routine for every single slice. It sounds like a lot of work, but the results are so satisfying! Now, grab a fork and dive into your hard work.
What to Serve with Chocolate Mousse Brownies
Since these Chocolate Mousse Brownies are incredibly rich, you want to serve them with something that offers a bit of contrast. A handful of fresh raspberries or sliced strawberries adds a wonderful tartness that cuts through the heavy cocoa. If you want to go full-on decadent, a small dollop of lightly sweetened whipped cream or a scoop of vanilla bean ice cream is never a bad idea. For beverages, a cold glass of milk is the classic choice, but a strong cup of black coffee or a shot of espresso works beautifully to highlight the bitterness of the semisweet chocolate. If you’re serving these at a dinner party, a glass of red wine, like a Cabernet Sauvignon or a Port, pairs surprisingly well with the deep flavors. Just remember, these are rich, so a little goes a long way!
Key Tips for Making Chocolate Mousse Brownies
The biggest tip for success is temperature control. Never add your mousse to a warm brownie, and never add warm ganache to a mousse that hasn’t fully set. If you rush these steps, the layers will bleed into each other, and while it will still taste delicious, you’ll lose that beautiful visual definition. Another tip is to use high-quality chocolate. Since chocolate is the star of the show here, using a brand you actually enjoy eating on its own will make a massive difference in the final result. Also, don’t be afraid to experiment with the base! If you like a bit of crunch, you could fold some toasted walnuts or pecans into the brownie batter before baking. Finally, if your mousse seems too soft, give it more time in the fridge—sometimes a full night of chilling makes the texture even better.
Storage and Reheating Tips Chocolate Mousse Brownies
Because of the dairy in the mousse and ganache, these brownies must be stored in the refrigerator. Keep them in an airtight container to prevent them from picking up any “fridge smells” and to keep the brownie base from drying out. They will stay fresh and delicious for up to 4 days, though I highly doubt they will last that long once your family finds them! I do not recommend reheating these, as the mousse layer will melt instantly and turn into a liquid. These are meant to be enjoyed cold or at a very slight chill. If you want to freeze them, you can! Wrap individual slices tightly in plastic wrap and then foil. Thaw them in the refrigerator for a few hours before eating. The texture of the mousse might change slightly after freezing, but it’s still a fantastic frozen treat.
FAQs
Can I use a box mix for the brownie base? Absolutely! If you are short on time, a 9×9-inch sized box mix works perfectly. Just make sure it is completely cool before adding the mousse.
What if I don’t have heavy cream? Unfortunately, for the mousse and ganache, heavy cream is essential. Milk or half-and-half won’t whip into the peaks needed to give the mousse its structure.
Can I use milk chocolate instead of semisweet? You can, but keep in mind the dessert will be much sweeter. Semisweet provides a nice balance to the sugar in the brownie and the cream.
My ganache is too thin, what happened? You might have used too much cream or not let it sit long enough with the chocolate. You can try chilling it longer, or whisking in a little more melted chocolate to thicken it up.
Final Thoughts
Making Chocolate Mousse Brownies is a labor of love that pays off in every single bite. It is the perfect project for a rainy Sunday or a special birthday where you want to show off just a little bit. By following the process Step by Step, you create a dessert that is far greater than the sum of its parts. Don’t let the multiple layers intimidate you; once you break it down, it’s just a series of simple tasks that lead to a truly spectacular result. Whether you are sharing these with friends, bringing them to a potluck, or hiding a couple in the back of the fridge for yourself, these brownies are guaranteed to bring a little bit of joy to your day. So grab your cocoa powder and your whisk, and let’s get baking—you deserve a treat this good!
Print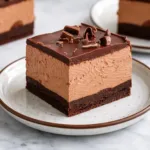
Chocolate Mousse Brownies: The Ultimate Triple-Layer Dessert
- Prep Time: 25 minutes
- Cook Time: 25 minutes
- Total Time: 3 hours 50 minutes
- Yield: 9 brownies
- Category: Dessert
- Method: Bake
- Cuisine: American
- Diet: Vegetarian
Description
Rich fudgy brownies topped with a light, silky chocolate mousse and finished with a glossy chocolate ganache. This layered dessert is perfect for holidays, celebrations, or any time you want an indulgent chocolate treat.
Ingredients
- 1/2 cup (115g) unsalted butter, melted
- 1 cup (200g) granulated sugar
- 2 large eggs
- 1 tsp vanilla extract
- 1/3 cup (40g) unsweetened cocoa powder
- 1/2 cup (65g) all-purpose flour
- 1/4 tsp salt
- 1/4 tsp baking powder
- 1 1/2 cups (350ml) heavy whipping cream, chilled
- 8 oz (225g) semisweet chocolate, finely chopped
- 3 tbsp (45ml) milk
- 2 tbsp (25g) powdered sugar
- 4 oz (115g) semisweet chocolate, finely chopped
- 1/2 cup (120ml) heavy cream
Instructions
1. Preheat the oven to 350°F (175°C) and line an 8×8-inch baking pan with parchment paper, leaving an overhang for easy removal.
2. In a large bowl whisk together the melted butter, granulated sugar, eggs, and vanilla extract until smooth.
3. Sift in the cocoa powder, flour, salt, and baking powder and gently fold until just combined without overmixing.
4. Pour the batter into the prepared pan and bake for 20–25 minutes until a toothpick inserted in the center comes out with a few moist crumbs. Cool completely.
5. Heat the milk in a small saucepan until just steaming, then pour over the chopped chocolate in a bowl. Let sit for 2 minutes and stir until smooth. Cool to room temperature.
6. In another bowl beat the chilled heavy cream with powdered sugar until soft peaks form.
7. Stir a spoonful of whipped cream into the cooled chocolate mixture to loosen it, then gently fold in the remaining whipped cream until airy and smooth.
8. Spread the chocolate mousse evenly over the cooled brownie layer and refrigerate for at least 2 hours until set.
9. Place chopped chocolate in a heatproof bowl. Heat the cream until simmering and pour over the chocolate. Let sit 2–3 minutes, then stir until smooth to form ganache.
10. Pour the ganache over the chilled mousse layer and smooth the top. Refrigerate for about 1 hour until firm.
11. Lift the brownies from the pan using the parchment overhang, slice into squares with a clean knife, and serve.
Notes
If the melted chocolate cools too much before folding, it may stiffen. Stir in a small amount of whipped cream first to loosen it before folding the rest.
For neat slices, run a knife under hot water and wipe dry between cuts.
Store leftovers covered in the refrigerator for up to 4 days.
You can dust the top with cocoa powder or add chocolate shavings for garnish.