If you’re anything like me, garlic bread is one of those simple joys that can make an ordinary meal feel like a feast. Now imagine garlic bread, but softer, fluffier, and with buttery layers that swirl through every single bite. That’s exactly what these Garlic Swirl Rolls bring to the table—and yes, they’re as dreamy as they sound.
These rolls are perfect alongside soups (like my Creamy Crockpot Chicken & Wild Rice Soup) or chili on a cozy night, but they also shine as a stand-alone snack. Trust me, I once made a batch for dinner, and half mysteriously disappeared before they even reached the table. (Looking at you, kids!)
Table of Contents
Why You’ll Love These Garlic Swirl Rolls
- Soft & fluffy: The dough rises beautifully, giving you pillowy rolls that practically melt in your mouth.
- Flavor-packed: Garlic, parsley, and butter—need I say more?
- Versatile: Serve them with soups, salads, pasta, or as an appetizer for guests.
- Family favorite: Even picky eaters can’t resist these.
What Do Garlic Swirl Rolls Taste Like?
Imagine the comfort of homemade bread mixed with the savory punch of garlic butter. Each swirl bakes into golden perfection, leaving you with layers of garlicky, buttery goodness in every bite. They’re rich, aromatic, and downright addictive—the kind of roll that disappears before you even sit down.
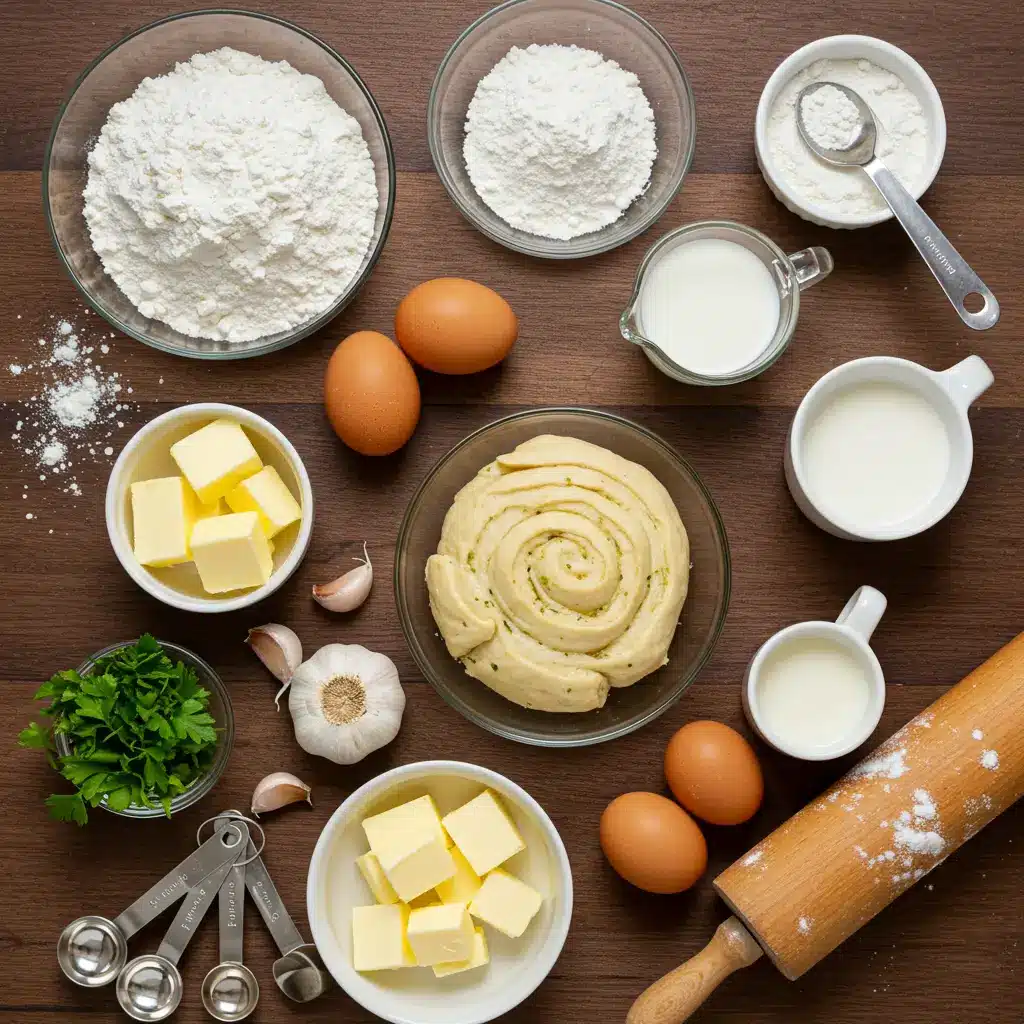
Ingredients You’ll Need for Garlic Swirl Rolls
When it comes to making Garlic Swirl Rolls, the magic lies in simple, pantry-friendly ingredients that work together to create a soft, fluffy dough and a savory, buttery filling. Below, I’ve broken everything down so you know exactly why each ingredient matters (because trust me, every little detail counts when it comes to bread baking!).
For the Dough:
- 2 cups warm milk (110°F) – Warm milk helps activate the yeast and adds richness to the dough, making your rolls extra tender. (Tip: Think “baby bath water” warm—it should feel cozy to the touch, not hot.)
- 2 tablespoons sugar – A little sweetness feeds the yeast and balances the savory garlic filling.
- 2 ¼ teaspoons active dry yeast (1 packet) – This is the powerhouse that makes your rolls rise beautifully. Proofing the yeast ensures your dough gets that light, airy texture.
- ½ cup unsalted butter, melted – Butter adds flavor and softness to the dough. I recommend unsalted so you can control the salt levels yourself.
- 2 large eggs – Eggs give the rolls structure and that gorgeous golden color.
- 1 teaspoon salt – Balances flavors and strengthens the gluten for a sturdy (but still pillowy) texture.
- 4–5 cups all-purpose flour – The foundation of the dough. Start with 4 cups and add more as needed until your dough is soft but not sticky.
For the Filling:
- ½ cup unsalted butter, softened – The base of your garlicky swirl. Softened butter spreads easily, ensuring every layer of dough gets coated.
- 4 cloves garlic, minced – The star of the show! Fresh garlic packs a punch and fills your kitchen with that irresistible aroma.
- ¼ cup fresh parsley, chopped – Bright and herbaceous, parsley adds freshness to balance the richness of the butter and garlic.
- Salt and pepper to taste – Simple seasonings that make every bite flavorful.
👉 Pro tip: If you’re a garlic lover like me, you’ll also enjoy pairing these rolls with a bowl of my Cheddar Garlic Herb Potato Soup. The combination is pure comfort food heaven!
How to Make Garlic Swirl Rolls
Making Garlic Swirl Rolls at home may sound fancy, but I promise it’s a process you’ll quickly fall in love with. Think of it as a little kitchen project that rewards you with the softest, most flavorful rolls you’ll ever taste. Let’s break it down step by step.
Step 1: Proof the Yeast
- In a large mixing bowl, whisk together 2 cups warm milk (about 110°F) with 2 tablespoons sugar.
- Sprinkle 1 packet of active dry yeast (2 ¼ teaspoons) over the top and let it sit undisturbed for 5–10 minutes.
- You’ll know the yeast is alive and well when it gets foamy and bubbly. If it doesn’t, toss it and start again with fresh yeast—this is the secret to rolls that actually rise!
Step 2: Mix the Dough
- Stir in the ½ cup melted butter, 2 large eggs, and 1 teaspoon salt.
- Gradually add in 4–5 cups of all-purpose flour, starting with 4 cups and adding more as needed.
- Mix until a soft, slightly tacky dough forms.
👉 If you’ve ever made my Garlic Bread Rolls, this step will feel familiar—it’s the same cozy process of building a flavorful base.
Step 3: Knead the Dough
- Turn the dough out onto a lightly floured surface.
- Knead for about 5–7 minutes until the dough is smooth and elastic. (Think of it like giving the dough a mini workout—it should bounce back when poked.)
- Place the dough in a greased bowl, cover it with a clean kitchen towel, and let it rise in a warm, draft-free spot for 1–1.5 hours, or until doubled in size.
Step 4: Make the Garlic Butter Filling
- While the dough is rising, combine ½ cup softened butter, 4 minced garlic cloves, ¼ cup chopped fresh parsley, and a pinch of salt and pepper in a small bowl.
- Stir until smooth. This buttery mixture is what makes your Garlic Swirl Rolls irresistibly fragrant and flavorful.
Step 5: Shape the Rolls
- Once the dough has doubled, gently punch it down to release excess air.
- Roll it out into a 12×18-inch rectangle—aim for even thickness so each roll bakes consistently.
- Spread the garlic butter mixture evenly across the dough, reaching all the edges.
- Starting from the long side, roll the dough up tightly (like a jelly roll) and slice it into 12 equal pieces.
Step 6: Second Rise
- Arrange the cut rolls cut-side up in a greased baking dish.
- Cover and let them rise again for 30–45 minutes, until puffy and ready for the oven.
👉 At this stage, your kitchen will smell like heaven already—it’s the anticipation that makes homemade rolls so fun!
Step 7: Bake the Rolls
- Preheat your oven to 350°F (175°C).
- Bake the rolls for 20–25 minutes, or until the tops are golden brown and your house smells like a bakery.
- Remove from the oven, let them cool slightly, and then dig in while they’re still warm.
Step 8: Serve & Enjoy
Serve your Garlic Swirl Rolls alongside soups, pastas, or as the star of the bread basket. Personally, I love pairing them with a comforting bowl of Creamy Tomato Orzo Soup—the buttery garlic layers balance perfectly with a creamy, tangy soup.
Tips and Tricks for Perfect Garlic Swirl Rolls
- Cheesy upgrade: Sprinkle Parmesan or mozzarella over the filling for extra flavor.
- Dough too sticky? Add flour a tablespoon at a time until manageable.
- Make-ahead hack: Prepare rolls the night before, cover, and refrigerate. Bake fresh the next day.
- Leftovers? Warm them in the oven at 300°F for 5 minutes to bring back that fresh-baked magic.
Storage for Garlic Swirl Rolls
- Room temperature: Store in an airtight container for up to 2 days.
- Freezer-friendly: Freeze baked rolls for up to 2 months. Reheat directly from frozen.
FAQs
Can I use instant yeast instead of active dry yeast?
Yes! Just skip the proofing step and mix it directly with the flour.
Can I swap parsley with another herb?
Absolutely—chives, thyme, or even rosemary taste fantastic.
Do I have to knead by hand?
Nope. A stand mixer with a dough hook makes the process quicker (and saves your arms).
Conclusion
These Garlic Swirl Rolls aren’t just bread—they’re little spirals of joy that turn any meal into something special. Whether you’re serving them with a hearty soup, a holiday dinner, or sneaking one straight from the pan (no judgment here), they’re guaranteed to impress.
So go ahead, roll up your sleeves (pun intended) and give these a try—you’ll be making them on repeat. And if you do, I’d love for you to tag me on Instagram or leave a review. Happy baking, friend!
Follow us on Pinterest for weekly slow cooker inspiration, or join the conversation over on our Facebook page where fellow food lovers share their favorite comfort meal.
Print
Garlic Swirl Rolls: Easy Homemade Recipe You’ll Love
- Prep Time: 20 minutes
- Cook Time: 25 minutes
- Total Time: 45 minutes
- Yield: 12 rolls
- Category: Bread
- Method: Baked
- Cuisine: American
- Diet: Vegetarian
Description
Indulge in these irresistible Garlic-Swirl Rolls, featuring a soft, fluffy texture and a delicious garlic butter filling. Perfect for any meal, these rolls are sure to impress your family and friends!
Ingredients
For the Dough:
- 2 cups warm milk (110°F)
- 2 tablespoons sugar
- 2 ¼ teaspoons active dry yeast (1 packet)
- ½ cup unsalted butter, melted
- 2 large eggs
- 1 teaspoon salt
- 4–5 cups all-purpose flour
For the Filling:
- ½ cup unsalted butter, softened
- 4 cloves garlic, minced
- ¼ cup fresh parsley, chopped
- Salt and pepper to taste
Instructions
1. In a large bowl, mix warm milk and sugar. Sprinkle yeast on top and let sit for 5-10 minutes until frothy.
2. Add melted butter, eggs, and salt. Gradually mix in flour until a soft dough forms.
3. Knead the dough on a floured surface for about 5-7 minutes until smooth. Place in a greased bowl, cover, and let rise in a warm place for 1-1.5 hours, until doubled in size.
4. In a small bowl, combine softened butter, minced garlic, chopped parsley, salt, and pepper. Mix until well combined.
5. Punch down the risen dough and roll it out into a 12×18 inch rectangle.
6. Spread the garlic butter mixture evenly over the dough. Roll tightly from the long edge and slice into 12 equal pieces.
7. Place the rolls cut-side up in a greased baking dish. Cover and let rise for 30-45 minutes until puffy.
8. Preheat oven to 350°F (175°C). Bake rolls for 20-25 minutes, until golden brown. Let cool slightly before serving.
Notes
For extra flavor, consider adding grated cheese to the filling.
These rolls are best served warm, but can also be stored for up to two days at room temperature.