When the crisp autumn air rolls in, all I want is something cozy, sweet, and just a little indulgent. Enter my No Bake Pumpkin Cheesecake Balls—the ultimate quick-and-easy fall dessert that feels like a hug in dessert form. These little bites are creamy, spiced just right, and dipped in chocolate for that irresistible finish. And the best part? No oven required. Which, let’s be honest, is a lifesaver when you’re juggling kids, work, or just don’t want to sweat it out in the kitchen.
Table of Contents
Why You’ll Love These No Bake Pumpkin Cheesecake Balls
Think pumpkin pie met cheesecake at a fall festival, and they decided to roll away together. That’s this recipe in a nutshell (or should I say, in a graham cracker crumb?).
- Quick & fuss-free – only 20 minutes of active prep time.
- No oven drama – perfect for busy days or when the oven’s already taken.
- Crowd-pleaser – kids, neighbors, and even that friend who “doesn’t like pumpkin” will be reaching for seconds.
(And yes, I’ve been that mom sneaking one from the fridge at midnight. No judgment here!)
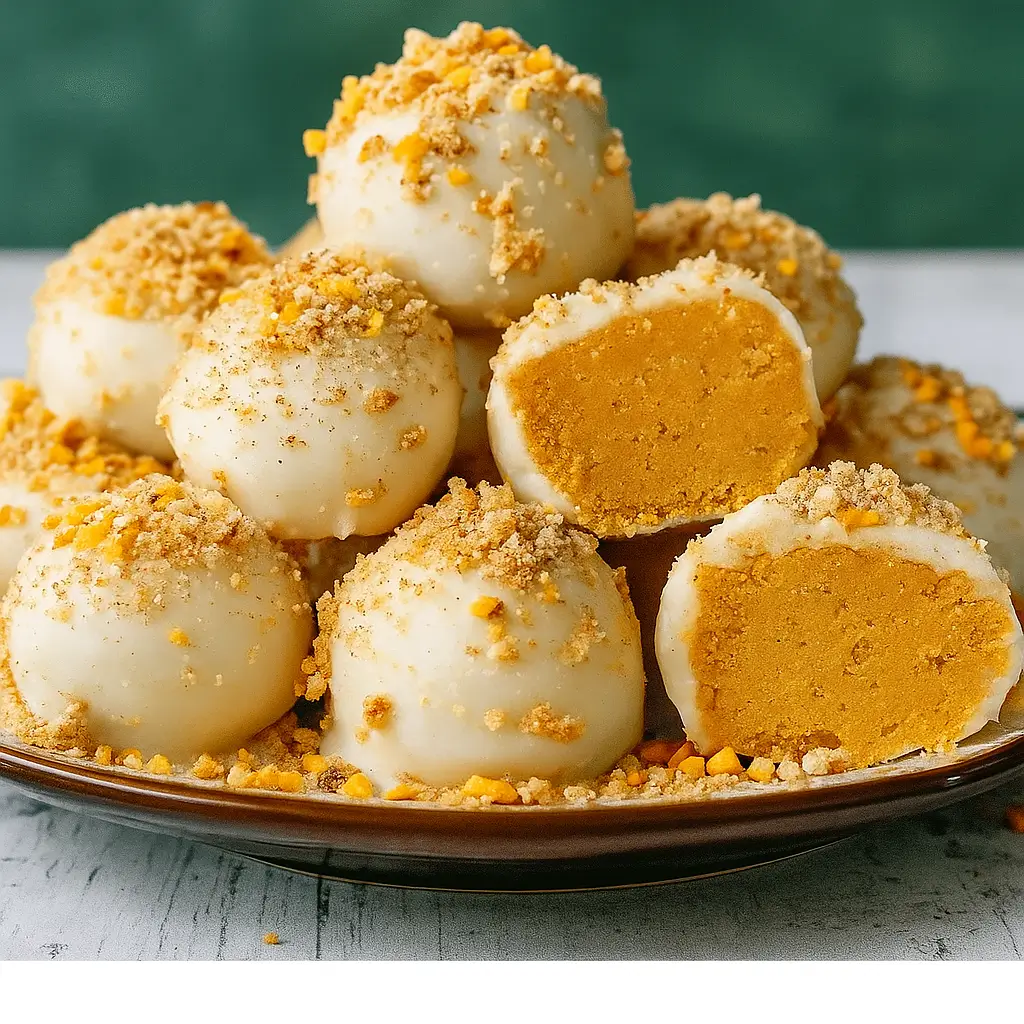
What Do No Bake Pumpkin Cheesecake Balls Taste Like?
Imagine the creaminess of cheesecake, the cozy spice of pumpkin pie, and the satisfying snap of chocolate coating. Each bite has that melt-in-your-mouth texture with just the right amount of crunch if you roll them in graham cracker crumbs or nuts. They’re little bites of pumpkin-spiced happiness.
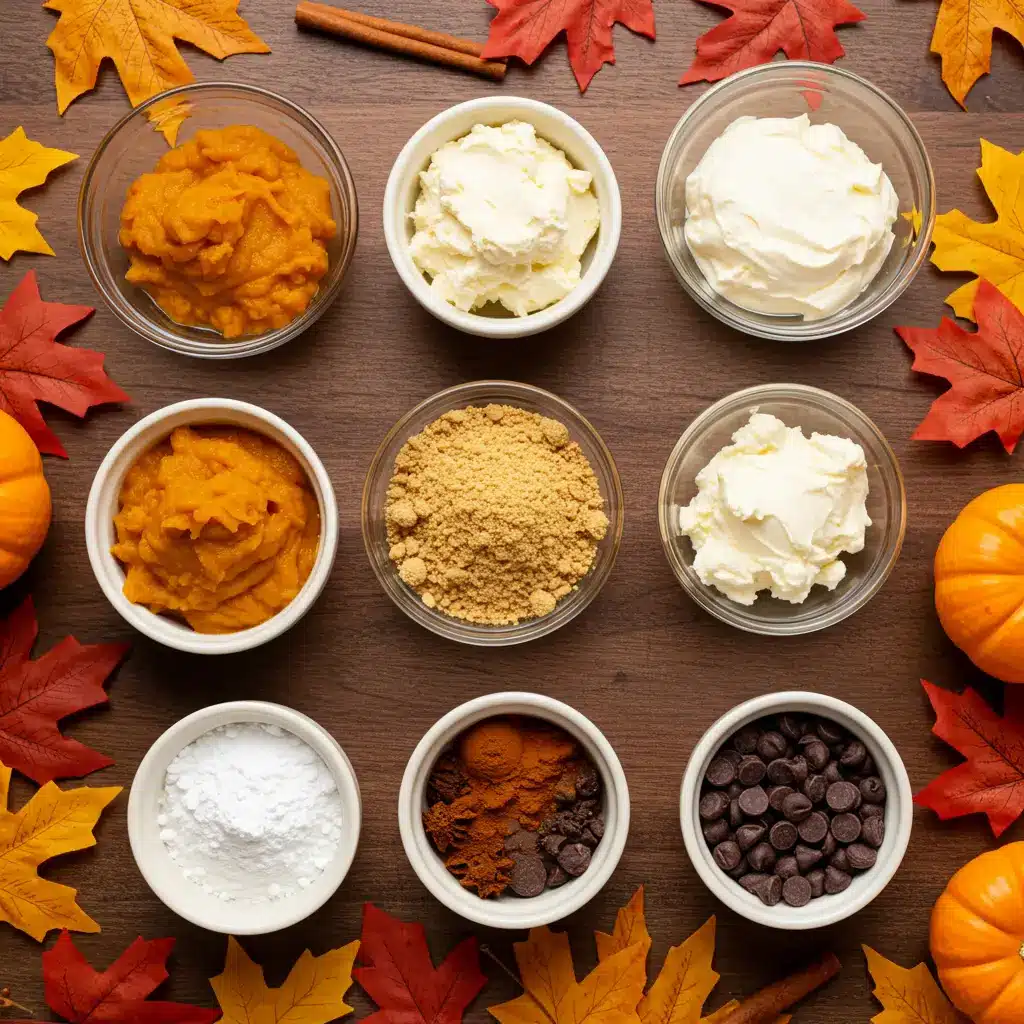
Ingredients You’ll Need for No Bake Pumpkin Cheesecake Balls
Before we dive into mixing and rolling, let’s talk about what goes into these irresistible little bites. Each ingredient plays a role in creating that creamy, spiced, and chocolate-dipped magic that makes these No Bake Pumpkin Cheesecake Balls so memorable.
- Cream Cheese (8 oz, softened): This is the silky base that gives the balls their rich, cheesecake-like texture. Make sure it’s softened at room temperature so it blends smoothly without lumps.
- Pumpkin Purée (1 cup, canned): The star of the show! Pumpkin purée adds natural sweetness, moisture, and that unmistakable fall flavor. (Tip: be sure you’re using pure pumpkin purée and not pumpkin pie filling, which already has added sugar and spices.)
- Powdered Sugar (1 cup): Adds sweetness while keeping the mixture smooth and creamy. It also balances the tanginess of the cream cheese.
- Vanilla Extract (1 tsp): A little splash of vanilla brings warmth and rounds out all the flavors.
- Ground Cinnamon (1 tsp): Cinnamon is the cozy spice that makes these bites taste like fall in every bite.
- Ground Nutmeg (½ tsp): Nutmeg adds depth and pairs beautifully with pumpkin.
- Ground Ginger (¼ tsp): A touch of ginger brings a gentle zing and prevents the flavor from being too flat.
- Ground Cloves (Pinch, optional): Cloves are powerful, so just a pinch adds that nostalgic pumpkin pie aroma.
- Graham Cracker Crumbs (2 cups): These act as the structure of your cheesecake balls. They hold everything together while adding a subtle honey sweetness and crunch. If you’re as obsessed with graham cracker-based desserts as I am, you’ll also love my Cinnamon Roll Cookies which use a similar cozy base.
- Chocolate (white or milk, for dipping): Because what’s a cheesecake ball without a luscious chocolate shell? You can use candy melts, white chocolate, or milk chocolate depending on your preference.
- Optional Toppings: Extra graham cracker crumbs, chopped pecans, or even sprinkles. These not only look beautiful but add extra crunch and personality.
These ingredients come together in the easiest way possible—no baking, no complicated techniques, just wholesome mixing, rolling, and dipping. That’s why these No Bake Pumpkin Cheesecake Balls are a favorite in my kitchen every fall.
Step-by-Step Instructions for Making No Bake Pumpkin Cheesecake Balls
Making these creamy, dreamy cheesecake bites is as simple as mix, roll, and chill. But since I know the little details make a big difference (especially when you’re baking…or in this case, not baking), I’ve laid out each step with plenty of tips so you’ll feel like I’m right there in your kitchen.
Step 1: Prepare the Cheesecake Mixture
In a large mixing bowl, add your softened cream cheese, pumpkin purée, powdered sugar, and vanilla extract. Using a hand mixer makes this part a breeze—you’ll want the mixture to be velvety smooth without any lumps. If you don’t have a mixer, a sturdy whisk and a little patience will do the trick.
👉 Personal tip: make sure your cream cheese is truly softened. If it’s too cold, you’ll be chasing chunks around the bowl instead of getting that creamy cheesecake base that makes No Bake Pumpkin Cheesecake Balls so irresistible.
Step 2: Spice It Up with Fall Flavors
Now for the cozy part—add the cinnamon, nutmeg, ginger, and optional cloves. These warm spices bring that nostalgic pumpkin pie flavor we all crave this time of year. Stir them in gently until they’re evenly distributed.
If you love spice-forward recipes like I do, you’ll also enjoy my Pumpkin Sugar Cookies with Cream Cheese Frosting. They use a similar spice blend that makes the whole house smell like fall.
Step 3: Fold in the Graham Cracker Crumbs
Next, fold in your graham cracker crumbs a little at a time. They thicken the mixture and help everything hold together. If the mixture feels a bit too sticky, don’t panic—just add a few extra crumbs until it reaches a texture that can be rolled without sticking to your hands.
This is the magic moment where cheesecake meets pumpkin pie, and suddenly you’ve got a mixture that tastes like dessert heaven.
Step 4: Roll Into Bite-Sized Balls
Grab a cookie scoop or tablespoon to keep the sizes even, then roll the mixture between your palms into smooth, bite-sized balls. Place each one onto a parchment-lined baking sheet. Don’t worry if they’re not perfectly round—honestly, that homemade look just makes them more charming!
Step 5: Chill to Firm
Pop the tray into the refrigerator for at least one hour. This step is crucial—it allows the cheesecake balls to firm up, making them much easier to dip in chocolate later. Think of it as giving your dessert a little spa break before the big chocolate bath.
Step 6: Melt the Chocolate
In a microwave-safe bowl, melt your white or milk chocolate chips (or candy melts) in 30-second bursts, stirring in between each until silky smooth. Be patient here—rushed chocolate almost always leads to burning. A double boiler on the stovetop works too if you prefer a gentler method.
Step 7: Dip the Cheesecake Balls
Using a fork or dipping tool, carefully lower each chilled ball into the melted chocolate, letting the excess drip back into the bowl. Place them back onto the parchment paper. If you’re making a large batch, work in small sections so the chocolate doesn’t firm up before you finish.
Step 8: Add Fun Finishes (Optional)
Before the chocolate sets, roll the coated cheesecake balls in extra graham cracker crumbs, crushed nuts, or even festive sprinkles. This not only adds texture but also makes your No Bake Pumpkin Cheesecake Balls look bakery-worthy.
Step 9: Final Chill
Place the tray back in the fridge for about 30 minutes, or until the chocolate coating is firm. This final chill locks in the flavors and makes sure the balls stay intact when you serve them.
Step 10: Serve and Enjoy!
Now the best part—enjoying your creation! These cheesecake balls are best served chilled and make the perfect bite-sized treat for holiday gatherings, school parties, or cozy nights in. Store any extras (if you manage to have leftovers!) in an airtight container in the refrigerator for up to five days.
For more no-bake inspiration, check out my No Bake Cookies Recipe—another easy favorite when the oven just feels like too much effort.
Tips and Tricks for Perfect No Bake Pumpkin Cheesecake Balls
- Too soft to roll? Just add extra graham cracker crumbs until they hold shape.
- Chocolate hack – A little coconut oil added to melted chocolate makes dipping smoother.
- Fun twist – Try dark chocolate for a richer bite or roll in toasted pecans for extra crunch.
- Kid-friendly tip – Let kids help roll the balls (messy, but worth the giggles).
- Storage tip – These taste even better the next day after the flavors mingle.
This recipe became a family favorite when I brought them to a fall gathering and my kids proudly announced, “Mom made pumpkin candy!” From then on, these little guys became a seasonal staple.
Storage for No Bake Pumpkin Cheesecake Balls
- Store in an airtight container in the fridge for up to 5 days.
- Freeze (before dipping in chocolate) for up to 2 months. Just thaw in the fridge overnight and dip when ready.
FAQs
Can I make these ahead of time?
Absolutely! They’re perfect for prepping the night before a party.
Can I skip the chocolate?
Sure! Roll them in graham cracker crumbs or cinnamon sugar for a lighter version.
Can I make them gluten-free?
Yes—just swap graham crackers with gluten-free crumbs.
Conclusion
These No Bake Pumpkin Cheesecake Balls are the perfect bite-sized treat when you need something festive, creamy, and oh-so-cozy. Whether you’re making them for a family get-together, holiday party, or just a Friday night snack attack, they’ll disappear faster than you can say “pumpkin spice.”
If you loved these, you might also enjoy my Pumpkin Cheesecake Cookies or Pumpkin Protein Balls.
So grab your pumpkin puree and let’s make this fall extra sweet—one cheesecake ball at a time.
Follow us on Pinterest for weekly slow cooker inspiration, or join the conversation over on our Facebook page where fellow food lovers share their favorite comfort meal.
Print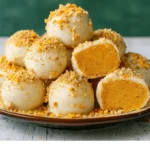
No Bake Pumpkin Cheesecake Balls – Best Fall Dessert Ever
- Prep Time: 20 minutes
- Cook Time: 0 minutes
- Total Time: 2 hours
- Yield: 24 balls
- Category: Dessert
- Method: No Bake
- Cuisine: American
- Diet: Vegetarian
Description
Creamy, spiced, and dipped in chocolate—these easy no bake pumpkin cheesecake balls are the perfect fall dessert that require no oven time!
Ingredients
8 oz (225 g) cream cheese, softened
1 cup canned pumpkin puree
1 cup powdered sugar
1 tsp vanilla extract
1 tsp ground cinnamon
1/2 tsp ground nutmeg
1/4 tsp ground ginger
Pinch of ground cloves (optional)
2 cups graham cracker crumbs
White chocolate or milk chocolate chips or candy melts (for dipping)
Extra graham cracker crumbs or crushed nuts (for rolling, optional)
Instructions
1. In a large mixing bowl, combine the softened cream cheese, pumpkin puree, powdered sugar, and vanilla extract. Mix until smooth and well combined.
2. Add the ground cinnamon, nutmeg, ginger, and optional cloves. Stir to incorporate the spices evenly.
3. Gradually fold in the graham cracker crumbs. Mix until the texture is thick enough to roll into balls. Add more crumbs if needed.
4. Use a tablespoon or cookie scoop to portion out the mixture. Roll into bite-sized balls and place on a parchment-lined baking sheet.
5. Refrigerate the balls for at least 1 hour to firm up.
6. Melt the chocolate chips or candy melts in a microwave-safe bowl, heating in 30-second intervals and stirring until smooth.
7. Dip each chilled ball into the melted chocolate using a fork or dipping tool. Let excess chocolate drip off before placing back on the sheet.
8. Optionally, roll dipped balls in extra graham cracker crumbs, crushed nuts, or sprinkles before the chocolate sets.
9. Refrigerate the coated balls for about 30 minutes, or until the chocolate is firm.
10. Serve chilled and enjoy! Store leftovers in an airtight container in the refrigerator for up to 5 days.
Notes
If your mixture feels too soft to roll, simply add more graham cracker crumbs a little at a time until it’s firm enough. These are great made a day ahead and can be frozen for longer storage.