Peri Peri Chicken is that fiery, flavor-packed meal that instantly transports your taste buds straight to Portugal. If you’ve ever craved something with just the right amount of spice—enough to make you fan your mouth a little but still go back for more—this recipe is your new best friend. With juicy, golden-brown chicken drenched in a bold marinade made from paprika, lemon, garlic, and chili flakes, Peri Peri Chicken hits all the right notes of tangy, smoky, and spicy.
Whether you grill it outdoors on a sunny weekend or roast it in the oven while wrangling kids and answering emails, it’s guaranteed to impress. The best part? It’s surprisingly simple to make, and you can tweak the heat to match your mood (or your family’s spice tolerance). Get ready to meet your new weeknight favorite that’s bursting with personality—and yes, leftovers taste even better.
Table of Contents
What is Peri Peri Chicken?
Peri Peri Chicken, often called “Piri Piri Chicken,” originated in Portuguese and African cuisine, combining the warmth of Mediterranean herbs with the fiery punch of African bird’s eye chili. Traditionally, it’s marinated in a zesty sauce made from olive oil, lemon, garlic, paprika, and chili, then grilled or roasted to perfection. The marinade does all the heavy lifting, infusing the chicken with a smoky, tangy depth of flavor that’s both addicting and comforting.
This dish is the perfect mix of spicy and savory—bold enough to keep things interesting but balanced enough that you’ll keep going back for seconds. While it’s a classic in Portuguese kitchens, it’s become a global favorite, popping up in everything from backyard BBQs to cozy family dinners. Think of it as the ultimate flavor adventure—warm, robust, and just a little rebellious.
Reasons to Try Peri Peri Chicken
Let’s be honest—chicken can get a little… well, boring. But Peri Peri Chicken changes that story in one spicy swoop. First, it’s ridiculously flavorful. The marinade seeps deep into the meat, giving every bite a perfect balance of heat, citrus, and smokiness. Second, it’s versatile. Grill it, roast it, or even pan-sear it—this recipe fits your mood and your schedule.
Third, it’s crowd-approved. Even picky eaters find something to love (especially if you tone down the spice). Plus, it’s made with simple, wholesome ingredients you probably already have in your kitchen. Finally, it’s a low-fuss recipe that delivers high-end flavor. Perfect for busy weeknights or lazy weekends, Peri Peri Chicken is one of those meals that make you look like you spent hours cooking—but really didn’t. And if you’re into meal prepping, it’s a dream come true because it reheats beautifully.
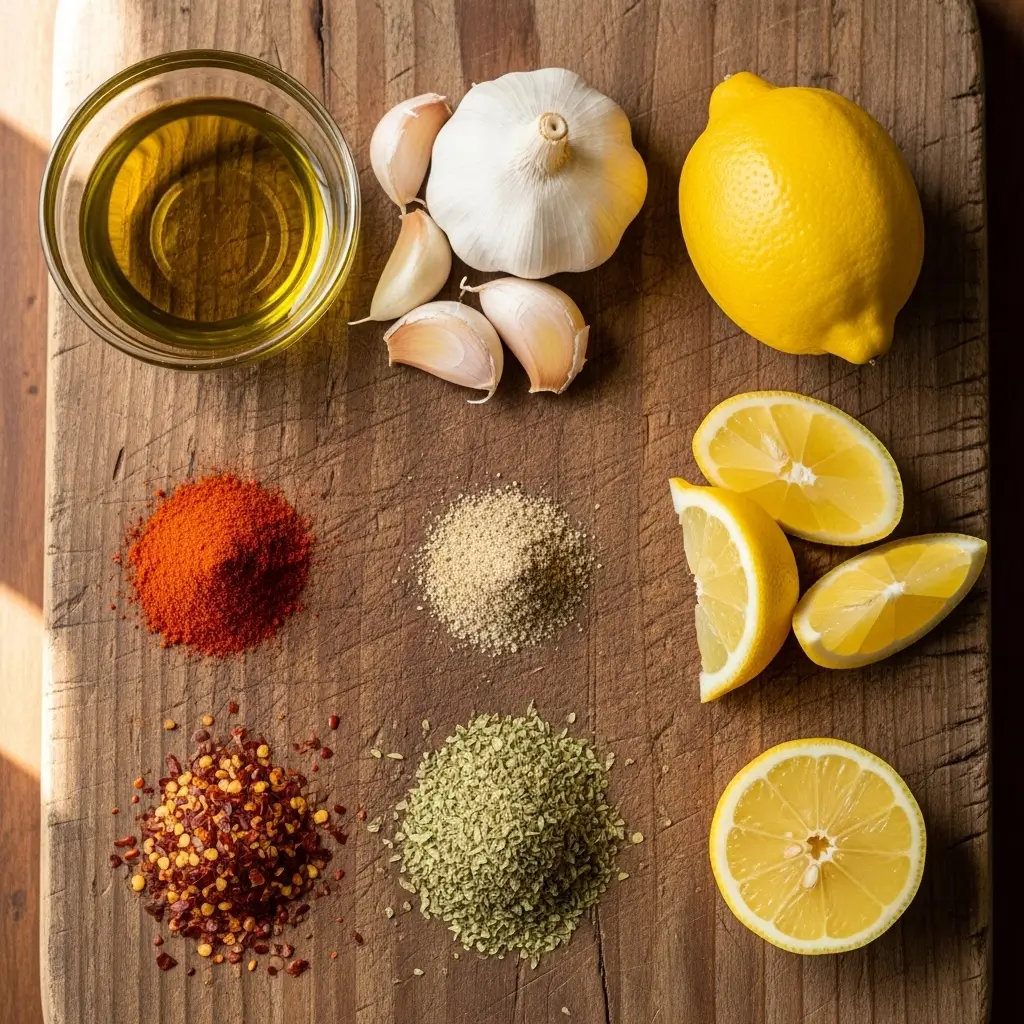
Ingredients Needed to Make Peri Peri Chicken
- 1 whole chicken, cut into pieces
- ¼ cup olive oil
- 4 cloves garlic, minced
- 2 lemons, juiced
- 2 tablespoons paprika
- 1 tablespoon dried oregano
- 1 tablespoon chili flakes
- Salt and pepper, to taste
Instructions to Make Peri Peri Chicken – Step by Step
Step 1: Prepare the Peri Peri Marinade
Start with the heart of this recipe—the marinade. In a medium bowl, whisk together olive oil, minced garlic, lemon juice, paprika, oregano, chili flakes, salt, and pepper. The scent alone might make you swoon—it’s fresh, tangy, and smoky all at once. Think of this as your secret weapon for turning plain chicken into something crave-worthy. If you like a smoother texture, toss everything in a blender and give it a quick whirl. The sauce should be thick enough to coat the chicken but still pourable.
Step 2: Marinate the Chicken
Place your chicken pieces in a large resealable bag or shallow dish. Pour the marinade over the chicken and make sure each piece gets a generous coating. Use your hands (or a spoon, if you’re not into the messy fun) to rub the marinade in—especially under the skin where all the flavor magic happens. Once coated, seal it up and let it rest in the fridge for at least 2 hours. Overnight is even better if you have the time. This step allows the flavors to soak deep into the meat, giving you juicy, flavorful chicken that tastes like a restaurant-quality dish.
Step 3: Preheat Your Grill or Oven
When you’re ready to cook, take the chicken out of the fridge and let it sit at room temperature for about 20 minutes. This helps it cook more evenly. Preheat your grill to medium-high or set your oven to 400°F. If you’re using a grill, lightly oil the grates so the chicken doesn’t stick. If you’re roasting, line a baking sheet with foil or parchment paper to make cleanup easy (because who has time for scrubbing pans on a weeknight?).
Step 4: Cook the Chicken
Place the chicken pieces on the grill or baking sheet. Cook for 25–30 minutes, turning occasionally to get those gorgeous char marks. You’ll know it’s done when the internal temperature hits 165°F and the juices run clear. The aroma will fill your kitchen with hints of garlic, lemon, and smoky spice—basically, pure heaven. If you’re using the oven, you can broil it for the last few minutes for that perfect crispy finish.
Step 5: Serve and Garnish
Once your Peri Peri Chicken is cooked to perfection, let it rest for about 5 minutes. This allows the juices to settle, keeping every bite tender and moist. Garnish with fresh herbs (like parsley or cilantro) and a few lemon wedges for extra zest. For a balanced plate, serve it with sides like grilled vegetables, couscous, or a simple salad. The combination of smoky chicken and bright, fresh sides is a total win. And if you want to pair it with another mouthwatering chicken recipe, check out Easy Skillet Chicken Thighs or Simple Roasted Chicken Pieces.
What to Serve with Peri Peri Chicken
Peri Peri Chicken pairs beautifully with a variety of sides. For a classic Portuguese-style meal, serve it with crispy roasted potatoes or fluffy white rice. If you’re going for a lighter vibe, try it with a fresh garden salad or grilled veggies. Craving something more comforting? Garlic bread or a creamy pasta dish works wonders. For summer barbecues, toss it alongside corn on the cob or coleslaw. And if you want to stay on the healthy side, this chicken pairs perfectly with Quinoa and Veggie Power Bowls. Whatever you choose, keep it simple—the chicken’s bold flavors do all the talking.
Key Tips for Making Peri Peri Chicken
- Marinate for longer: If possible, let the chicken marinate overnight. The flavors deepen and create an incredible tenderness.
- Adjust the spice: Love heat? Add more chili flakes or a splash of hot sauce. Want it milder? Cut back on the chili and add a bit more lemon juice.
- Don’t skip the resting time: Letting the chicken rest after cooking keeps it juicy.
- Grill for flavor: While you can roast or pan-sear, grilling gives that authentic smoky edge that makes this dish irresistible.
- Batch prep: Make extra marinade and store it for future meals—it’s amazing on shrimp, tofu, or veggies too!
Storage and Reheating Tips for Peri Peri Chicken
Store leftover Peri Peri Chicken in an airtight container in the fridge for up to 4 days. To reheat, warm it in the oven at 350°F for 10–12 minutes or in a skillet with a splash of water or olive oil to keep it moist. You can also microwave it in short bursts, though the texture is best when reheated gently. For meal prep, freeze the marinated raw chicken for up to 3 months. When you’re ready to cook, just thaw it overnight in the fridge and grill as usual. Bonus: the marinade actually gets richer over time, so it’s a win-win.
FAQs
Can I make Peri Peri Chicken with chicken breasts or thighs only? Absolutely. Chicken thighs stay juicier, but breasts work great too—just adjust cooking time.
Is Peri Peri Chicken super spicy? It’s as spicy as you want it to be! Adjust the chili flakes to your liking.
Can I bake instead of grill? Yes, bake at 400°F for about 30 minutes, then broil for 2–3 minutes to crisp it up.
What does Peri Peri mean? “Peri Peri” refers to the chili pepper used in the sauce, originally from Africa.
What can I do with leftovers? Shred the chicken for wraps, salads, or even spicy sandwiches—it’s delicious cold too.
Final Thoughts
Peri Peri Chicken is one of those dishes that delivers every single time. It’s bold, comforting, and packed with that punchy flavor you didn’t know your weeknight dinners were missing. Whether you’re cooking for family, friends, or just yourself after a long day, this recipe proves that “homemade” doesn’t have to mean complicated. Grab your spices, fire up that grill (or oven), and let the magic happen. And when you’re ready to try more crowd-pleasers, don’t miss our Cowboy Butter Chicken Bites or Creamy Garlic Parmesan Chicken Thighs. Here’s to flavorful meals and happy bellies!
Follow us on Pinterest for weekly slow cooker inspiration, or join the conversation over on our Facebook page where fellow food lovers share their favorite comfort meal.
Print
Peri Peri Chicken (Portuguese Style) – Bold, Spicy, and Totally Addictive
- Prep Time: 15 minutes
- Cook Time: 30 minutes
- Total Time: 45 minutes
- Yield: 4 servings
- Category: Main Course
- Method: Grilling
- Cuisine: Portuguese
Description
Enjoy the bold and spicy flavors of Peri Peri Chicken (Portuguese Style) – a dish that combines succulent chicken with a fiery Peri Peri marinade. Perfect for grilling, roasting, or pan-searing, this versatile recipe is a crowd-pleaser at any gathering or family dinner.
Ingredients
- 1 whole chicken, cut into pieces
- 1/4 cup olive oil
- 4 cloves garlic, minced
- 2 lemons, juiced
- 2 tablespoons paprika
- 1 tablespoon dried oregano
- 1 tablespoon chili flakes
- Salt and pepper to taste
Instructions
1. In a bowl, combine olive oil, minced garlic, lemon juice, paprika, oregano, chili flakes, salt, and pepper. Mix well to create the Peri Peri marinade.
2. Place the chicken pieces in a large resealable bag and pour the marinade over them. Ensure each piece is coated evenly. Marinate in the refrigerator for at least 2 hours, preferably overnight.
3. Preheat your grill or oven to medium-high heat. Remove the chicken from the marinade and grill or roast until cooked through, with beautiful char marks on the outside.
4. Serve your Peri Peri Chicken hot, garnished with fresh herbs and lemon wedges. Pair it with grilled vegetables or a side salad for a complete meal.
Notes
For best results, marinate the chicken overnight to let the flavors fully infuse.
Adjust the amount of chili flakes to control the spice level to your preference.
This recipe works great with chicken thighs or drumsticks as well.