Pizza Rolls — just saying it makes you think of gooey cheese, a warm crust, and the smell of a pizzeria in your kitchen, doesn’t it? These homemade pizza rolls are a fun twist on everyone’s favorite comfort food. Think cinnamon rolls… but stuffed with melty mozzarella, tangy pizza sauce, and pepperoni. They’re perfect for game nights, family snacks, or that “just one more bite” moment we all know too well.
The best part? They’re ready in under an hour and can be customized however you like — veggie-loaded, extra saucy, or all about that cheese life. Whether you’re making them for kids, friends, or just yourself (no judgment), this pizza rolls recipe delivers big on flavor and ease. So grab your rolling pin and let’s make your kitchen smell like heaven.
Table of Contents
What Is Pizza Rolls?
Pizza rolls are like the delicious middle ground between classic pizza and handheld snacks. Instead of the traditional round crust, these are made by rolling pizza dough with sauce, cheese, and toppings, then slicing and baking them into little spirals of joy.
Each bite is packed with flavor — crispy on the outside, cheesy and saucy on the inside. The beauty of this pizza rolls recipe lies in its versatility; you can go traditional with pepperoni and mozzarella or get creative with veggies, sausage, or even a sprinkle of crushed red pepper for a spicy kick. It’s the kind of recipe that feels homemade but still has that “takeout night” magic. Perfect for anyone who wants pizza night without the hassle of delivery or cleanup.
Reasons to Try Pizza Rolls
If you need convincing to make these, let’s talk reasons. First, pizza rolls are ridiculously simple — no complicated steps or fancy equipment. They’re also a huge hit with kids and adults alike, which means you can kiss picky-eater stress goodbye. They bake in less than 20 minutes, making them perfect for busy weeknights, game-day spreads, or quick appetizers when guests surprise you. Plus, the smell alone will make you look like a kitchen hero.
You can prep them ahead, chill, and bake when you’re ready. Pair them with a fresh salad or soup (like this Easy One-Pot Creamy Vegetable Soup), and dinner’s done. Homemade pizza rolls also taste miles better than frozen — no mystery fillings, just real cheese and your favorite ingredients rolled up in buttery dough bliss.
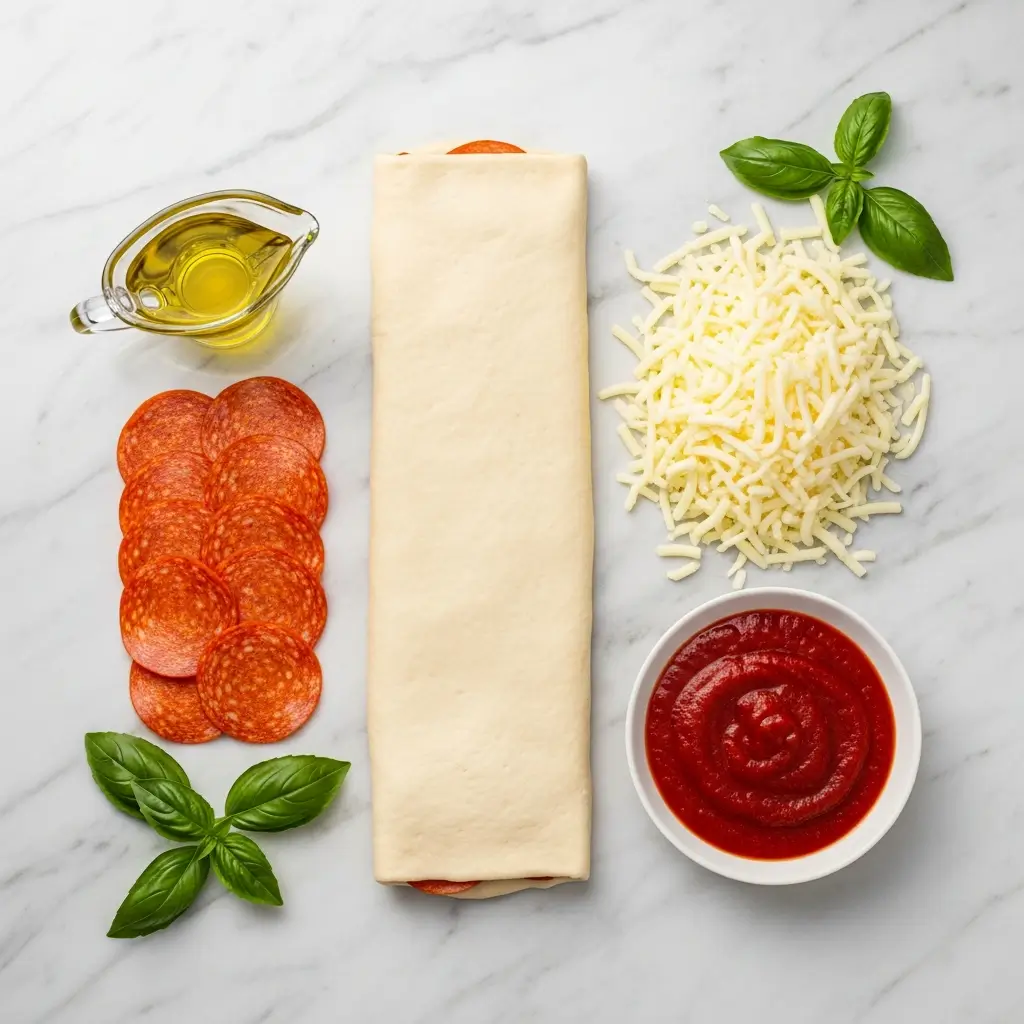
Ingredients Needed to Make Pizza Rolls
- 1 homemade pizza dough (or store-bought if you’re in a pinch)
- Olive oil for brushing
- ¼–⅓ cup (65–90 g) pizza sauce
- 6 oz (170 g) shredded mozzarella cheese
- Pepperoni (optional, but highly recommended)
- 2 Tablespoons (28 g) salted butter, melted
- Grated parmesan cheese (optional, for that extra “wow” factor)
- Fresh or dried basil for sprinkling
Instructions to Make Pizza Rolls
Making these pizza rolls is easier than you might think — and honestly, a little fun too. Below is a step-by-step guide that walks you through every part of the process so you can enjoy perfectly golden, cheesy, and crowd-pleasing pizza rolls every time. Whether you’re a total beginner or a kitchen pro, this step-by-step method will make you feel confident (and maybe even a little proud) when that first batch comes out of the oven.
Step 1: Prepare and Roll the Dough
Let’s kick things off with the base — the dough. You can use your favorite homemade pizza dough (check out this healthy homemade pizza dough alternative if you’re into lighter versions) or store-bought to save time. Once your dough is ready and has finished rising, transfer it to a lightly floured surface. Using a rolling pin, roll the dough into a smooth rectangle about 15×9 inches. Don’t worry about getting it perfect; rustic edges just mean it’s made with love. The goal is to create a thin, even layer that will roll up easily without tearing.
Step 2: Add Flavor and Texture
Now comes the fun part — layering the good stuff! Brush a thin coating of olive oil across the surface of your dough. This helps create a crisp, golden bottom when baked and adds that irresistible flavor you get from pizzeria-style crusts. Then, spread your favorite pizza sauce evenly, leaving about a ¼-inch border around the edges (this keeps everything tidy when rolling).
Sprinkle shredded mozzarella cheese generously — you want every bite to be gooey and satisfying. Top with pepperoni slices, or mix it up with sautéed mushrooms, bell peppers, or even spinach if you prefer something veggie-packed. For more inspiration on flavorful ingredient swaps, peek at our Seared Garlic Chicken Penne in Mozzarella Cajun Sauce — the Cajun-style seasoning works beautifully here too.
Step 3: Roll It Up (Nice and Tight)
Starting from the long edge of the rectangle, begin rolling the dough into a tight log, just like you would a cinnamon roll. Take your time and roll firmly to avoid air pockets — that’s the key to achieving beautiful, even spirals when cut. Once rolled, transfer the log onto a parchment-lined baking tray or plate. This step-by-step chilling process is essential because it helps the dough firm up, making it easier to slice later. Chill the roll in the refrigerator for at least 15 minutes. If you’re planning ahead, you can cover it with plastic wrap and refrigerate for up to 24 hours.
Step 4: Slice Like a Pro
When your dough has chilled, preheat your oven to 400°F (205°C) and line a baking sheet with parchment paper. Use a serrated knife to slice your roll into 1-inch pieces — this type of knife keeps the shape intact and prevents squishing. Each slice should reveal a perfect swirl of sauce, cheese, and toppings (a sight that’s basically kitchen joy). Arrange the rolls flat-side down on your prepared baking sheet, leaving about an inch of space between each so they bake evenly. If you want to brush up on knife safety or proper slicing methods, you can check out our tips in Easy Honey Pepper Chicken Pasta where we discuss kitchen prep basics.
Step 5: Add a Buttery Finish
Melt 2 tablespoons of salted butter and lightly brush the tops of each roll. This isn’t just for looks — it gives your pizza rolls that golden, slightly crisp finish that makes them utterly irresistible. You can even mix a pinch of garlic powder or Italian seasoning into the butter for an aromatic boost. This step-by-step touch turns simple rolls into bakery-worthy bites.
Step 6: Bake to Perfection
Place your baking sheet on the center rack and bake the pizza rolls for 15–18 minutes, or until the edges turn golden brown and your kitchen smells like an Italian dream. Keep an eye on them during the last few minutes; every oven runs differently, and you don’t want to overbake. The cheese should be melted and bubbly, with just the right amount of crisp on the edges.
Step 7: Garnish and Serve
Once baked, pull your pizza rolls from the oven and let them cool slightly — though good luck resisting that cheesy temptation. Sprinkle freshly grated parmesan and a pinch of chopped basil (fresh or dried) over the warm rolls. This step-by-step final flourish adds a burst of flavor and color that makes them look as good as they taste.
Serve them as a snack, appetizer, or side dish. For a full meal idea, pair them with a cozy bowl of Creamy White Chicken Lasagna Soup or a fresh salad from your favorite greens. They also pair beautifully with a dipping sauce — marinara, ranch, or even a homemade garlic butter.
Step 8: Bonus Step — Store and Reheat
If (and that’s a big if) you have leftovers, store them in an airtight container in the fridge for up to three days. When ready to reheat, pop them in the oven or air fryer at 350°F for about 5 minutes. This step-by-step reheating trick keeps them crisp and melty, just like they were fresh from the oven. Avoid the microwave if you can — it tends to soften the crust too much.
Pro Tip: Want a fun twist? Try making mini versions for party platters or swap the pepperoni for turkey slices for a lighter bite. And if you’re craving something new but in the same comfort-food family, our Dump and Bake Meatball Casserole gives off similar “cozy night in” vibes.
With this step-by-step pizza rolls recipe, you’ll have an easy, family-friendly snack that’s as satisfying as it is simple to make. Now go ahead — grab that dough and roll up something delicious.
What to Serve with Pizza Rolls
Pizza rolls are the ultimate versatile snack. Serve them with extra pizza sauce or ranch for dipping, a crisp garden salad, or even a bowl of soup. They make a killer side for pasta dishes like Smoky BBQ Cheddar Chicken Skillet Pasta or alongside a cozy bowl of Creamy White Chicken Lasagna Soup. For game days, serve them with a variety of dips — garlic butter, spicy marinara, or even creamy Caesar. And if you’re going for a casual dinner, pair them with roasted veggies or a big antipasto board. The possibilities? Endless (and delicious).
Key Tips for Making Pizza Rolls
A few tricks make all the difference. First, chill the rolled dough before cutting — it keeps the rolls neat. Use a serrated knife for clean slices. If your sauce is watery, pat it with a paper towel before spreading to avoid soggy rolls. For extra crisp edges, bake them on the center rack. Don’t skip brushing with butter — it gives that irresistible golden glow. And if you want to make them ahead, prep the rolls, cover them tightly, and chill overnight. When ready to bake, just pop them in the oven. Want to go plant-based? Try my Vegan Caramelized Onion Spinach Pizza Rolls for a delicious twist.
Storage and Reheating Tips for Pizza Rolls
Store leftover pizza rolls in an airtight container in the fridge for up to three days. Reheat them in an oven or air fryer at 350°F (175°C) for about 5–7 minutes to bring back their crispiness — microwaving makes them soft, so skip that if you can. You can also freeze unbaked rolls: place them on a tray, freeze until solid, then store in a freezer bag. When you’re ready to bake, just add a few extra minutes to the cooking time. Homemade pizza rolls are the gift that keeps on giving — perfect for meal prep, lunchboxes, or those late-night cravings.
FAQs
Can I use store-bought dough? Absolutely. It saves time, and the results are still delicious.
What if I don’t eat meat? Swap pepperoni for mushrooms, spinach, or roasted peppers.
Can I make them gluten-free? Yep! Just use a gluten-free pizza dough base.
Can these be made ahead? Yes — assemble, chill, and bake when ready.
Final Thoughts
There’s something wildly comforting about pizza rolls — they bring the joy of pizza without the fuss. Whether you’re baking for a party, your kids, or just because you deserve a treat, these cheesy bites never disappoint. They’re quick, customizable, and dangerously snackable. For more cozy, family-friendly recipes, check out my Cheesy Chicken Crescent Rolls or Bang Bang Shrimp Tacos. As always, I hope your kitchen smells amazing and your plate’s always full.
Follow us on Pinterest for weekly slow cooker inspiration, or join the conversation over on our Facebook page where fellow food lovers share their favorite comfort meal.
Print
Pizza Rolls Recipe: Easy, Cheesy, and Totally Addictive
- Prep Time: 35 minutes
- Cook Time: 15 minutes
- Total Time: 45 minutes
- Yield: 14 servings
- Category: Appetizer, Bread, Side Dish, Snack
- Method: Baking
- Cuisine: American
- Diet: Vegetarian
Description
Pizza rolls are a savory, cheese-filled take on cinnamon rolls, made with pizza dough, sauce, and your favorite toppings. Perfect as an appetizer, snack, or fun twist on pizza night.
Ingredients
- 1 homemade pizza dough
- Olive oil for brushing
- 1/4–1/3 cup (65–90 g) pizza sauce
- 6 oz (170 g) shredded mozzarella cheese
- Pepperoni (optional)
- 2 tbsp (28 g) salted butter, melted
- Grated Parmesan cheese, for sprinkling (optional)
- Fresh shredded basil or dried basil, for sprinkling (optional)
Instructions
1. Prepare pizza dough as instructed. Once risen, turn dough out onto a floured surface and knead briefly until smooth.
2. Roll dough into a 15×9-inch (38×23 cm) rectangle.
3. Brush surface lightly with olive oil. Spread pizza sauce evenly, leaving a 1/4-inch (0.6 cm) border.
4. Sprinkle mozzarella evenly over the sauce, then layer pepperoni if using.
5. Starting from the long side, roll the dough tightly into a log.
6. Place the log on a parchment-lined tray and refrigerate for at least 15 minutes. If chilling longer, cover with plastic wrap.
7. Preheat oven to 400°F (205°C) and line a baking sheet with parchment.
8. Remove the log from the fridge and slice into 1-inch (2.5 cm) segments using a serrated knife.
9. Arrange slices on the prepared baking sheet, spacing 1 inch apart.
10. Brush the tops with melted butter.
11. Bake for 15–18 minutes on the center rack until golden brown on the edges.
12. Sprinkle with Parmesan and basil if desired. Cool slightly before serving.
Notes
Chilling the dough before slicing helps keep the rolls from unraveling while baking.
Customize with your favorite toppings like sausage, peppers, or mushrooms.
Store leftovers in an airtight container in the refrigerator for up to 3 days.