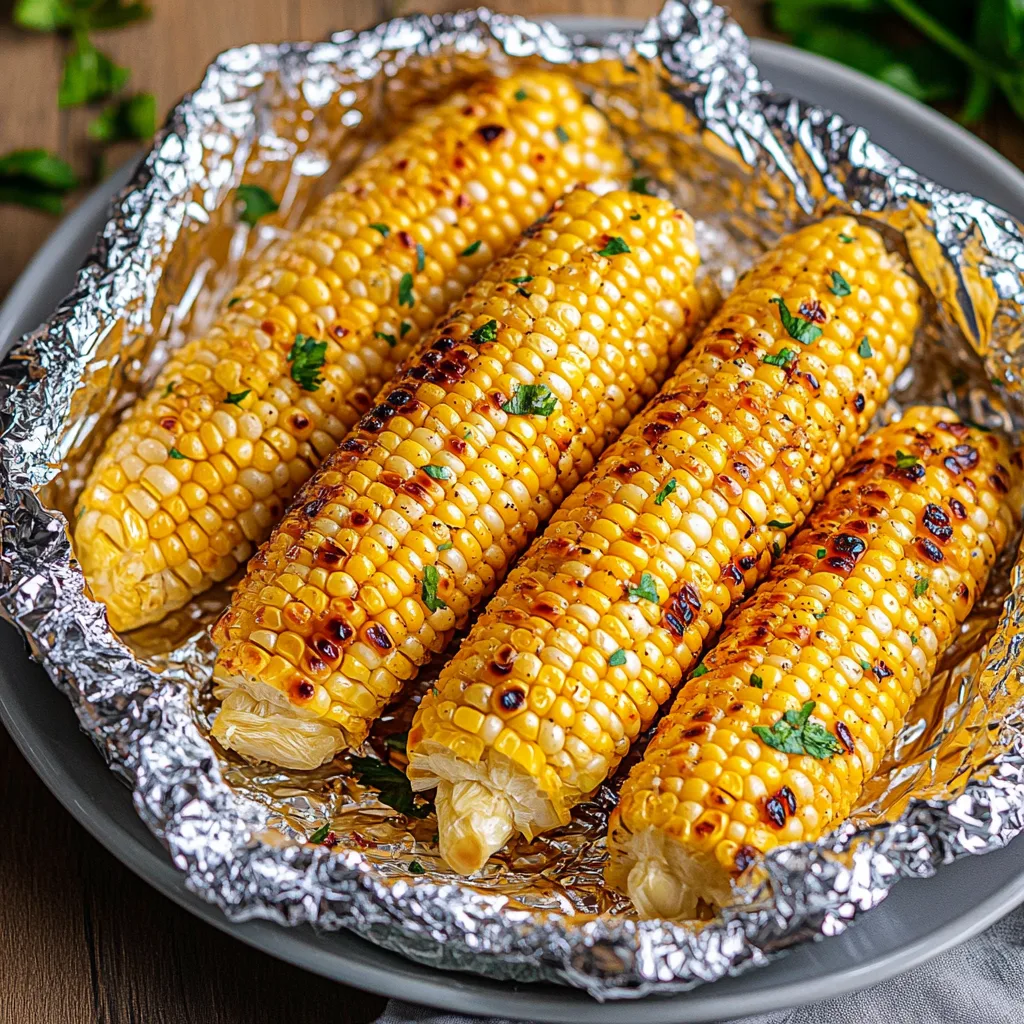
Grilled Corn on the Cob in Foil is a summer staple that combines smoky heat with tender sweetness. Wrapped in shiny foil packets, this method keeps the corn moist while infusing it with bold flavor. Whether you’re hosting a backyard cookout or craving a quick, wholesome side, this recipe delivers every time. The foil packets make grilling effortless, and the result is a dish that feels both rustic and refined. With just a few ingredients and minimal prep, you’ll be savoring golden, buttery ears of corn in 30 minutes flat.
What makes this technique special is the way the foil locks in moisture, creating a tender, juicy bite. Unlike traditional grilled corn (which dries out in direct heat), foil-wrapped versions stay plump and fresh, with char marks that add depth. The kiss of garlic and salt in the butter mixture elevates the natural sweetness, making each kernel a burst of flavor. It’s a recipe that bridges casual family meals and elegant gatherings, proving how simple ingredients can transform into something extraordinary.
What is Grilled Corn on the Cob in Foil?
Grilled Corn on the Cob in Foil is a classic American side dish with a clever twist. The method dates back to the early 20th century, when home cooks discovered that wrapping vegetables in foil prevented them from drying out over open flames. For corn, this means preserving its tender texture while still achieving those coveted charred edges. The foil acts as a portable pan, shielding the kernels from direct heat while allowing steam to soften the cob evenly.
The heart of the recipe lies in the butter mixture. A blend of softened butter, salt, garlic powder, and pepper creates a rich, savory coating that soaks into the corn as it cooks. The foil also makes grilling accessible for beginners, as it eliminates the need to constantly rotate the cobs. This method is particularly beloved in Southern and Texas kitchens, where corn is a dietary cornerstone. What sets it apart is the balance of smokiness from the grill and the tender, juicy bite of the corn itself.
Reasons to Try Grilled Corn on the Cob in Foil
This dish is a summer essential for its simplicity and flavor. The foil-wrapping technique ensures perfect results, even for novice cooks. Unlike other grilling methods that require constant attention, this recipe allows you to set it and forget it. The buttery, slightly charred flavor is addictively good, and the versatility of the technique—whether grilling, oven-baking, or freezing leftovers—makes it a year-round favorite.
It’s a matter of balance: the foil protects moisture, the grill adds smoky depth, and the seasonings highlight the corn’s natural sweetness. This makes it ideal for families, who appreciate a fuss-free side that pleases all palettes. For busy weeknights or festive gatherings, it’s a win-win. Plus, the parchment-like foil automatically creates a convenient serving tray, perfect for portable meals or potlucks. It’s a recipe that feels indulgent without being complicated—a hallmark of comfort food done right.
Ingredients Needed to Make Grilled Corn on the Cob in Foil
- 4 tablespoons softened butter
- ¼ teaspoon salt
- ½ teaspoon dried garlic powder (optional)
- ⅛ teaspoon ground black pepper (optional)
- 6 ears shucked corn
- Aluminum foil (double thickness recommended)
The wonders here are in simplicity. Use unsalted butter to control brininess, and softened it to blend smoothly with the seasonings. Garlic powder and pepper are optional but elevate the corn’s natural sweetness. For corn, choose fresh ears with a plump, unblemished husk. Pre-shucked corn saves time, though many enjoy the tactile experience of peeling back the husk themselves. The foil is crucial—for even grilling without direct flame exposure, double-layered sheets work best to prevent leaks or tears.
Instructions to Make Grilled Corn on the Cob in Foil – Step by Step
Step 1: Begin by preheating your grill to 400°F (200°C). Place the ears of corn shucked side-down on paper towels to absorb excess moisture. While the grill heats, in a small bowl, whisk together softened butter, salt, optional garlic powder, and pepper until smooth. A fork works nicely for mashing the mixture into an even consistency.
Step 2: Take 2 ears of corn and place them on a large sheet of aluminum foil. The size of the sheet should allow enough room to fold up the edges without crowding. Brush the butter mixture evenly over the corn, coating each kernel. Stack another ear of corn if using a larger packet, then fold the foil over the ears. Use the tines of a fork to crimp and seal the edges tightly, creating a tight-enough packet to hold in moisture but flexible enough to open on the grill.
Step 3: Carefully place the foil packets directly onto the preheated grill. Close the lid and let the corn cook undisturbed for 10 minutes. The indirect heat will begin melting the butter and steaming the corn, turning it tender. After 10 minutes, use tongs to lift the packet and carefully open one side to peek—there may be condensation, which is normal. Flip the packet over using the tongs and reseal the edges. Repeat this process for another 10-20 minutes, depending on your grill’s intensity, until the kernels feel tender when pierced with a knife.
Step 4: Once the corn is done, use oven mitts or tongs to remove the packets from the grill. Open one side of the packet and drain any excess liquid into the sink. Brush the ears with additional melted butter and sprinkle with extra flake salt if desired. Flatten the foil for serving or transfer to a platter, drizzling with fresh lime juice if desired for a bright counterpoint. The foil itself becomes a makeshift serving tray, but for meals where presentation matters, transfer the ears to a more decorative plate.
Chef’s Tips for a Perfect Result
- Prep the corn carefully: Wipe shucked corn with a dry towel to remove excess moisture, which can lead to steaming versus grilling. Drier corn gets better char marks.
- Make double foil packets: Using two layers prevents butter from seeping out. It also creates a mini oven effect, evenly cooking the corn without burning.
- Test for doneness at 20 minutes: Some grills run hotter than others. Use a paring knife to pierce a kernel—a soft, burst-of-juice texture means it’s done. Avoid overcooking if the edges begin browning too quickly.
- Don’t skip the foil crimping: Use the back of a fork to press the edges together. A loose packet can crack open, risking a buttery mess and undercooked kernels.
- Save time by pre-shucking: Pre-shucked corn is convenient and often cheaper at farmers’ markets or specialty stores. If time allows, shucking your own ensures freshness—it should feel cool and taut when peeled.
Variations and Substitutions
Vegan Option: Swap butter with vegan margarine or olive oil. The flavor shifts toward herbaceousness, but savory notes still stand.
Gluten-Free Alternative: The base recipe is naturally gluten-free. Ensure all seasonings (especially garlic powder blends) are labeled gluten-free.
Make-It-Savory Swap: Substitute 2 tablespoons of melted butter with lime juice and sprinkle with chopped cilantro for a Mexican-style twist. Add crumbled cotija cheese for a tangy bite.
Low-Carb Version: The corn on the cob fits into low-carb diets when consumed in moderation. Skip added butter and salt to keep the recipe keto-friendly.
Extra Flavor Boost: Add a pinch of smoked paprika or chili powder to the butter mixture for a smoky, slightly spicy kick.
How to Serve and Pair
This versatile dish shines as a side to grilled meats, from juicy burgers to smoky barbecue chicken. For a vegetarian spread, serve it with a zippy fresh salad drizzled with olive oil and balsamic. It also pairs beautifully with creamy dishes like coleslaw or avocado toast, as the buttery corn contrasts with crisp textures.
To elevate the presentation, add a sprig of thyme or parsley as a garnish. For a more rustic feel, serve the foil packages directly on a platter. At family gatherings, cut the cooked kernels off the cob and fold into cold pasta salads or grain bowls. For a manicure-friendly serving, present the corn with broken shells—tiny ceramic cups for catching melted butter as you eat.
Storage and Reheating
Refrigerator: Store cooled leftovers in an airtight container for up to 3 days. Moisture from the butter keeps the corn tender, but for crispier texture upon reheating, let the corn sit at room temperature for 30 minutes first.
Freezer: Freezing is not recommended for whole cobs, as the kernels can become mushy. Instead, cut the corn off the cob and freeze in a sealed plastic bag for up to 3 months. Use thawed kernels in salads or stir-fries.
Room Temperature: Whole cooked corn can sit at room temperature for up to 2 hours. For picnics, transport in an insulated cooler to prevent condensation.
Reheating: Reheat in a 350°F oven for 10 minutes or on the stovetop under a skillet for 2-3 minutes per side. Avoid the microwave, as it dries out the kernels. If using the oven method, add a pat of butter to restore moisture.
Nutritional Values
- Calories: 167kcal
- Protein: 4g
- Carbohydrates: 22g
- Fat: 9g
- Fiber: 3g
Approximate values.
Frequently Asked Questions
Can I substitute sweet corn for field corn?
Yes. Sweet corn is the most common variety for grilling, as its high sugar content caramelizes during cooking. Field corn is drier and best used for cornmeal.
How do I know when the corn is perfectly charred?
Perfectly grilled corn should have slightly blackened edges and tender, juicy kernels. Use a fork to test—the kernel should yield with a crisp pop but still feel plump.
Why is my foil packet leaking?
Ensure you crimp the edges tightly using a fork. If packets still leak, use wax paper to line the bottom before adding corn. Double-check for pinpricks in thefoil before wrapping.
Can I make these packets ahead?
Absolutely. Prepare ungrilled packets and refrigerate for up to 24 hours. Just don’t preheat or assemble in foil until ready to cook, or the corn will weep excess juice.
Is it better to serve the corn hot, warm, or cold?
Hot is ideal for immediate eating, as the butter and seasoning melt and coat the kernels. Many enjoy cold corn in salads or on charcuterie boards for its refreshing sweetness.
Conclusion
Grilled Corn on the Cob in Foil is a summer treasure that marries convenience and flavor. Its foolproof method turns everyday ingredients into something remarkable. The smoky, buttery flavor clings to warm ears of corn, making every bite feel like a backyard celebration. Whether you’re a grilling pro or a first-timer, this recipe proves that food at its best begins with simplicity and intention.
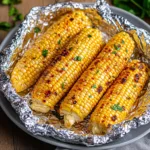
Grilled Corn on the Cob in Foil
- Prep Time: 10
- Cook Time: 35
- Total Time: 45
- Yield: 4 main dishes
- Category: Recipes
- Method: Grilling
- Cuisine: American, Southern
- Diet: Vegetarian
Description
Moist, buttery, and smoky grilled sweet corn in foil packets. Perfect for summer barbecues or quick sides, this method ensures tender kernels with charred edges using a simple garlic-salt butter blend. No direct heat needed—just easy foil-wrapped grilling.
Ingredients
4 ears fresh sweet corn
2 tablespoons salted butter, softened
1 teaspoon garlic powder
1/2 teaspoon fine sea salt
1/4 teaspoon black pepper
Instructions
Preheat grill to medium-high heat (375°F/190°C)
Cut corn kernels off cobs and reserve 1 ear
Combine butter, garlic powder, salt, and pepper in a bowl
Rub mixture over remaining corn cobs, covering kernels fully
Wrap each cob in heavy-duty aluminum foil with sealed edges
Place packets on grill, close lid, and cook for 20-25 minutes
Optional: Finish with a sprinkle of Parmesan cheese or fresh herbs
Notes
Use super sweet corn varieties like Silver Queen for best flavor
Adjust salt quantity if using salted butter
Add optional seasonings like paprika or cayenne for heat
Packets can be oven-baked (375°F/190°C for 25-30 minutes) or frozen for later use
Brush with extra butter before serving for a richer finish